X
This article was co-authored by wikiHow Staff. Our trained team of editors and researchers validate articles for accuracy and comprehensiveness. wikiHow's Content Management Team carefully monitors the work from our editorial staff to ensure that each article is backed by trusted research and meets our high quality standards.
This article has been viewed 27,592 times.
Learn more...
Use goat’s milk to make a really thick and creamy Greek yogurt! It makes the perfect snack that’s yummy and healthy. Make your own yogurt at home to get all the benefits of an all natural yogurt. By heating the milk, adding live cultures, and straining the yogurt, you can make your own goat’s milk greek yogurt!
Ingredients
- 2 US quarts (1.9 L) of goat’s milk
- 4 tablespoons (59 mL) of yogurt starter with live cultures
Steps
Part 1
Part 1 of 3:
Adding Live Cultures
-
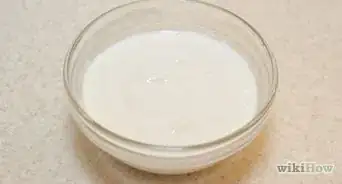
1Heat 2 US quarts (1.9 L) of goat’s milk in a dutch oven. Slowly heat the milk until little bubbles form around its edges. This should happen at around 170 °F (77 °C) to 180 °F (82 °C). Try to use the thickest and freshest goat’s milk that you can find.[1]
- Measure the milk’s temperature with a candy thermometer.
-
2Cool the milk to 110 °F (43 °C) to 120 °F (49 °C). Turn the heat off and let the dutch oven sit to cool. This step should take you around 30 minutes. Be careful, if you let the milk cool too much, the yogurt won’t set well. And, if you don’t let it cool enough, you’ll kill off too much bacteria.[2]Advertisement
-
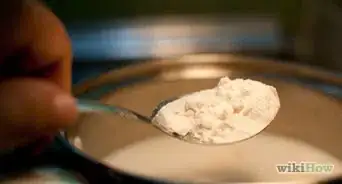
3Add 4 tablespoons (59 mL) of yogurt starter to the dutch oven. Use a starter that has either Bifidus, L. acidophilus L. bulgaricus, S. thermophiles, or L. casei in it. Once you’ve added the starter, use a whisk to mix it in the milk.[3]
- You can get the yogurt starter from multiple places. For instance, you can use store-bought freeze-dried yogurt starter packets with live cultures or plain store-bought yogurt with no additives.[4]


Advertisement
Part 2
Part 2 of 3:
Baking the Yogurt
-
1Preheat the oven to 100 °F (38 °C). Use a timer to indicate when you’ve reached your desired heat. If your oven often falls below or above its set temperature, consider using an oven thermometer. This is more common with gas ovens.[5]
-
2Wrap the dutch oven in a towel. Place the dutch oven in the center of a towel. Then, wrap the excess towel around the sides of the dutch oven. Make sure that the towel is tightly hugging the dutch oven to make incubation most effective.
- This is important because one of the common reasons yogurt making fails is not being able to keep the yogurt at the right temperature.[6]
- Use a towel you don’t care about because your towel can get oven marks on it.
-
3Place the dutch oven in the oven for 6 to 12 hours. Set a loud timer and let the yogurt sit. You can mess with its cultures if you disturb the yogurt.[7]
- Be careful when opening the oven and inserting the dutch oven. Use heat protection, like oven mitts, and keep your arms and legs away from the inside of the oven.
-
4Check to see if the yogurt has set after 6 hours. Set yogurt will have pool of cloudy whey liquid on top and a custard-like consistency underneath. If the yogurt hasn’t set, continue to check every 30 to 60 minutes.[8]
- To check, look first for the whey liquid. If there is a layer of liquid, insert a toothpick or straw and in the yogurt and look for the custardy consistency
- If you mess up the towel wrapping when you check, just rewrap it.
-
5Remove the dutch oven from the oven. When the yogurt has set, take out the dutch oven and place it on a heat-safe surface. The dutch oven will be hot, so use heat protection!


Advertisement
Part 3
Part 3 of 3:
Straining the Yogurt
-
1Pour out the whey liquid. Whey is the liquid that is sitting at the top of your yogurt. It should look cloudy and yellowish in color. Hold the dutch oven steady while you slowly pour out the whey liquid.[9]
- Save the whey liquid for a nutrient-rich milk substitute!
-
2Line the strainer with cheesecloth. Use a strainer with prongs, hooks, or a handle so it can sit comfortably over the opening of a large bowl. Place up to 2 layers of cheesecloth over the strainer and press the cheesecloth down.[10]
- If you don’t have cheesecloth, you can use a coffee filter or tea cloth in its place.[11]
-
3Secure the strainer over a bowl. Place the cheesecloth covered strainer over the opening of a large bowl. Hook it or secure the prongs on the side of the bowl to make sure that the strainer doesn’t fall into the bowl later on.
- You can also help secure the strainer by putting a large rubber band around the ends of the cheesecloth and side of the bowl.[12]
-
4Scoop the yogurt into the strainer and let most of the liquid strain through. Use a large spoon or ladle to scoop the yogurt into the strainer. If you don’t have a spoon or ladle, slowly pour the yogurt into the strainer. Let the whey liquid quickly drip out.[13]
- Refrain from pushing down on the yogurt to speed up the straining.
-
5Put the bowl in the fridge to let strain for 2 hours. Do this once the dripping whey liquid has slowed dramatically. Let the yogurt continue to strain and thicken for 2 hours.[14]
-
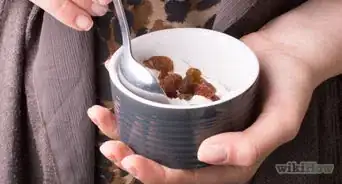
6Store and refrigerate your yogurt. Scoop your yogurt out of the cheesecloth and move it to an airtight container. You can keep it refrigerated for up to a week before it goes bad. Enjoy or gift your goat milk greek yogurt!
- If you don’t have an airtight container, move your yogurt to a bowl and secure it with plastic wrap.


Advertisement
Things You’ll Need
- Dutch oven
- Candy thermometer
- Large glass bowl
- Whisk
- Large strainer with front prongs
- 2 squares of cheesecloth
Warnings
- The oven is hot! Be careful when handling it.⧼thumbs_response⧽
Advertisement


References
- ↑ https://www.mensjournal.com/food-drink/how-to-make-greek-yogurt-at-home-20140905/
- ↑ https://www.mensjournal.com/food-drink/how-to-make-greek-yogurt-at-home-20140905/
- ↑ https://www.mensjournal.com/food-drink/how-to-make-greek-yogurt-at-home-20140905/
- ↑ https://www.mensjournal.com/food-drink/how-to-make-greek-yogurt-at-home-20140905/
- ↑ https://www.thekitchn.com/5-important-things-to-know-about-baking-in-a-gas-oven-226270
- ↑ https://www.scientificamerican.com/article/bring-science-home-yogurt-bacteria/
- ↑ https://www.mensjournal.com/food-drink/how-to-make-greek-yogurt-at-home-20140905/
- ↑ https://www.culturesforhealth.com/learn/yogurt/greek-yogurt/
- ↑ https://www.mensjournal.com/food-drink/how-to-make-greek-yogurt-at-home-20140905/
- ↑ https://www.mensjournal.com/food-drink/how-to-make-greek-yogurt-at-home-20140905/
- ↑ https://www.theyummylife.com/make_your_own_greek_yogurt
- ↑ https://www.mensjournal.com/food-drink/how-to-make-greek-yogurt-at-home-20140905/
- ↑ https://www.theyummylife.com/make_your_own_greek_yogurt
- ↑ https://www.mensjournal.com/food-drink/how-to-make-greek-yogurt-at-home-20140905/
- ↑ https://www.theyummylife.com/make_your_own_greek_yogurt
- ↑ https://www.mensjournal.com/food-drink/how-to-make-greek-yogurt-at-home-20140905/
About This Article

wikiHow Staff
wikiHow Staff Writer
This article was co-authored by wikiHow Staff. Our trained team of editors and researchers validate articles for accuracy and comprehensiveness. wikiHow's Content Management Team carefully monitors the work from our editorial staff to ensure that each article is backed by trusted research and meets our high quality standards. This article has been viewed 27,592 times.
Co-authors: 2
Updated: December 29, 2020
Views: 27,592
Categories: Yogurt
Advertisement