This article was co-authored by wikiHow staff writer, Jessica Gibson. Jessica Gibson is a Writer and Editor who's been with wikiHow since 2014. After completing a year of art studies at the Emily Carr University in Vancouver, she graduated from Columbia College with a BA in History. Jessica also completed an MA in History from The University of Oregon in 2013.
The wikiHow Video Team also followed the article's instructions and verified that they work.
This article has been viewed 37,345 times.
Learn more...
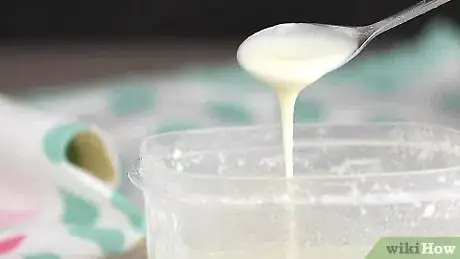
Don't rush out to the store the next time you run out of glue! With a few pantry items, you can make simple homemade craft glue that dries completely clear. While most homemade glue recipes contain flour as a binder, you can make a flour-free glue using cornstarch. If you're short on time and don't want to cook the glue, just mix flour with water to make a quick paste.
Ingredients
- 1 cup (120 g) of all-purpose flour
- 1/3 cup (67 g) of sugar
- 1 1⁄2 cups (350 ml) cup water, divided
- 1 teaspoon (4.9 ml) of vinegar
Makes 1 cup (240 ml) of glue
- 1 1⁄2 cups (350 ml) cup water, divided
- 2 tablespoons (40 g) of corn syrup
- 1 teaspoon (4.9 ml) of vinegar
- 2 tablespoons (15 g) of cornstarch
Makes 1 cup (240 ml) of glue
- 2 tablespoons (16 g) of all-purpose flour
- 1⁄4 to 1⁄2 cup (59 to 118 ml) of water
- 1 pinch of salt
Makes 1⁄4 cup (59 ml) of glue
Steps
Basic Craft Glue
-
1Whisk flour with sugar and 3⁄4 cup (180 ml) of the water. Put a saucepan on the stove and pour 1 cup (120 g) of all-purpose flour into it along with 1/3 cup (67 g) of sugar and 3⁄4 cup (180 ml) of the water. Whisk the mixture to make a smooth paste.[1]
- Don't worry if you see a few lumps since you can strain them out later.
-
2Stir in the remaining 3⁄4 cup (180 ml) of water and vinegar. Slowly pour in the rest of the water while you whisk. Then, mix in 1 teaspoon (4.9 ml) of vinegar. The vinegar is a very mild preservative that helps your homemade glue last a little longer.[2]
- It doesn't matter which type of vinegar you use, especially since you won't smell the vinegar after you cook and cool the glue.
Advertisement -
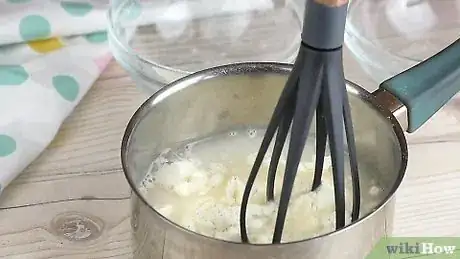
3Heat the glue over medium and simmer it for 5 minutes. Turn the burner to medium and whisk the glue while it cooks. Keep whisking as it bubbles gently and cook the glue until it's thick.[3]
- Although the glue looks white, it dries clear so it's great for most craft projects.
-
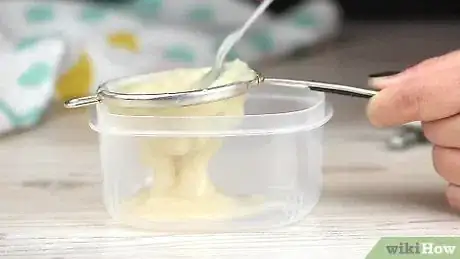
4Strain the glue into an airtight storage container. Turn off the burner and set a fine-mesh strainer over your storage container. Carefully spoon the glue into the strainer and push it through using the back of the spoon. Then, use the glue or put the lid on it and store it at room temperature for up to 2 days.[4]
- If your glue doesn't look lumpy, you can skip this step and transfer the glue directly to your storage container.
- Clean the saucepan and strainer in hot, soapy water as soon as you finish making the glue. Once you've used the glue in the container, soak it for 30 minutes before scrubbing it with hot, soapy water.
Flour-Free Clear Glue
-
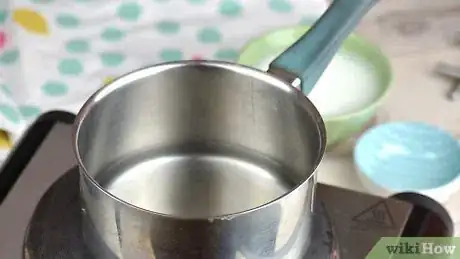
1Mix 3⁄4 cup (180 ml) of the water with corn syrup and vinegar. Set a saucepan on the stove and pour in 3⁄4 cup (180 ml) of the water. Add 2 tablespoons (40 g) of corn syrup and 1 teaspoon (4.9 ml) of vinegar. Then, stir the mixture until the corn syrup dissolves.[5]
- You can use any type of vinegar in this glue recipe.
-
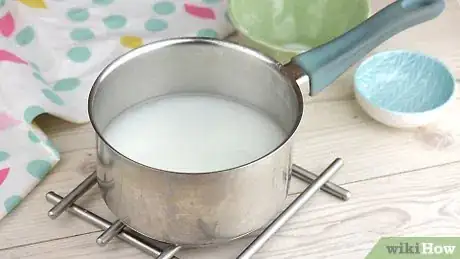
2Bring the mixture to a boil over medium heat. Turn the burner to medium and keep the lid off of the pan so you can see when the liquid begins to boil. Stir the mixture occasionally and heat it until it comes to a full rolling boil.[6]
-
3Mix the remaining water with cornstarch in a small bowl. Pour the remaining 3⁄4 cup (180 ml) of water into a small mixing bowl and add 2 tablespoons (15 g) of cornstarch. Use a spoon or a whisk to mix the cornstarch until it dissolves in the water.[7]
- The cornstarch makes the glue thick and easier to spread.
-
4Whisk the cornstarch into the pan and boil it for 1 minute. Slowly pour the cornstarch mixture into the pan with the boiling liquid. Keep whisking the whole time you pour so the cornstarch doesn't clump. Bring the glue to a boil and continue to whisk for 1 minute.[8]
- It's really important to whisk constantly so the glue becomes smooth.
- Wash the pan immediately in hot, soapy water so the glue doesn't have a chance to harden.
-
5Turn off the burner and cool the glue to room temperature. Set the pan on a cool burner so the glue stops cooking and leave it to sit until it's cool enough to handle. This should take around 20 minutes. Then, use your glue or store it for later.[9]
- To store the flour-free glue, spoon it into an airtight container and keep it at room temperature for up to 2 days.
- Once you've used the glue and need to clean the container, soak it in hot, soapy water for 30 minutes before you scrub it out.
No-Cook Clear Paste or Glue
-
1Put 2 tablespoons (16 g) of flour into an airtight container. Find a small container that you'd like to use to store the glue and put the flour into it. If you'd like to double or triple the recipe, use a larger container.[10]
- Since this glue only lasts 1 day, make just as much as you need for your project.
-
2Stir in 1⁄4 cup (59 ml) of water and 1 pinch of salt. Slowly whisk in the water 1 spoonful at a time to prevent large lumps from forming. Then, mix in a pinch of salt. Keep mixing until the flour is hydrated and you have a sticky paste.[11]
-
3Whisk in more water until the glue is the consistency you want. If you'd like a clear paste, you may not need to add more water. To make thinner glue that you can spread with a brush, whisk in a spoonful of water at a time.[12]
- Add up to an extra 1⁄4 cup (59 ml) of water for thin, clear glue.
-
4Refrigerate the glue for 10 to 15 minutes if you want to make thick paste. Although you can use the clear glue as soon as you've mixed it, stick it in the fridge to chill if you want a thicker paste. Then, stick a popsicle or craft stick into the paste to spread it on your project.[13]
- Store your no-cook glue or paste at room temperature for up to 1 day. If you keep it in the fridge for more than 15 minutes, it will dry out and harden.
- To clean out the container, soak it in hot, soapy water for 30 minutes before you wash it.
Things You'll Need
Basic Craft Glue
- Measuring cups and spoons
- Saucepan
- Whisk
- Spoon
- Fine-mesh strainer
- Storage container
Flour-Free Clear Glue
- Measuring cups and spoons
- Saucepan
- Whisk
- Spoon
- Storage container
No-Cook Clear Paste or Glue
- Storage container
- Spoon
- Measuring spoon
- Whisk, optional
References
- ↑ https://youtu.be/KBEmT1RlJL4?t=43
- ↑ https://youtu.be/KBEmT1RlJL4?t=59
- ↑ https://snappyliving.com/11-recipes-to-make-your-own-glue/
- ↑ https://snappyliving.com/11-recipes-to-make-your-own-glue/
- ↑ https://www.thoughtco.com/homemade-glue-recipes-607826
- ↑ https://snappyliving.com/11-recipes-to-make-your-own-glue/
- ↑ https://www.thoughtco.com/homemade-glue-recipes-607826
- ↑ https://snappyliving.com/11-recipes-to-make-your-own-glue/
- ↑ https://www.thoughtco.com/homemade-glue-recipes-607826
