This article was co-authored by wikiHow Staff. Our trained team of editors and researchers validate articles for accuracy and comprehensiveness. wikiHow's Content Management Team carefully monitors the work from our editorial staff to ensure that each article is backed by trusted research and meets our high quality standards.
There are 9 references cited in this article, which can be found at the bottom of the page.
The wikiHow Culinary Team also followed the article's instructions and verified that they work.
This article has been viewed 1,754,700 times.
Learn more...
You can make a simple cheese using ingredients and equipment found in most kitchens. "Yogurt cheese" is a basic introduction. While not the traditional kind of cheese you're probably used to, without any additives it tastes very similar to cream cheese or neufchatel. Alternatively, milk and acid make a simple, spreadable cheese similar to ricotta. Once you've mastered this, try your hand at the process used for most cheeses, a more difficult project involving specialized ingredients such as rennet.
Ingredients
- Plain yogurt
- Or 1 quart (1L) milk & a packet of yogurt starter
- 2 cups (480 mL) whole milk (not ultrapasteurized or UHT)
- 4 teaspoons (20 mL) distilled vinegar, lemon juice, or baker's citric acid
- Salt to taste (optional)
- 1 gallon (3.8 liters) milk (not ultrapasteurized or UHT)
- 4 drops rennet, diluted in ¼ cup (60 mL) cold water
- 1/32 tsp (0.15 mL) mesophilic culture
- ¾ tbsp (11 mL) non-iodized salt
Steps
Yogurt Cheese (Easy)
-
1Make your own yogurt (optional). You may skip this step and start with store-bought yogurt for an even easier recipe. But if you'd like a recipe that involves fermentation, you can make an extra-thick "yogurt cheese" from scratch. To do this, add the following steps to the recipe:
- Heat 1 quart (1 liter) milk to exactly 110ºF (43ºC) with the help of a cooking thermometer. Avoid UHT or ultra-pastuerized milk for best results.
- Stir in one packet of yogurt starter culture, available from cooking supply stores and online cheese-making stores. Alternatively, use 2 tbsp (30mL) plain yoghurt with live active cultures.
- Instead of draining in the refrigerator as described below, let drain in a yogurt maker for 12–16 hours. This keeps the yogurt around 100ºF (38ºC), encouraging bacterial fermentation.
-
2Prepare a draining container. Line a colander with at least four layers of cheesecloth, and place the colander over a large saucepan. Spoon as much yogurt as you like onto the cloth.
- You can tie the yoghurt up in the cheesecloth and hang it over a pot instead.
Advertisement -
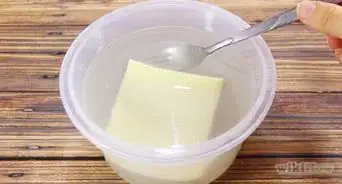
3Refrigerate for 12–48 hours. The liquids in the yogurt will drain away until you get a soft, cream-cheese like consistency. The longer you let the yogurt drain, the thicker and more complex the cheese will be.
- Optionally, you can occasionally smooth out the "cheese" with a spoon for a creamier texture.
- Letting it drain at room temperature will speed up the process, but risks introducing harmful bacteria.
-
4Store the cheese. Once the yoghurt is done draining, transfer it to a ramekin or bowl, using another clean cloth underneath. Cheesecloth will leave a beautiful printed pattern on the cheese, but you may use anything you like. Eat before it spoils, usually within a week or so.
- Optionally, stir in salt and herbs for a cracker topping, or sugar for a light dessert.
- You may discard the whey or use it as a substitute for milk in baking.


Ricotta Cheese (Moderate)
-
1Pour whole milk into a saucepan. You must use whole milk for this recipe. Non-homogenized milk gives the most flavor, but homogenized milk will work. Do not use milk labeled ultra-pasteurized or UHT.
-
2Stir acid into the milk. Stir in the acidic ingredient while you test the milk with a waterproof pH meter. Continue to the next step once the pH reaches 5.9–6.0.[1]
- Lemon juice adds a tangy citrus flavor. Fresh lemon juice has better, cleaner flavor than bottled juice.
- Distilled vinegar is more precisely controlled, giving you predictable results each time you follow the recipe.
- Baker's citric acid adds less flavor than either of the other options, which some people prefer. Look for it at a grocery store or baking supply store.
-
3Heat the acidified milk. Slowly heat the acidified milk to 176–185ºF (80–85°C), while stirring constantly. It is very important to constantly stir the milk or it will burn. Keep it at this temperature for 15–30 minutes.[2] Stop stirring once the milk separates into solid curds and liquid whey. Take care not to break the curds into smaller pieces.
- An infrared thermometer is a reliable way to measure the milk temperature.
-
4Drain out the whey. Spoon the curds onto a thick, fine cheesecloth or muslin handkerchief. Squeeze the cloth around the curds to get most of the moisture out.
- You can use a draining spoon if you don't have cheesecloth, but you'll lose some of the curds.
- Optionally, you can rinse the curds in clean water for a more mild-flavored cheese.
-
5Eat or refrigerate. Let drain for five minutes for a "cream cheese" consistency, 15–20 minutes for a moist spread, and 2–8 hours in the refrigerator for a relatively firm cheese.[3] Refrigerate all leftovers in a closed container and eat before it goes sour, usually within 2–4 days.
- To reduce the risk of harmful bacteria, do not leave the ricotta at room temperature for longer than 20 minutes.
- Stir in salt for significantly more flavor and a slightly longer shelf life.


Rennet Cheese (Difficult)
-
1Purchase cheese-making cultures. You might find these in a grocery store, but more likely you'll have to order it online from a cheese-making supply store. For this recipe and most other cheeses, use any mesophilic culture. These bacteria thrive in temperatures below 102ºF (39ºC).[4] Their job is to acidify the milk and get it ready for the rennet. These "good" bacteria also make it more difficult for harmful bacteria to take hold in the milk.
- As a last resort, you can use a dash of buttermilk instead. However, store-bought buttermilk is an unpredictable source of cultures. The cheese could fail to form, or the flavor could be affected.[5]
-
2Buy rennet. Traditionally taken from animal stomachs, rennet is now available in vegetarian forms as well. You may use any type to form your cheese. The rennet will separate the acidified milk into curds and whey.
- This is also available from cheese-making supply stores.
- If using dry rennet, follow the label instructions to convert drops of liquid rennet into tablet amounts. Make sure the tablets are 100% rennet.
-
3Heat the milk in a non-reactive pan. Use an infrared thermometer to measure the milk, heating until it reaches 86ºF (30ºC). Non-chipped enameled pans or stainless pans are your best options. Stay way from copper and aluminum, which leach chemicals into your cheese due to the cheese's acidity.
- You may use raw milk or pasteurized milk, although cheese made from pasteurized milk may have trouble holding together. Ultra-pasteurized milk will not work.
- You can use milk with any fat percentage. Whole milk typically has a richer flavor than low-fat or skim milk.
-
4Add the bacterial culture. Let sit for two minutes. After two minutes, stir with an up and down motion to mix it into the milk.
-
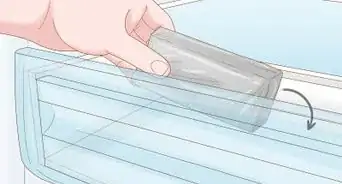
5Cover and let sit. Leave the milk in a warm room away from light. The label on your starter bacteria may specify the length of this step. If it does not, or if you are using buttermilk, continue after two to four hours.[6]
- The milk should still look like ordinary milk. If it thickens, you've used too much acid or left it too long. (This is easy to do, since it's difficult to predict exactly how active the bacteria will be.) You can still use it to make cheese, but it may have trouble staying together.
-
6Warm the milk and add the rennet. Heat the milk up again to 86ºF (30ºC). Dilute liquid rennet in ¼ cup (60 mL) cold water, or dissolve dry rennet in cold water according to label instructions. Stir just as you did with the culture, in an up and down motion.
- Filtered water is less likely to interfere with the cheese-making.[7]
-
7Cover and let sit for 4-12 hours. Leave it at room temperature, and completely undisturbed. You're ready to continue once the cheese has formed a thick, custard-like curd. Ideally, a clean finger poked into the cheese should come out clean, and a clear, liquid whey should fill the hole. If it sticks to your finger, cover and try again in 30–60 minutes.
- If it's still not set after 12 hours, continue anyway. Your cheese may have trouble draining, ending up soft and wet.
-
8Drain some of the whey. Cover a colander with butter muslin cheesecloth. Place the colander over a pot to catch the draining whey. Spoon the solid curd into the colander. Stir gently with long, slow movements for about fifteen minutes, to allow excess whey to escape.
- Fabric sold as cheesecloth is not always fine or thick enough to drain this cheese. You can experiment with other options, but butter muslin is your best bet.
-
9Cut into cubes and heat. Gently cut the curd into roughly equal cubes, without squashing it. Place these cubes in a double boiler (a raised pan inside a pan of hot water). Heat over very low heat, stirring frequently, until the curds reach about 100ºF (38ºC). This may take a full hour.[8]
- Don't stop heating until most of the liquid is gone. The curds should hold their shape, but fall apart in your hand when you pick them up.[9]
-
10Finish the cheese. When you are happy with the consistency, stir in the salt to halt the acidification and preserve the cheese. Optionally, you can shape the cheese, and/or mix in herbs, fruit, or nuts. You can eat it soft, or allow it to dry a little if you prefer.
- Store the cheese in the refrigerator or another dark, cool location.
-
11Learn about other cheese recipes. You can create hundreds of different cheeses by using different bacterial cultures, rinsing the curd, draining more or less whey, aging the cheese, and other variations. Try your hand at mozzarella and cheddar, or talk to dairy farmers in your area to learn more.


Community Q&A
-
QuestionI was not paying attention and I heated milk to 140 degrees for mozzarella. Did I kill the bacteria? I have some fresh yogurt in the fridge, could I add that culture to the milk and still use it for cheese?
 LandonCommunity AnswerYes, you did kill the bacteria in the milk. No, the yogurt will not only curdle, it will make your kitchen smell funky. I would go out and buy new milk and just leave the food to simmer.
Warnings
- Never leave your cheese out in the hot sun. It will spoil and will taste awful. It's best to store the cheese in the fridge until ready to use.⧼thumbs_response⧽
Things You'll Need
Yoghurt Cheese
-
Fine Cheesecloth
- Purchase from a cheese making supply store or website
- Cheesecloth from the regular stores is made for crafts and have large holes
- If making soft cheese, use butter muslin instead
- Colander
- Saucepan
Ricotta
- Saucepan
- Cheesecloth or handkerchief
- Spoon
- Thermometer
- Stove
Rennet Cheese
- Stirring spoon
- Thermometer
- Double boiler or large cast iron (enameled) pot.
- Cooking thermometer with a range from 70-180ºF (21–82ºC).
- Fine cheesecloth, preferably butter muslin
- Colander
- Stove


References
- ↑ http://www.cheesemaking.com/store/pg/217-Ricotta.html
- ↑ http://www.cheesemaking.com/store/pg/217-Ricotta.html
- ↑ http://www.seriouseats.com/2010/02/how-to-make-fresh-ricotta-fast-easy-homemade-cheese-the-food-lab.html
- ↑ https://hoeggerfarmyard.com/the-farmyard/cheese-making/cheese-cultures-101-direct-set-vs-mother-culture-2/
- ↑ http://www.cheesemaking.com/learn/faq/cheese-cultures-faq.html
- ↑ http://www.motherearthnews.com/real-food/making-cheese-at-home-zmaz76mjztak.aspx
- ↑ http://www.motherearthnews.com/real-food/cheese-making-recipes-zmaz08jjzmcc.aspx
- ↑ http://www.i4at.org/countrylife/cheese.html
- ↑ http://www.motherearthnews.com/real-food/making-cheese-at-home-zmaz76mjztak.aspx?PageId=2#ArticleContent
- Videos provided by Food Wishes
About This Article

The easiest cheese to make at home is yoghurt cheese, or Labneh. To make it, line a colander with at least four layers of cheesecloth and place the colander over a large saucepan. Then, spoon as much yoghurt onto the cloth as you want, and refrigerate it for 12 to 48 hours. The longer you let the yoghurt drain in the refrigerator, the thicker it will be. Use it within a week so it doesn’t spoil. Keep reading to learn how to make ricotta and rennet cheeses.


-Step-7-Version-3.webp)