X
wikiHow is a “wiki,” similar to Wikipedia, which means that many of our articles are co-written by multiple authors. To create this article, volunteer authors worked to edit and improve it over time.
There are 7 references cited in this article, which can be found at the bottom of the page.
This article has been viewed 65,217 times.
Learn more...
Buro or burong is the Filipino term for pickles. While there are many different varieties of pickled food in the Philippines, pickled shrimp (burong hipon), pickled fish (burong isda), and pickled green mangoes (burong mangga) are some of the most popular options.
Ingredients
Makes 1 gallon (4 L)
- 1 lb (450 g) fresh shrimp, rinsed and drained
- 1 cup (250 ml) sea salt or rock salt
- 10 cups (2.5 L) cooked white rice
- 1/2 lb (225 g) bamboo shoots, slices thinly
- 1/2 cup (125 ml) vegetable oil (for cooking)
- 2 Tbsp (30 ml) minced garlic (for cooking)
- 2 cups (500 ml) chopped onions (for cooking)
Makes 1 gallon (4 L)
- 2 lb (1 kg) dalag or tilapia, rinsed and drained
- 6 cups (1.5 ml) cooked white rice
- 4 to 5 Tbsp (60 to 75 ml) sea salt or rock salt
- 2 Tbsp (30 ml) vegetable oil (for cooking)
- 2 Tbsp (30 ml) minced garlic (for cooking)
- 2 cups (500 ml) chopped onions (for cooking)
Makes 2 qt (2 L)
- 6 green mangoes, rinsed and dried
- 1/2 cup (125 ml) rock salt
- 2 cups (500 ml) water
Steps
Method 1
Method 1 of 3:
Burong Hipon
-
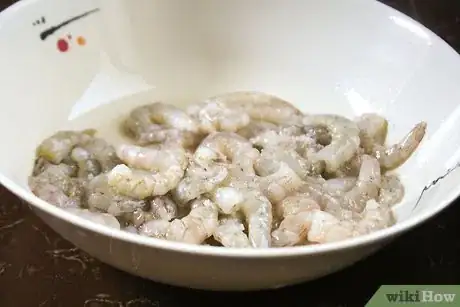
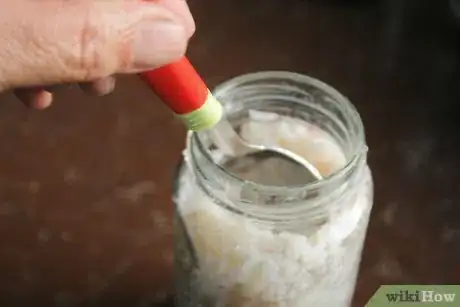
1Combine the shrimp and salt. Place the shrimp and salt in a large bowl and mash them together using a wooden spoon or your hands.
- If possible, use fresh shrimp instead of frozen shrimp.
- Make sure that the shrimp has been washed in running water and drained well in a colander before using it.
- The salt must coat the shrimp evenly after you mix the two ingredients together. The shrimp must be allowed to absorb as much salt as possible.
-
2Let stand. Set the shrimp mixture off to the side and allow it to stand for two hours.
- The shrimp mixture should sit out at room temperature during this time. You can cover it partially with a loose sheet of plastic wrap to prevent dust and debris from falling in, but do not create a tight seal.
Advertisement -
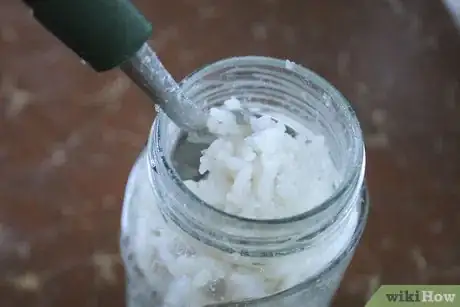
3Add the rice and bamboo shoots. Place the rice and bamboo shoots in the salted shrimp mixture. Use your hands or a wooden spoon to mix them in thoroughly.[1]
- The rice should be freshly cooked, slightly cooled, and slightly watery when added to the shrimp mixture.
- Strictly speaking, the bamboo shoots are optional. Shrimp, salt, and rice are the only ingredients that must be included, but bamboo shoots are highly recommended.
-
4Pack the mixture in a clean jar. Transfer the mixture to a clean, dry glass jar. Leave at least 1/2 inch (1 cm) of empty headspace at the top of the jar, then seal it.
- You can use separate jars or opt for one jar. If using one jar, it will need to hold 1 to 2 gallons (4 to 8 L).
- Cover the top of the jar tightly with a sheet of clean plastic wrap. After covering it with the plastic, tightly screw on the cap.
-
5Let the mixture ferment. Allow the mixture to sit in a cool location for 3 to 10 days.[2]
- It is best to keep the jar in a slightly cool location. A refrigerator can be too cold, but a humid kitchen is too warm. A basement or cellar is ideal.
-
6Store in cold temperatures. After buro ferments, you should store it by keeping the jar in your refrigerator or freezer.
- When stored in the refrigerator, the buro should last for about one month. When stored in the freezer, it should remain good for two to three months.
- If storing the buro in the freezer, you may wish to separate the buro into serving size portions before freezing it. That way, you will not have to defrost the entire jar just to use a portion of it.
-
7Cook before serving. When you are ready to serve the buro, sauté the amount you want in hot oil, onion, and garlic for roughly 10 minutes on medium heat.[3]
- For one-quarter of the buro produced in this recipe, use 1/2 cup (125 ml) vegetable oil, 2 Tbsp (30 ml) minced garlic, and 2 cups (500 ml) chopped onions.
- Cook the garlic and onions in the oil, stirring occasionally, until they become fragrant and lightly browned. Use a medium skillet or saucepan.
- Add one-quarter of the buro to the pan with the onions and garlic. Cook for 10 minutes, stirring continuously, until browned.
Advertisement
Method 2
Method 2 of 3:
Burong Isda
-
1Rub the fish with salt. Use just enough salt to coat all sides of the fish evenly. Set the fish aside for 15 to 20 minutes.
- Make sure that the fish has been thoroughly cleaned before you use it. If working with fillets, you simply need to rinse and dry the fish. When cleaning fresh fish, you must remove the scales, gut it, and rinse the flesh.
- Slice each fish into 7 or 8 pieces before rubbing it with the salt.
- Let the fish sit out at room temperature. You can cover it loosely with plastic wrap, but do not create a tight seal.
-
2Combine the rice and the rest of the salt. Combine the two ingredients in a large bowl until the salt evenly coats the cooked rice.
- The rice must be soft and cool when you mix it with the salt.
-
3Add the fish. Transfer the salted fish to the rice mixture and mix thoroughly, mashing the fish and rice together until evenly combined.
- Use gloved hands or a wooden mixing spoon to combine the ingredients together.
-
4Pack tightly. Transfer the mixture to clean, dry glass jars. Cover the top of each jar tightly.
- Leave at least 1/2 inch (1 cm) of empty headspace at the top of each jar.
- You can either use separate jars or a single jar. If using a single jar, make sure that it can hold approximately 1 gallon (4 L).
- Cover the top of the jar tightly with plastic wrap. Place the cap on securely over the plastic wrap.
-
5Allow the mixture to ferment. Place the jars of buro in the vegetable drawer of your refrigerator. Let the sit there for two weeks before you use them.[4]
- The buro can also be fermented in a cold cellar or basement, but in this instance, a refrigerator is recommended.
-
6Store in a refrigerator or freezer. For long-term storage, keep the buro in your refrigerator or transfer it to a freezer.
- When stored in a refrigerator, the buro should last for one or two months. When stored in a freezer, it should last for three or four months.
-
7Cook before serving. To prepare the buro for eating, sauté the amount you want in a skillet or saucepan coated with hot oil. Cook it with minced garlic and chopped onion for best results.[5]
- sauté the garlic and onion in the hot oil until they turn light brown and become fragrant. Cook the ingredients over medium heat.
- Add your desired amount of buro to the pan and continue cooking for 10 minutes, or until browned.
- You may also want to add 1 to 2 Tbsp (15 to 30 ml) of sugar to the buro as you cook it to help balance the sour, salty flavor of the pickled fish.
Advertisement
Method 3
Method 3 of 3:
Burong Mangga
-
1Boil the brine. Combine the water and salt in a small saucepan and bring the solution to a boil over medium-high heat. Allow the mixture to boil for a full five minutes, then remove it from the heat and let cool.[6]
- The water and salt are necessary components of the brine, but you can alter the flavor if desired by adding 1/4 cup (60 ml) sugar or 1/4 cup (60 ml) sili (small chili peppers).
-
2Peel and slice the mangoes. The flesh of each green mango needs to be cut into fat, long slivers.
- After rinsing and drying each mango, peel off the skin using a sharp knife or vegetable peeler.
- Cut each mango into three flat pieces. Two of the pieces should hold nothing but the flesh, while the third middle piece will contain the pit or seed.
- Use a knife the shave away the flesh of this middle piece away from the seed. You should be able to get two long slivers from this section alone.
- Cut the flesh from the remaining sections into fat slivers.
-
3Place the slices in a large jar. Arrange the mango pieces in a large glass jar. The pieces should be packed closely enough to keep them upright, but there should also be gaps between them.[7]
- If you have a large enough jar, you can keep the slices in one jar. Otherwise, you may need to use several smaller jars.
- Make sure that each jar is clean and dry before using it.
-
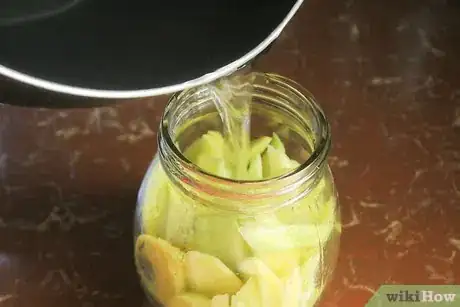
4Pour the brine over the mango slices. Pour the cooled salt brine over the mango slices. Make sure that the slices are completely covered, but leave at least 1/2 inch (1 cm) of empty headspace at the top of the jar.
- It is essential that the brine cools to room temperature before you pour it over the mango slices. If the brine is still hot or warm, it could partially cook the mango, causing a distortion in the taste and texture of the finished buro.
-
5Let the mixture ferment. Loosely cover the jar with its cap, then keep the jar in a cool to room temperature location for three days.[8]
- A basement or cellar would work well. Refrigerators are too cold, but a humid kitchen might be too warm.
- You do not need to keep the jar covered tightly during the initial fermentation. In fact, for this type of buro, it is best if you leave the lid a little loose.
-
6Store in the refrigerator. After three days pass, you should tighten the lid of the jar and store the buro in your refrigerator.
- When stored in the refrigerator, the buro should last for about one month.
- You could also try storing the buro in your freezer. When frozen, it can stay good for two or three months.
-
7Enjoy. Burong mangga does not need to be cooked before you eat it. When you want to serve the buro, simply remove it from the jar and enjoy.
Advertisement
Community Q&A
-
QuestionIs it just the fillet I use or with the fish bone?
 Community AnswerIt depends. In traditional buro they leave the bone in and they only consider the buro fermented enough once the bones have "melted" into the buro.
Advertisement
Things You'll Need
- Large mixing bowl
- Wooden spoon
- Knife
- Plastic food-grade gloves
- Glass jars with lids
- Plastic wrap
- Skillet or saucepan
References
- ↑ https://www.panlasangpinoymeatrecipes.com/balao-balao-burong-hipon.htm
- ↑ http://www.filipinofoodstore.com/recipes/buro-recipe.html
- ↑ https://pepper.ph/recipes/burong-mangga-hipon-mustasa
- ↑ https://ryan.kainpinoy.com/2010/02/03/how-to-make-buro/
- ↑ https://businessdiary.com.ph/593/how-to-make-burong-isda/
- ↑ https://pepper.ph/recipes/burong-mangga-hipon-mustasa
- ↑ https://www.kawalingpinoy.com/pickled-mangoes/
- ↑ https://businessdiary.com.ph/3564/burong-manga/
About This Article
Advertisement








-Step-8.webp)


