This article was co-authored by Andrew Peters and by wikiHow staff writer, Hunter Rising. Andrew Peters is an Architecture and Construction Specialist and a Principal at Peters Design-Build, a full service architecture and construction firm in the San Francisco Bay Area. With over 20 years of experience, Andrew specializes in sustainable and holistic design and building practices. Andrew holds a Bachelor of Architecture and a Project Management Professional (PMP) certification and is a Leadership in Energy and Environmental Design (LEED)-Accredited Professional. He served as Project Manager for the international-award-winning “Refract House,” Team California’s entry in the 2009 U.S. Department of Energy Solar Decathlon, a project featured in over 600 online and print articles.
There are 11 references cited in this article, which can be found at the bottom of the page.
This article has been viewed 177,015 times.
Drop ceilings, also known as a suspended ceiling, offer many advantages over drywall. Drop ceilings are cost-effective, easy to install on your own, and allow you to access ductwork and wires easily after it’s been installed. In order to put in a drop ceiling, you need to first install a grid system of runners to support your ceiling tiles. When the grid is secure, set the tiles in place to create your new ceiling!
Steps
Placing Your Wall Angles
-
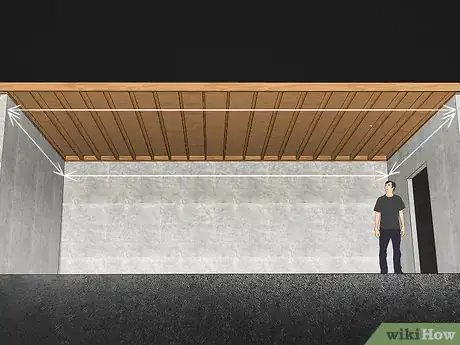
1Measure the length of each wall in your room. Use a tape measure to find the length of each wall in the room where you’re installing your ceiling. Write the dimensions of your room either in a notebook or directly on the wall 2–3 in (5.1–7.6 cm) from the top so you can easily reference them later.[1]
- If your room is square or rectangular, you only need to measure the length and width.
-
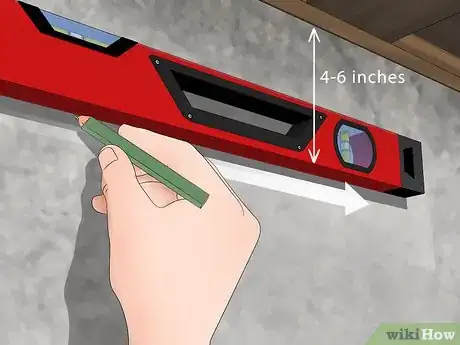
2Make a line between 4–6 in (10–15 cm) down from the tops of your walls. Leave at least 4–6 in (10–15 cm) of space from the top of your wall to your line so you have room for fixtures and to put in your tiles. Use a 4 ft (1.2 m) level and draw a straight line with your pencil completely around your room.[2]
- Snap a chalk line if you don’t want to draw the lines on yourself. Hold the string of the chalk line against your wall and snap it so the line transfers onto the drywall.
- If you plan on installing a large fluorescent light panel, make your line 6 in (15 cm) down.
Advertisement -
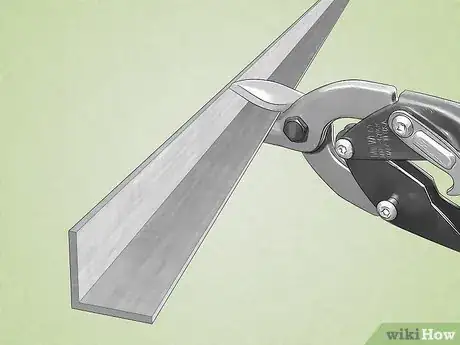
3Use a pair of tin snips to cut wall angles to the lengths of your walls. Wall angles are long L-shaped pieces used around the walls of your room to support the tiles and runners. Since wall angles are usually sold in 8–12 ft (2.4–3.7 m) lengths, trim them down with your tin snips to match the lengths of your walls.[3]
- If you have a corner that juts out from your wall, cut the wall angles going on those walls 1⁄2 in (1.3 cm) longer than your measurements.
- If you want a mitered finish in the corners, cut the wall runner bottom-most wall angle at a 45-degree angle.
- If your walls are longer than the wall angles, butt 2 of them together by lining up the ends.
-
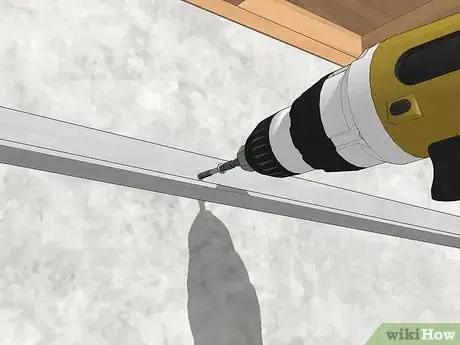
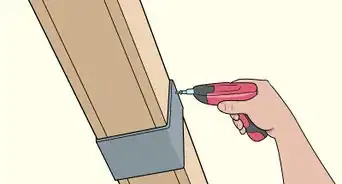
4Screw the wall angles into the studs along the line you drew. Use a stud finder to locate the studs in your walls and mark their locations with a pencil. Line up the top of the wall angle with the line you’ve drawn on the wall. Use 1 1⁄4 in (3.2 cm) screws and electric screwdriver where you marked the studs to secure your wall angles in place.[4]
- Double check that your wall angles are level as you install them.
Tip: If a wall angle bows out, don’t try to tighten it flat against the wall since it may warp the metal. Instead, keep the wall angle straight by placing a wooden shim between it and the wall. When your ceiling is completely finished, fill the gap in with caulk.
Putting in the Grid System
-
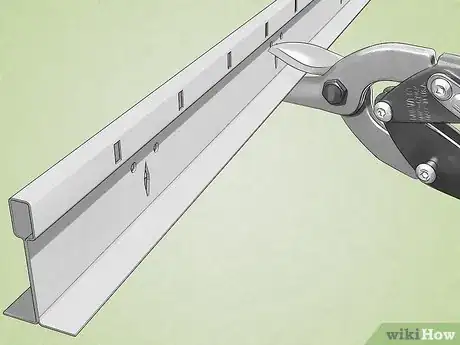
1Cut the main runners to fit the length of your room perpendicular to the joists. The main runners will support the bulk of the weight of your ceiling. Measure the length of your room that runs perpendicular to the wooden joists of your ceiling. Cut the runners with a pair of tin snips to the correct length.[5]
- If your room is longer than the length of a main runner, use the clips on the ends of the piece to attach them together.
-
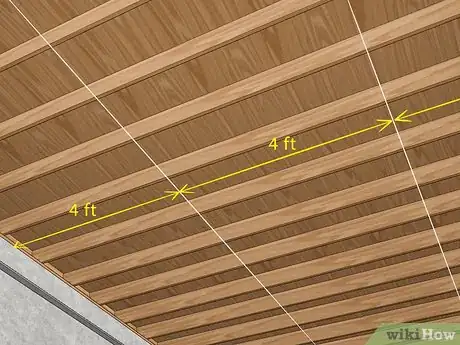
2Use a chalk line or tie strings across your room every 4 ft (1.2 m). Secure the end of a chalk line on one end of your room and pull it tight to the other side. Snap the chalk line to leave a line on the joists. Move over 4 ft (1.2 m) and make another line on your ceiling. Keep moving across your room until you reach the other edge.[6]
- You may also tie strings tight across your ceiling if you don’t have a chalk line.
-
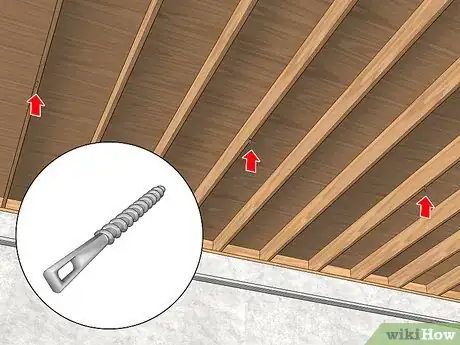
3Screw an eyelet into every third joist along your line. Eyelet screws have holes on the end so you can run wires through them to hang your main runner. Attach a lag bit onto your electric screwdriver, and set an eyelet inside the bit. Start placing your eyelets 3 joists away from the wall along each of your chalk or string lines. Keep adding an eyelet at every third joist.[7]
- Eye lit screws can be purchased from your local hardware store.
-
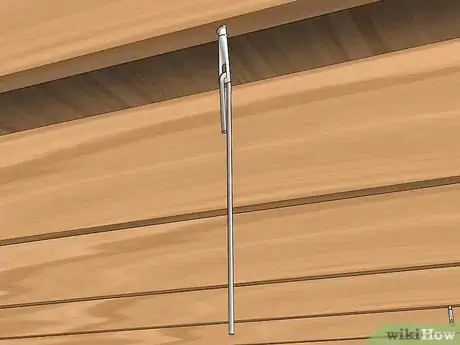
4Feed a length of wire through each of the eyelets. Cut a 8–10 in (20–25 cm) piece of 16-gauge wire for each of your eyelets. Feed about 2 in (5.1 cm) of the wire through the eyelet, and bend it with a pair of pliers until it points down.[8]
-
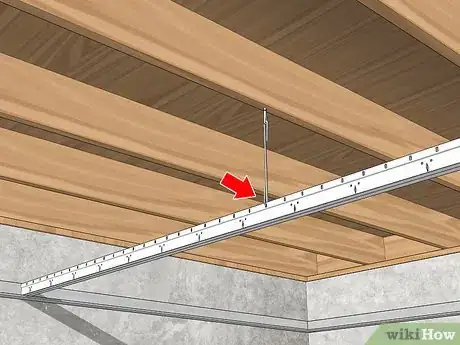
5Hang up the main runners by the wires. Hold one of your main runners up so the ends rest on your wall angles and so it’s perpendicular to your joists. Feed the other end of the wire through one of the circular slots on the runner, and bend it up with your pliers. Twist the wires around themselves at least 3 times to keep them secure.[9]
- Make sure your joists are level as you keep adding wires. Adjust where the bend is in the wires if one side is higher than the other.
-
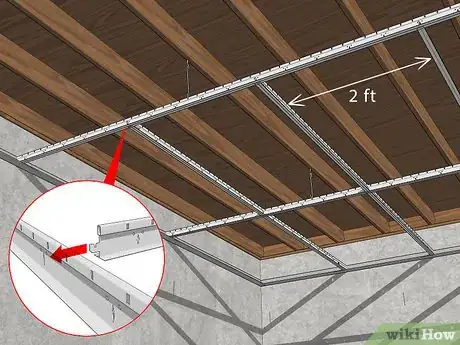
6Install the secondary runners perpendicular to your mains by clipping them in place. Locate the slots on the main runners every 2 ft (0.61 m). Lift your 4 ft (1.2 m) runners above the main runners and feed them into the slots on the mains. Put a secondary runner every 2 ft (0.61 m) along your main runners.[10]
Tip: If you want a 2 ft × 2 ft (0.61 m × 0.61 m) tile system, click 2 ft (0.61 m) secondary runners in the center each 4 ft (1.2 m) runner.
Installing the Ceiling Tiles
-
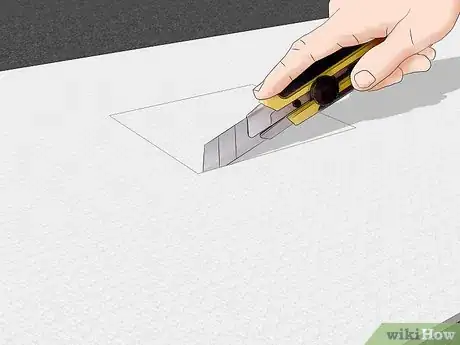
1Make holes in the tiles for any lighting or ductwork first. Locate any areas on your ceiling where you need to make an opening for your ducts or light fixtures. Trace the end of the duct or the size of the light feature onto the back of one of your tiles. Cut the shape out of the tile with a sharp utility knife.[11]
- If you’re installing a full-panel fluorescent light fixture, you don’t need to cut any shapes from the tiles.
-
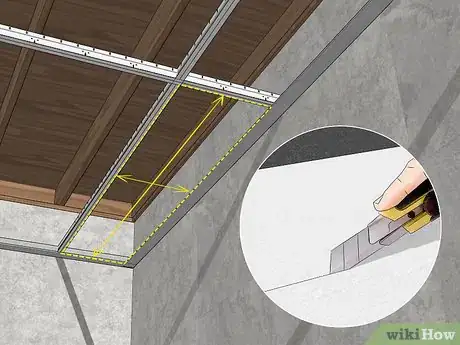
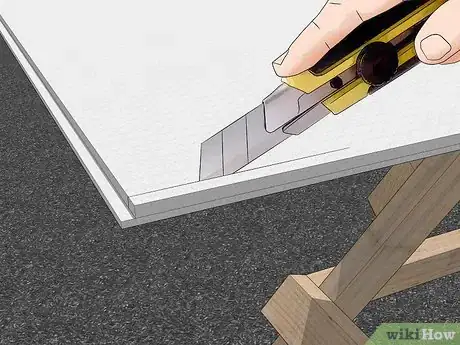
2Trim any edge tiles down to size with a utility knife. Your room will most likely have edges that won’t fit full-sized tiles. Measure the grid opening for the tile and add 3⁄8 in (0.95 cm) to the measurement you found. Transfer that measurement to tile and cut the piece to size using a utility knife.[12]
- Avoid using any power equipment to cut your tiles since it will generate a lot of dust.
Tip: Tiles usually come in 2 ft × 4 ft (0.61 m × 1.22 m) or 2 ft × 2 ft (0.61 m × 0.61 m) sizes. While 2 ft × 4 ft (0.61 m × 1.22 m) tiles use less material and are more cost effective, they do not have the same versatility as 2 ft × 2 ft (0.61 m × 0.61 m) tiles.
-
3Cut out a 3⁄8 in (0.95 cm) flange in any cut edge of your tiles. The flanges rest on your runners and make the tile have more dimension when you put it in your ceiling. Measure in 3⁄8 in (0.95 cm) from any edge that doesn’t have a flange and draw a line with a pencil. Follow along the line with a utility knife, only cutting halfway through the tile. Make another cut on the side of the tile at the same depth as your first cut to remove the flange piece.[13]
- This only needs to be done if your tiles don’t have flanges already.
-
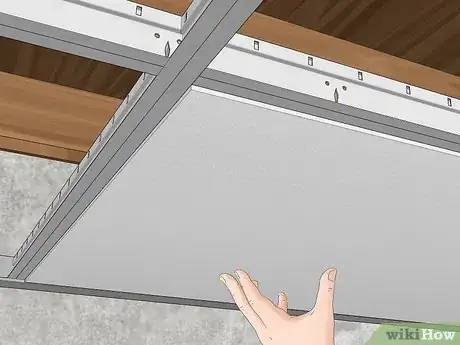
4Lift the tiles through the grid and set them on top of the grid. Start in the center of your room and work towards the edges. Angle the tiles and lift them through the grid system. Straighten the tiles out before setting the flanges on the runners. Continue putting the tiles into your ceiling until it’s completely covered.[14]
- Make sure the tiles are level as you install them. If you find any that aren’t level, adjust the runners before moving on.
Expert Q&A
Did you know you can get expert answers for this article?
Unlock expert answers by supporting wikiHow
-
QuestionWhat are the advantages of a drop ceiling?
 Andrew PetersAndrew Peters is an Architecture and Construction Specialist and a Principal at Peters Design-Build, a full service architecture and construction firm in the San Francisco Bay Area. With over 20 years of experience, Andrew specializes in sustainable and holistic design and building practices. Andrew holds a Bachelor of Architecture and a Project Management Professional (PMP) certification and is a Leadership in Energy and Environmental Design (LEED)-Accredited Professional. He served as Project Manager for the international-award-winning “Refract House,” Team California’s entry in the 2009 U.S. Department of Energy Solar Decathlon, a project featured in over 600 online and print articles.
Architecture & Construction Specialist Drop ceilings are often used in commercial applications when you're building in a concrete structure. The ceiling is supported by T-shaped metal bars that are hanging on wires from the floor above. Then, you have your air conditioning system, pipes, fire sprinkler systems, and utilities running above that.
Warnings
- Avoid using power tools when working with tiles since they could create a lot of dust.⧼thumbs_response⧽
Things You’ll Need
- Tape measure
- Level
- Pencil or chalk line
- Wall angles
- Tin snips
- Stud finder
- Electric screwdriver
- 1 1⁄4 in (3.2 cm) screws
- Wall runners
- String
- Lag screwdriver bit
- Eyelet screws
- 16-gauge wire
- Pliers
- Utility knife
References
- ↑ https://www.familyhandyman.com/ceiling/drop-ceiling-installation-tips/view-all/
- ↑ https://youtu.be/PAvDlRbTHoI?t=202
- ↑ https://youtu.be/PAvDlRbTHoI?t=465
- ↑ https://youtu.be/PAvDlRbTHoI?t=513
- ↑ https://youtu.be/PAvDlRbTHoI?t=1541
- ↑ https://youtu.be/USetnRXLlGs?t=160
- ↑ https://youtu.be/PAvDlRbTHoI?t=1599
- ↑ https://youtu.be/PAvDlRbTHoI?t=1664
- ↑ https://youtu.be/PAvDlRbTHoI?t=1664
- ↑ https://youtu.be/USetnRXLlGs?t=182
- ↑ https://www.popularmechanics.com/home/interior-projects/how-to/a168/suspended-ceiling-tiles-install/
- ↑ https://www.popularmechanics.com/home/interior-projects/how-to/a168/suspended-ceiling-tiles-install/
- ↑ https://www.popularmechanics.com/home/interior-projects/how-to/a168/suspended-ceiling-tiles-install/
- ↑ https://www.popularmechanics.com/home/interior-projects/how-to/a168/suspended-ceiling-tiles-install/
About This Article
To install a drop ceiling, you will first need to install a grid system to support its weight. Start by measuring the dimensions of your room so you can cut the runners of the grid to fit. Then, use wire to hang the main runners from your ceiling joists. To complete the grid system, cut secondary runners to the other length of the room and install them perpendicular to your mains. Finally, once the grid is installed, fill it in with ceiling tiles to complete your drop ceiling. To find out how to install your ceiling tiles, keep reading! To find out how to install your ceiling tiles, keep reading!
