This article was co-authored by Maggie Moran. Maggie Moran is a Professional Gardener in Pennsylvania.
There are 17 references cited in this article, which can be found at the bottom of the page.
This article has been viewed 28,722 times.
Oyster mushrooms are an increasingly popular and tasty type of edible mushroom and they are easy to grow at home. They’re especially amenable to being grown at home, and do not need much space to grow and thrive. To plant the mushrooms, prepare a damp, nutrient-rich mixture of sawdust and used coffee grounds. Add the mushroom spawn, and keep the soil cool and moist while the mushrooms grow.
Steps
Readying the Growing Containers
-
1Purchase oyster mushroom spawn. If you live in the USA, it’s relatively easy to come by oyster mushroom spawn or starter cultures: they can be ordered from Amazon, and from any number of other online seed catalogs. Order at least 50 spawns or starter cultures for this growing method.
- If you live in Canada (or elsewhere outside of the USA), it may be a little more difficult to acquire the spawn. Check European online sources like http://www.mycelia.be/en.[1]
- Regardless of where you live, check with your local plant nursery. Nurseries may stock mushroom spawn. If not, the nursery may be able to recommend another retailer that does.
-
2Cut the tops off of your 2 milk cartons. Use a sharp pair of household scissors to cut the tops off of both 1⁄2 gallon (1.9 L) milk cartons. Make the incisions right at the point where the vertical sides of the cartons intersect with the sloped tops.[2]
- You can throw the carton tops away.
Advertisement -
3Punch 4 to 5 holes in all sides of both milk cartons with a pencil. The holes should be situated at different heights around all 4 sides of each carton. For example, each side could have a hole at 3 inches (7.6 cm) and 1 at 6 inches (15 cm).[3] This way you’ll end up with 20–25 holes total per carton at a variety of heights.
- Make sure that your pencil is sharp before you begin poking the holes.
-
4Mix together sawdust and used coffee grounds in a microwave-safe bowl. Use a large kitchen spoon to stir 8 cups (680 grams) of sawdust and 2 cups (170 grams) of used coffee grounds together until they’re completely mixed. The bowl that you use should be large enough to contain the full 10 cups (850 grams) without overflowing, and ideally should be made of plastic, glass, or porcelain.[4]
- You can use any type of regular coffee grounds that you’ve produced through making coffee. Just save them up for a few days until you’ve produced the 2 cups (170 g). If they start growing their own fungi, do not use them as their fungi will compete with your mushrooms.
- You can get sawdust from any nearby hardware store. Since 8 cups (680 g) is a relatively small amount, they may give you the sawdust for free.
- You can also use hay that has been pasteurized in boiling water for 35 to 45 minutes. Just mix the hay and mushroom spawn together in a plastic bag that has holes poked in it.
-
5Pour water over the mixture until it has a spongy texture. This sponge-like mixture will have both the moisture and the nutrients that your mushrooms need to grow, so don’t skimp on the non-chlorinated water. Start by adding about 2 cups (0.47 L) of water, and add more water as necessary.[5]
- If you accidentally add too much water and the mixture becomes soupy, just pour some water back out.
- Don’t add water if you’re using hay.
-
6Microwave the mixture for 2 minutes. This will disinfect the sawdust and coffee grounds, and kill any bacteria and microbes that may be living in the mixture. Depending on the heat settings of your microwave, you may need to microwave for longer. The water should be boiling hot after microwaving, so if it’s not that hot after 2 minutes, microwave for another 2 minutes.[6]
- If you skip this step and do not microwave the sawdust and coffee ground, bacteria may kill the mushroom spawn before they have a chance to grow.
- Don’t microwave the mixture if you’re using hay.
-
7Let the mixture cool to room temperature. The mushroom spawn won’t survive being planted in boiling-hot temperatures, so you’ll need to wait at least 30 minutes for the sawdust mixture to cool off. Periodically test the temperature of the spongy coffee grounds and sawdust by pressing your finger into the mixture.[7]
- If you’re in a hurry, try putting the bowl in your fridge for 30 minutes.
-
8Pour another 2 cups (0.47 L) of water over the sawdust mixture. Microwaving the coffee grounds and sawdust mixture tends to dry it out. Adding more non-chlorinated water will dampen the mixture before you add the mushroom spawn.[8]
- Oyster mushrooms need a very moist environment to grow in.


Growing the Mushroom Spawn
-
1Add the mushroom spawn to the mixture. Dump a generous handful or 2 of the mushroom spawn into the mixture, and use your hands to thoroughly work the spawn into the sawdust and coffee grounds.[9]
- Unlike flower seeds—which typically should only be about 1⁄2 inch (1.3 cm) under the soil—mushroom spawn need to be completely buried in order to grow well.
-
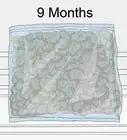
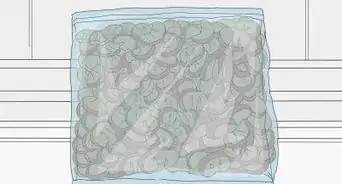
2Pour the mixture into the 2 milk cartons. Now that you’ve completely mixed the oyster mushroom spawn into the soil substitute, you can dump the whole mixture into the milk cartons. Don’t be afraid to pack the sawdust mixture in. Use your hands to press down on the mixture every 3–4 inches (7.6–10.2 cm) or so, to ensure that it’s packed at an even consistency throughout.[10]
- Oyster mushrooms can grow well through packed soil.
-
3Set the mixture in a cool room. Oyster mushrooms thrive in slightly cool environments, so place them in a room that’s about 64 to 77 °F (18 to 25 °C). Try placing them in a cellar or basement. If you don’t have a basement, you could set the mushroom cartons under your bed or in a pantry cabinet. [11]
- Some sunlight in the room is fine, since the mushrooms would occasionally have direct sunlight if they were growing in nature.
- Do not disturb the mushrooms while they’re growing. You’re welcome to check in on them and watch as they grow from day to day, though.
- If you’re using hay as the growing medium, place it in a warm—but not hot—place that is out of direct light.
-
4Dampen the sawdust mixture while the mushrooms grow. As the mushrooms grow, use a plastic spray bottle to keep the soil damp. Test the soil with your finger, and when it begins to feel like it’s drying out, give it a thorough misting.[12]
- It’ll take the oyster mushrooms 2 to 3 months to grow. No regular maintenance is required, aside from making sure that the soil is damp.
- If using hay, mist the bag once or twice daily when you start to see white mushroom growth in the hay.


Harvesting the Mushrooms
-
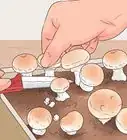
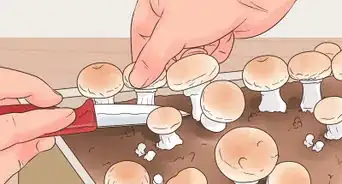
1Cut the mushrooms off at the base with a sharp knife. You can tell that the oyster mushrooms are developed when the caps are fully separated from the stems. Rather than tearing off the mushrooms by hand—which can damage the delicate fungi—use a sharp knife to cut the individual mushrooms off at their base.[13]
- You can also tell that the mushrooms are mature if the edges of the caps have just begun to develop a slight frill.[14]
-
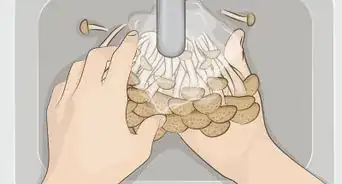
2Remove the stems and rinse the mushrooms. The hard, woody stems of oyster mushrooms are unpleasant to eat. Use a sharp kitchen knife to slice off the stems.[15] Then rinse any lingering dirt off of the mushrooms before you cook them.
- The stems can be disposed of or composted.
-
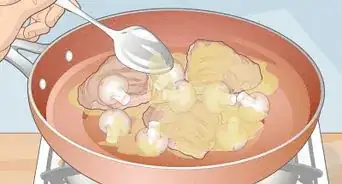
3Cook the oyster mushrooms before eating them. Oyster mushrooms can be eaten just like any of the more well-known types of mushroom, like Portobello or white button. Sauté the mushrooms in butter and add them to a rice or pasta dish, or put them on top of a pizza.[16]
- Or, if you prefer, grill the large mushrooms whole and eat them on their own.
-
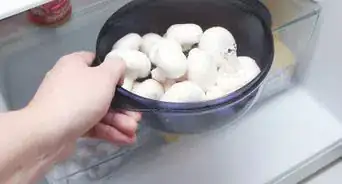
4Store the mushrooms in your refrigerator for up to 2 weeks. If you’d rather not eat the entire harvest at once, the rinsed mushrooms will keep for 1 or 2 weeks in your fridge. Place them in an airtight container or plastic bag, and set them in a section of your fridge where they won’t be crushed.


Expert Q&A
Did you know you can get expert answers for this article?
Unlock expert answers by supporting wikiHow
-
QuestionWhat temperature do oyster mushrooms grow at?
 Maggie MoranMaggie Moran is a Professional Gardener in Pennsylvania.
Home & Garden SpecialistTypically, oyster mushrooms grow best at a temperature of around 78 degrees F.
Support wikiHow by unlocking this expert answer.
-
QuestionHow do you start an oyster mushroom farm?Maggie MoranMaggie Moran is a Professional Gardener in Pennsylvania.
Home & Garden SpecialistYou have to find the proper spores and the right substrate, which is ideally straw or wood chips.Support wikiHow by unlocking this expert answer.
-
QuestionHow much does it cost to grow oyster mushrooms?Maggie MoranMaggie Moran is a Professional Gardener in Pennsylvania.
Home & Garden SpecialistGrowing oyster mushrooms is fairly inexpensive. It costs $25.00 to get an oyster mushroom starting kit.Support wikiHow by unlocking this expert answer.
Things You’ll Need
- Oyster mushroom spawn
- 2 empty milk cartons
- Wooden pencil
- 8 cups (680 grams) of sawdust
- 2 cups (170 grams) of coffee grounds
- Spray bottle
- Non-chlorinated water
- Sharp knife
- Plastic wrap (optional)


References
- ↑ https://joybileefarm.com/growing-oyster-mushrooms/
- ↑ https://www.youtube.com/watch?v=EWy9t71pT5A&feature=youtu.be&t=31s
- ↑ https://www.youtube.com/watch?v=EWy9t71pT5A&feature=youtu.be&t=38s
- ↑ https://www.youtube.com/watch?v=EWy9t71pT5A&feature=youtu.be&t=42s
- ↑ https://www.youtube.com/watch?v=EWy9t71pT5A&feature=youtu.be&t=46s
- ↑ https://www.youtube.com/watch?v=EWy9t71pT5A&feature=youtu.be&t=50s
- ↑ https://www.youtube.com/watch?v=EWy9t71pT5A&feature=youtu.be&t=1m2s
- ↑ https://www.youtube.com/watch?v=EWy9t71pT5A&feature=youtu.be&t=1m8s
- ↑ https://www.youtube.com/watch?v=EWy9t71pT5A&feature=youtu.be&t=1m13s
- ↑ https://www.youtube.com/watch?v=EWy9t71pT5A&feature=youtu.be&t=1m16s
- ↑ https://www.growveg.com/guides/growing-gourmet-mushrooms-at-home-from-waste-coffee-grounds/
- ↑ https://www.youtube.com/watch?v=EWy9t71pT5A&feature=youtu.be&t=1m33s
- ↑ https://www.maximumyield.com/how-to-grow-oyster-mushrooms-at-home/2/3635
- ↑ http://www.verticalveg.org.uk/how-to-grow-oyster-mushrooms-at-home/
- ↑ http://www.verticalveg.org.uk/how-to-grow-oyster-mushrooms-at-home/
- ↑ https://joybileefarm.com/growing-oyster-mushrooms/
- ↑ https://www.youtube.com/watch?v=EWy9t71pT5A&feature=youtu.be&t=57s
- ↑ https://www.youtube.com/watch?v=EWy9t71pT5A&feature=youtu.be&t=1m25s
About This Article

To grow oyster mushrooms, place a generous handful of mushroom spawn into a mixture of sawdust and coffee grounds and blend thoroughly. Next, pour the mixture into 2 milk cartons with holes cut into them, and press down to pack evenly throughout. Then, set the cartons in a cool environment that’s about 64 to 77 °F, like in a basement or under your bed. As the mushrooms grow, dampen the mixture with a spray bottle any time it feels dry. Finally, wait for 2 to 3 months before you begin harvesting. For more advice from our Gardener reviewer, including how to harvest your mushrooms, read on!