X
wikiHow is a “wiki,” similar to Wikipedia, which means that many of our articles are co-written by multiple authors. To create this article, volunteer authors worked to edit and improve it over time.
There are 7 references cited in this article, which can be found at the bottom of the page.
This article has been viewed 60,651 times.
Learn more...
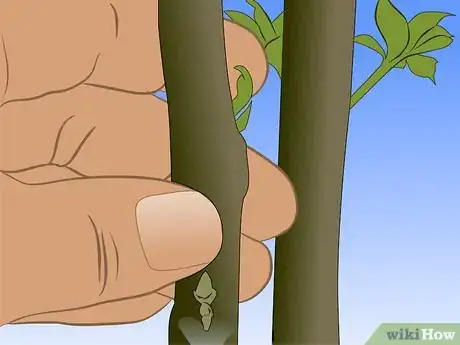
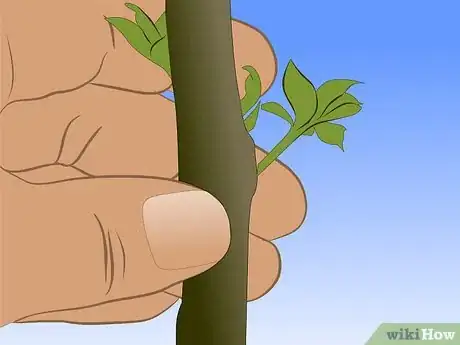
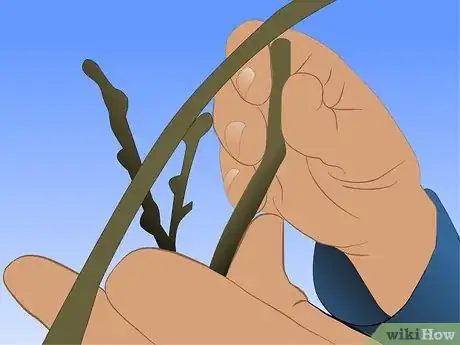
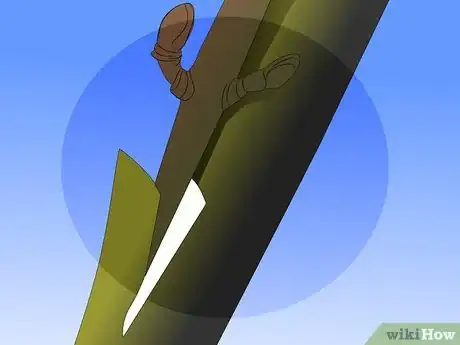
Grafting is a technique used to grow fruit tree cultivars that cannot be reproduced from seed. There are multiple grafting techniques you can use, but the process always involves attaching "scion" wood of your desired cultivar to "stock" wood of another variety.
Steps
Part 1
Part 1 of 3:
Part One: Collecting Scion Wood
-
1Wait until dormancy. Wait until the fruit tree enters its dormant season before collection scion wood from it.[1]
- "Scion" wood is the wood collected from the cultivar you wish to propagate. It is the wood you will graft onto another tree.
- In most regions, the best time to collect scion wood is November.
- Do not wait until spring to collect scion wood. The wood should not be collected while it is frozen, either. Buds may grow at the start of spring or become injured during the winter, and if that happens, the graft is less likely to be successful.
-
2Choose young shoots. Cut away shoots that grew during the previous growing season and use those for your scion wood.
- The best scions are vigorous shoots at least 1 foot (30.5 cm) in length.
- The shoots you collect should also have diameters between 1/4 to 3/8 inch (6.35 to 9.5 mm).
Advertisement -
3Store in cool, moist conditions. Tie the scion wood in secure bundles. Label the bundles, then store them in temperatures ranging between 40 and 45 degrees Fahrenheit (4.4 and 7.2 degrees Celsius).[2]
- Gather together one to two dozen shoots and tie the bundle together with cotton twine or a similar substitution.
- Place the bundles in moistened sawdust, paper towels, or moss, then wrap them in plastic sheets or place them in plastic containers. Note that the material should only be moist and not soaking wet.
- Store the scion wood in a cellar or refrigerator.
-
4Trim the tip and base before use. Immediately before you plan to graft the scions onto stock wood, you should cut off the tip and base of each collected shoot.
- Note that buds at the tip of the shoot are usually flower buds, but those near the base are usually fairly weak. Each scion should have three to five buds, and most of these buds should lie near the tip of the shoot.
Advertisement
Part 2
Part 2 of 3:
Part Two: Preparing the Stock
-
1Choose a young, healthy tree. As a general rule, the stock should be five years old or younger. It must also produce vigorous growth and show no signs of disease.
- The "stock" is the tree you're grafting onto.
- Most apple and pear trees can be grafted at any age, but the process is notably more difficult after the trees reach 10 years of age.
- For trees up to the age of five, you can graft all of the branches at once. For older trees, only graft the upper half and center of the tree the first year. The rest of the tree can be grafted the following year.
-
2Opt for a similar tree. Even though the scion and stock will be different trees, they should be as closely related as possible to encourage better success.[3]
- Typically, varieties and cultivars of a single fruit species can be grafted together.
- Plants of the same genus and species are usually able to be grafted together even if the fruit is different, but your odds of success are significantly lower.
- Fruit trees that are in completely different families cannot be grafted together.
-
3Graft in the spring. The best time to graft is when the buds of the stock tree just begin to open. Do not graft after the stock has blossomed.
- In most regions, the ideal time to graft is in April or early May.
-
4Keep plenty of space between the trunk and the graft. Keep at least 1 to 2 feet (30.5 to 61 cm) of branch in between the trunk and the graft, especially when working with young trees.
- If you do not keep enough space in between the trunk and graft, the trunk can grow past the grafted union, and the connection between the branch and stock will not form correctly.
Advertisement
Part 3
Part 3 of 3:
Part Three: Grafting
Whip Grafting
-
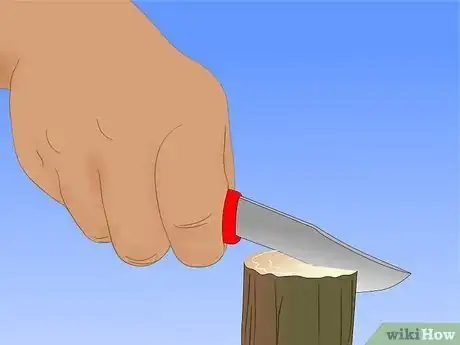
1Cut the stock. Remove a branch from the stock, leaving 1 foot (30.5 cm) behind.
- Choose branches that are roughly the same diameter as the scion wood. Each branch you graft onto should be no wider than 1/2 inch (1.25 cm) in diameter.
- The cut should be straight and slanted, measuring roughly 1-1/2 inches (3.8 cm) long. Use a sharp knife and cut the stock branch in one even stroke.
- Note that this type of graft is mostly used on young fruit trees, especially young apple and pear trees.
-
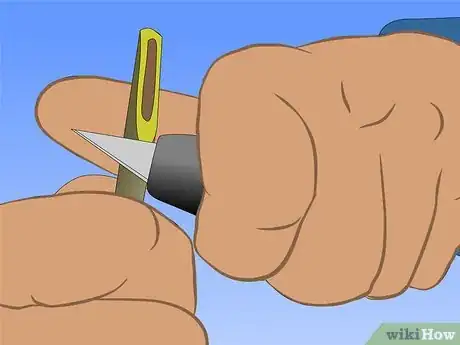
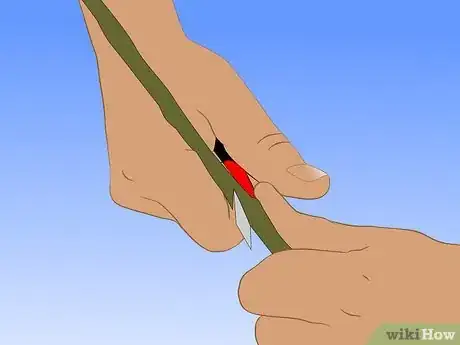
2Slice a tongue into the stock branch. Use a sharp knife to slice into the cut side of the stock. Start near the top of the cut surface and slice down to the bottom of the cut.[4]
- Slice the tongue into the stock branch so that the it is crosswise across the cut surface and not lengthwise. The previously cut surface should not be divided into two mirror halves.
-
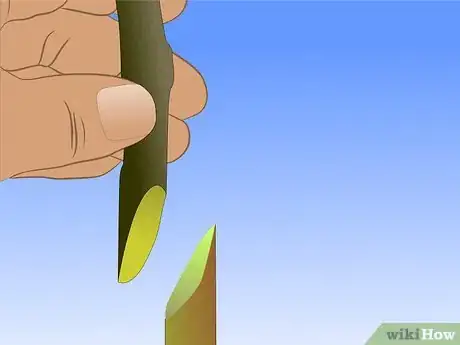
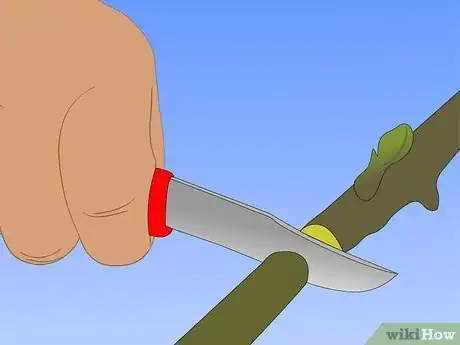
3Mirror the cut on the scion wood. Cut the base of the scion wood so that it mirrors the cuts made into the stock branch.[5]
- Cut the base of the scion at a straight slant. This cut surface should be 1-1/2 inches (3.8 cm) long.
- Slice a tongue into the scion, as well. The position and dimensions of this tongue should match those of the stock tongue.
-
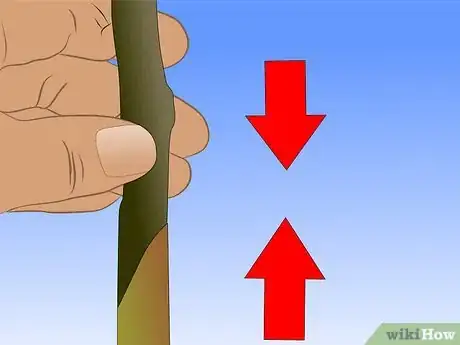
4Match the cut wood together. Fit the cut ends of the stock and scion together, slipping the tongued sections of both pieces into one another.[6]
- If any cut end of either the stock or scion branch extends beyond the other cut surface, you will need to use a sharp knife to shave this excess away. The two cut surfaces must line up evenly and completely.
-
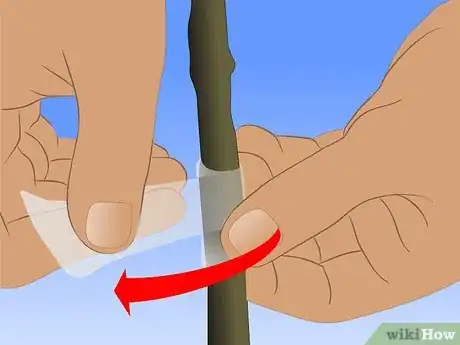
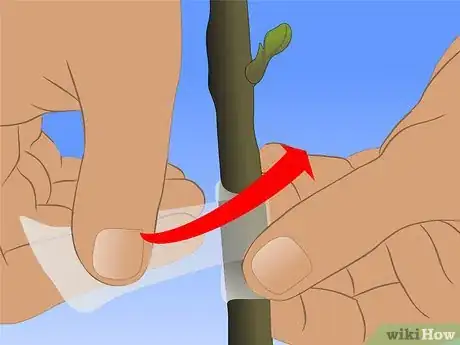
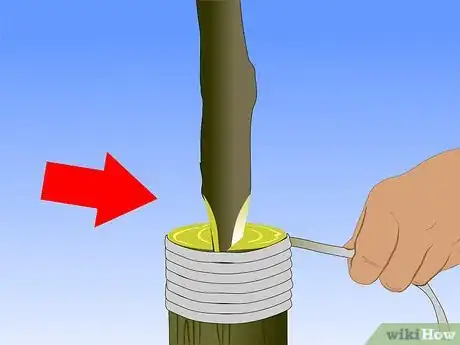
5Tie and cover the graft. Wrap grafting tape around the entire graft. Cover the tape with grafting compound to further secure.
- You must make sure that all cut portions of wood are completely covered. Exposed wood will be weaker to disease, and the graft is less likely to be successful if the cut portion is exposed to air.
- If you do not have grafting tape, rubber electrical tape can also work. Plastic electrical tape and masking tape may work in some situations but are less ideal.
- Apply asphalt water emulsion using a paintbrush or small paddle. This substance is a strong grafting compound that should further protect the cut wood.
-
6Remove the wrapping once new growth develops. Once the scion begins to grow, you should scrape away the grafting compound and remove the grafting tape.
- If you do not remove the wrappings on time, they can strip away the bark and weaken the tree as a result.
- The graft should be secure by this point, and the tree should be able to grow normally.
Advertisement
Cleft Grafting
-
1Cut the stock branch. Use a saw to cut off the top of the stock branch, leaving at least 2 feet (61 cm) of branch attached to the tree.[7]
- Note that this method is typically used on slightly older trees, the trunks of small trees, or the side branches of larger trees. It works best with branches that are 1 to 3 inches (2.5 to 7.6 cm) in diameter.
-
2Make a cleft into the cut. Place a grafting chisel across the middle of the cut surface. Strike the chisel with a hammer or mallet to create a cleft in the wood.
- A large knife or hatchet will work if you do not have a grafting chisel.
- Split the end of the stock branch vertically. Keep the chisel in the split after forming the cleft.
- The depth of the cleft should be 2 to 3 inches (5 to 7.6 cm).
-
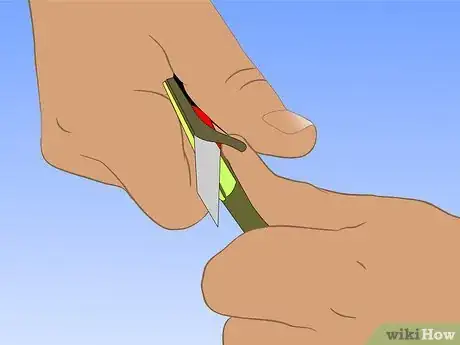
3Trim the scions. Trim the scion down to three buds, then make a straight, slanted cut along the tip of the scion measuring 1 to 2 inches (2.5 to 5 cm) in length.
- The cut should be tapered so that one side is slightly thicker than the other.
- Do not cut the scion to a sharp point, however, since doing so can cause the bark to peel and may make the graft less successful.
-
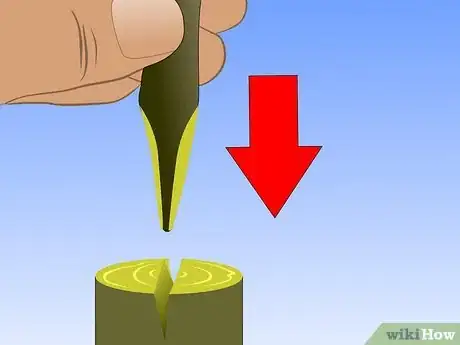
4Insert the scions into the cleft. Slip one scion into either side of the stock cleft. The inner bark of the stock must come into direct contact with the inner bark of the scion, and the thick part of the scion should face outward.
- The scion bark and stock bark will not be flush with one another since the latter is thicker than the former, but the two inner barks must come into contact at a slight tilt.
- If the inner bark layers do not meet, the graft will not take hold.
-
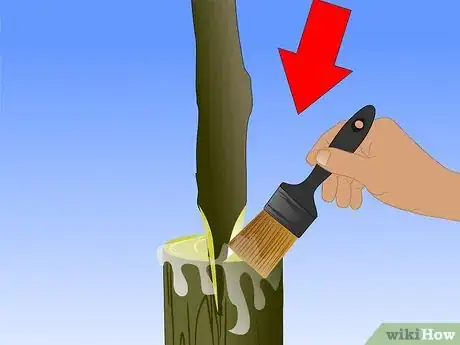
5Cover the area with grafting compound. Apply grafting compound over all exposed wood.[8]
- The most common grafting compound is asphalt water emulsion, which can be applied to the wood with a brush or small paddle.
- Make sure that all cut wood is coated with the compound. Exposed wood is prone to disease.
- Initial wrapping is usually unnecessary with this type of graft.
-
6Support the growing scions. As the scions begin to grow, tie them to supporting braces to prevent them from breaking prematurely.
- Using cotton twine, attach a piece of 2-inch (5-cm) thick wood to the stock branch beneath the graft. Make sure that this brace extends up along the length of the scion wood. As the scions grow, tie them to this brace wood, as well.
- You can also pinch back the growing tips to prevent the growth from expanding too rapidly or gently encircle all of the shoots growing from one stock base with additional twine.
-
7Gradually cut back the scions. Allow the scions and attached shoots to grow during the first season but do not allow the shoots to overshadow the scions.
- During the second growing season, select the strongest scion from each grafted stock branch and cut the other scions back to one or two buds. The strongest scion is the permanent one, while the others should be considered support.
- Repeat your second year pruning during the third year.
- In the fourth growing season, cut away all of the spare scions, leaving only the permanent one in place. Allow the grafted tree to grow normally from that point on.
Advertisement
Bark Grafting
-
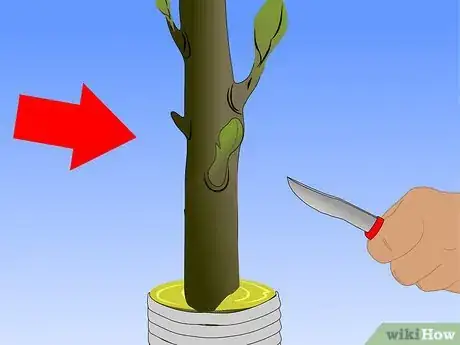
1Cut into the bark of the stock. Use a fine-toothed saw to cut evenly and straight across the end of the stock branch.
- Choose a section of branch or trunk that is 1 to 2 inches (2.5 to 5 cm) in diameter.
- Use this method when the stock is too large for whip grafting and too horizontal for cleft grafting. Wait until the bark begins to slip from the stock before starting the process.
- Note that this technique is usually used on apple, pear, and nut trees.
-
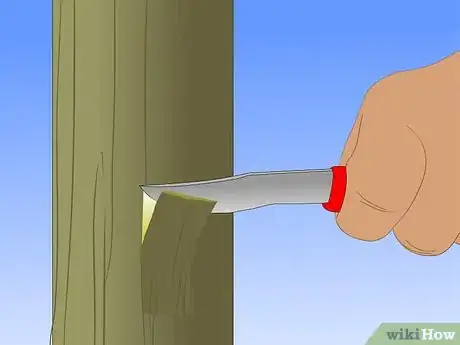
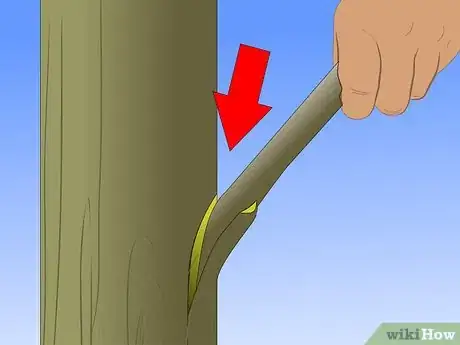
2Slice into the stock at an angle. Use a sharp wedge to make a diagonal cut into the side of the stock. This cut should slice into the inner layer of bark at a very slight angle that is nearly parallel to the stock branch.
- Ideally, you should cut into the bark without cutting into the flesh of the branch. Do not remove the bark completely.
-
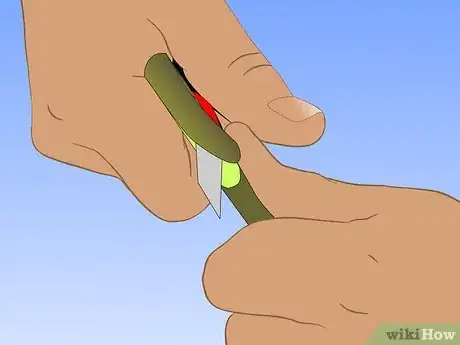
3Make sloping cuts into the scion. Trim the top of the scion 1/4 inch (6.3 mm) above the top bud, cutting into the wood at a slant. Make a 2-inch (5-cm) sloping cut into the base of the scion, as well.[9]
- You will graft the scion at its base cut.
- Ideally, the scion should be trimmed to a length of 6 inches (15 cm) before you cut the slants into either end.
- Note that you should prepare two scions for each stock branch.
-
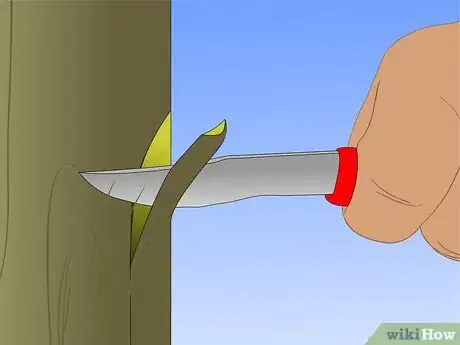
4Join the scion and stock. Insert the scion into the slit made along the bark of the stock.
- You may need to hold the slit open with a screwdriver or chisel as you slide the scion inside.
- If the angle of the slit and the slanted cut of the scion do not align, you may need to trim away more wood from either piece until they both match.
- One scion should lie on one side of the branch, and the second scion should be placed on the opposite side of the branch in a similar bark slit.
-
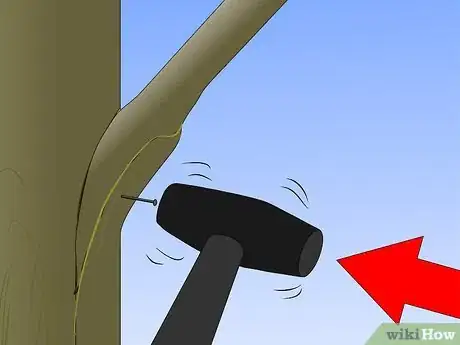
5Nail the scions in place. Carefully hammer short wire nails through the scions and stock wood to hold the graft together.
- The nails should be 1/2 to 3/4 inch (1.25 to 1.9 cm) long.
-
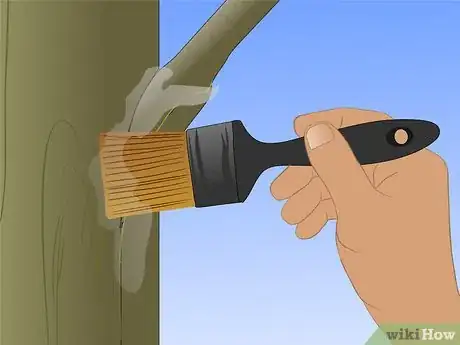
6Coat the wound. Cover any exposed or cut wood with asphalt water emulsion or a similar grafting compound. Apply the compound with a brush or small paddle.
- Note that melted grafting wax can also be used, but hot wax may damage the plant tissue.
- Make sure that all exposed wood is covered. Doing so will protect the wood of the fruit tree from disease and further injury.
-
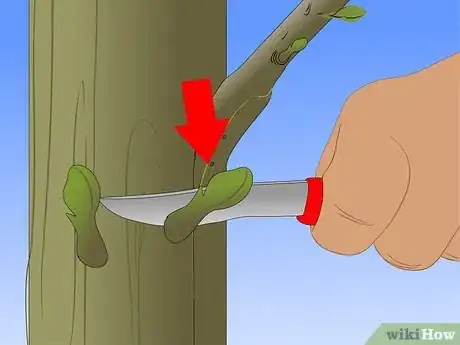
7Prune as needed. Remove shoots and sprouts below the graft during the first season. When grafting two or more scions into the same stock branch, pinch back the weaker shoot during the summer to prevent it from growing too vigorously to remain supported.
- Allow all grafted scions to grow during the second summer.
- Pinch back the growth of weaker scions during the third summer, then remove weaker support scions completely during the fourth spring.
- Once the grafted tree branches have been reduced to one scion per branch, allow the tree to grow normally.
Advertisement
Community Q&A
-
QuestionCan I attach scion-sticks of peach and plum on an apple stock?
 Community AnswerNo, they should each only receive scions from their own types of trees.
 -
QuestionWhat will happen if I use a non-dormant scion for grafting?
 Izuku madoriaCommunity AnswerWhen using non-dormant scions, energy is going to be used to push and grow the leaves from the scions. Without a healed bond, then all the stored energy will be used up quickly in the scion. It takes a couple of weeks for the grafting union to heal so that sap from the rootstock can feed the scion.
 -
QuestionWhat is fruit tree grafting?
 Izuku madoriaCommunity AnswerIn general, grafting is a technique used to propagate specific fruit varieties by inserting a piece of a desired plant into the rootstock or branch of another plant, which if successful, grows out to be a new plant or branch of the transferred variety.
Advertisement
Things You'll Need
- Grafting knife
- Fine-tooth saw
- Pruning shears
- Dormant scions
- Healthy stock
- Grafting tape or similar binding
- Asphalt water emulsion or similar grafting compound
- Hammer or mallet
- Grafting chisel
- Wire nails
References
- ↑ https://www.ag.ndsu.edu/hort/info/fruit/graft.htm
- ↑ https://www.ag.ndsu.edu/hort/info/fruit/graft.htm
- ↑ http://www.ag.ndsu.edu/hort/info/fruit/graft.htm
- ↑ https://aggie-horticulture.tamu.edu/propagation/whipgrafting/step4.html
- ↑ https://aggie-horticulture.tamu.edu/propagation/whipgrafting/step6.html
- ↑ https://aggie-horticulture.tamu.edu/propagation/whipgrafting/step8.html
- ↑ https://extension.unh.edu/resource/growing-fruit-grafting-fruit-trees-home-orchard-fact-sheet
- ↑ https://extension.unh.edu/resource/growing-fruit-grafting-fruit-trees-home-orchard-fact-sheet
- ↑ http://www2.ca.uky.edu/agc/pubs/ho/ho39/ho39.pdf
About This Article
Advertisement

