This article was co-authored by Michelle Myles. Michelle Myles is the Co-owner of Daredevil Tattoo, a tattoo shop located based in New York City's Lower East Side. Michelle has more than 20 years of tattooing experience. She also operates the Daredevil Tattoo Museum, co-owner Brad Fink's personal collection of antique tattoo memorabilia that he has amassed over the last 27 years of tattooing.
There are 13 references cited in this article, which can be found at the bottom of the page.
wikiHow marks an article as reader-approved once it receives enough positive feedback. This article received 12 testimonials and 100% of readers who voted found it helpful, earning it our reader-approved status.
This article has been viewed 867,595 times.
If you've never gotten a tattoo before, you should get it from a professional. But if you're looking to get into the art and practice on yourself, you can learn to do it safely and effectively. Learning to tattoo properly involves preparation, concentration, and safety. Learn how to get inking the right way.
Warning: The risk of blood-bourne infection is much higher when you're doing a tattoo at home. Sterile conditions, new needles, and proper care are essential. It's recommended that you get all tattoos at licensed parlors.[1]
Steps
Preparing for a Tattoo
-
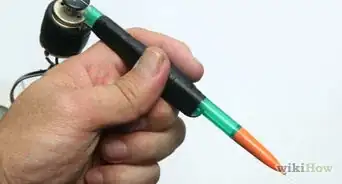
1Buy a tattoo machine. If you've never tattooed before, it's probably best to start with a tattoo machine, commonly referred to as a "tattoo gun." These operate via electromagnetic coils, which control an armature bar, moving a grouping of needles up and down rapidly. The needles are dipped in tattooing ink, which is applied under the skin. Tattoo starter kits with sterile supplies are available for around a hundred dollars.
- It's true that tattoo machines and supplies cost about the same as getting a small tattoo professionally done at a parlor, making a shop tattoo a much better option if you don't have any work done yet. But if you do, and you're interested in learning on yourself, it's important to invest in a good-quality tattooing machine.
- If you want to make your own tattoo gun, you can also save a bit of money. If you want to give yourself a stick 'n poke tattoo, without the use of a tattoo gun, check out Give Yourself a Tattoo Without a Gun to learn to minimize the risks associated with this technique.[2]
-
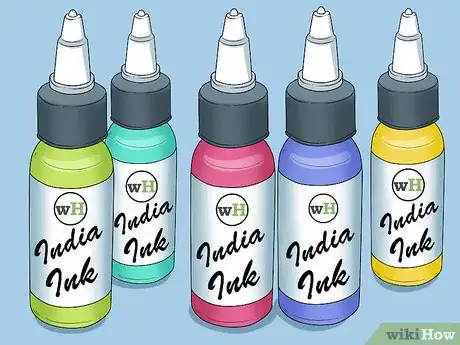
2Use tattoo or India ink. Tattoos should only be made from specialized tattoo ink, or carbon-based India ink. These inks are natural and react gently with your body, making the process safe and sterile. Never use other types of ink for tattoos.
- Some people have allergies to specific ink ingredients and pigments, but this is usually only true of colored inks. It's generally not a good idea to start messing around with colors anyway, unless you're an experienced tattoo artist.
- Never use pen ink or other varieties of ink to make a tattoo, unless you want an infection and terrible-looking art on your body. Do it right.[3]
Advertisement -
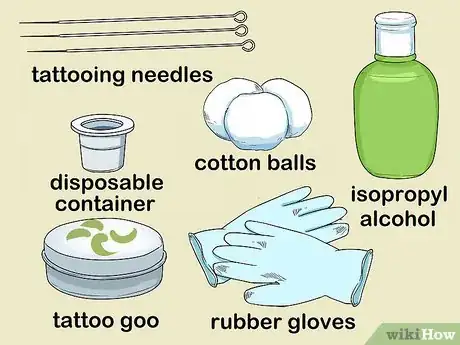
3Get the other necessary sterilization supplies. Because the risk of blood-borne infection is much higher in tattoos done outside the parlor, it's absolutely essential that you take your tattoo seriously and only use brand-new, just-out-of-the-package, sterilized supplies to give yourself a tattoo. The best way to get everything you'll need is to invest in a starter kit, again, which are available for about a hundred bucks. To get started, you'll need:
- New tattooing needles
- A disposable container for the ink
- Isopropyl alcohol (rubbing alcohol)
- Cotton balls or soft batting
- Rubber gloves
- Tattoo goo, A&D, or Bacitracin for aftercare
-
4Choose a simple design. When you're giving yourself your first tattoo, it's probably not the time to ink that sick panther wearing a camo bandana and slashing through the outline of Uranus across your arm. Go with a simple outline-style tattoo, something that you'll be able to add to later if necessary. A few words, or a simple line drawing? Now you're talking. Good first-tattoo ideas include:
- Hand-print style lettering
- Small line-drawings of animals
- Stars
- Crosses
- Anchors
- Hearts
-
5Prepare your body. To make the tattoo process as easy as possible, you need to be clean and prepare the tattoo area. Be sure you haven't drunk any alcohol for several hours, and that you aren't on any blood-thinning painkillers (such as aspirin) or other drugs when you're ready to start inking.[4]
- Shower, dry yourself, and change into clean clothes, so that you're as clean as possible before you begin.
-
6Shave the area that will be tattooed.[5] Using clean strokes with a fresh blade, shave the area you'll be tattooing, plus a decent margin of skin in the surrounding area. Shave even if there doesn't seem to be any hair. The razor is more accurate than your eyes.
-
7Prepare your space. Choose a clean, flat surface with plenty of light, where you'll be able to work. Wash the surface thoroughly with soap and water and let it dry for a few minutes, then use a disinfectant to remove any trace amounts of bacteria.[6] Afterward, lay down a thick layer of paper towels all over your work area to prevent staining any furniture or flooring.
- Ventilate the room by opening a window or turning on a fan. The pain can make it kind of a sweaty process, so it's good to keep the room cool.
-
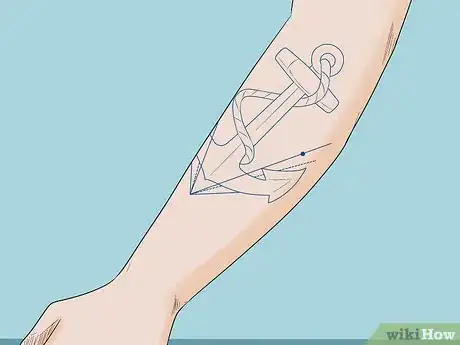
8Apply the design to your skin. Depending on the design that you're trying to tattoo, you might want to go freehand, although this is pretty uncommon, or (more likely) work from a stencil, which is basically like a temporary tattoo. This is the most common way that professional tattoo artists provide a guide from which to work:[7]
- Draw the design on a sheet of paper or print it out from your computer, then place the design on the stencil paper. Use a stencil liquid, like StencilStuff or StencilPro, and spread the liquid over the area.
- Place the stencil on the skin with the purple side down, smoothing the stencil out flat. Let it sit before carefully removing the stencil from the skin. Allow the skin to dry completely.
Tattooing Yourself
-
1Sterilize your equipment. The main risk of a home tattoo is the risk of infection. Take steps to keep everything as clean as possible, only using absolutely new, sterile equipment to complete your tattoo.
- Sterilize your needle. Just before you plan to give yourself a tattoo, drop your needle in a pot of water and boil it for five minutes. Spoon it out and let it cool on a clean paper towel for a moment, then soak it in rubbing alcohol and carefully wipe it down with a new towel.[8]
- Pour your ink cleanly. Wipe down the ink container with a rubbing alcohol-soaked paper towel, then pour in a small amount of ink in gently. Lay another towel across it to prevent dust from falling into it.
- Use less ink than you think you'll need. A little tattoo ink goes a long way, and you can always pour more if you need it. Also keep a clean glass of water handy for cleaning your needle during the process.
- Put on clean rubber gloves. Have the box on hand and be ready to change them regularly, as your hands get sweaty.
-
2Load the needle with ink to get started. When you're ready to start tattooing, dip your needle into the ink and position the stylus so that your hand is steady.[9] Turn on the tattoo gun, line up the needle with the guide line, and get started.
- You need to start the machine to get the needle moving before you attempt to start the tattoo. Never stick the needle into the skin before turning it on.
- Using your other hand, keep the skin to be tattooed as tight and flat as possible. It's very important to give yourself a good canvas on which to tattoo. The flatter the better.
- Some tattoo guns can be auto-loaded with ink by screwing a canister of tattoo ink directly into the gun. If you have access to one of these guns, you don't need to dip the needle, obviously.
-
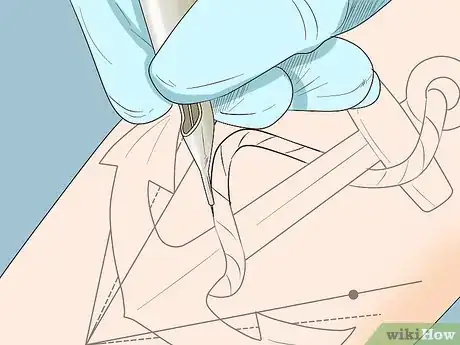
3Push the needle into your skin. It's very difficult to push a tattooing needle in too deeply because of the design of the needle will keep it from happening, but you do need to make sure it goes deep enough, at least a few millimeters. As you do, start moving it along the outline of your design.[10]
- Your skin should tug just a bit on the needle when you pull it out, but bleeding should be minimal. If your skin doesn't resist when you pull the needle out, it's probably too shallow. If there is a lot of blood, the needle is too deep.
- Because the needle is difficult to see, it's usually better to tilt the needle at a diagonal to the skin, resting the tube rests on the skin.
-
4Outline your design. Move the needle slowly down your stencil line. Don't go farther than a few centimeters along your outline before you remove the needle, wipe the excess ink off, and keep going. Take your time and look closely at the line quality to make sure you're giving an even tattoo.[11]
- The needle will be moving, so it's sometimes difficult to see exactly where it's going into the skin. Keep it moving along the line, then remove it and wipe away the excess ink to stay on track. It's a slow process.
-
5Continue filling in your tattoo. Continue tracing along the lines of your tattoo, wiping the excess ink off as you go, and re-upping the ink on the needle as you work. Keep a close eye on what you're doing and the thickness of the line. High-quality tattoos will have very even line-work, making it important that you use consistent pressure and evenness.[12]
- Filling in the tattoo is generally done with a slightly larger needle, and instead of moving in straight lines, you move in gentle, tiny circles to fill in the area. For your first tattoo, this may be unnecessary, but feel free to experiment.
-
6Keep the stylus clean. Wet the needle periodically, before putting more ink onto it. Cleaning the excess ink off the needle is absolutely essential for cleanliness and a good tattoo job. If you set your needle anywhere other than the ink dish and your skin, stop and sterilize again it with a clean paper towel and rubbing alcohol. Be sure it's dry before you continue.
- Wipe away the excess ink regularly. Every few repetitions, use a soft paper towel to wipe away excess ink and seeping blood from your tattoo. Use a fresh towel each time.
Cleaning and Healing
-
1Gently clean the tattoo. As soon as you're done, apply a thin layer of Tattoo ointment, typically called A&D or Tattoo Goo, and cover the tattoo with clean gauze. Fresh tattoo work needs to be protected as soon as you're finished, to minimize the risk of infection.[13]
- Never put lotion or petroleum jelly on a fresh tattoo. These clog the pores, draw the ink out, and keep the tattoo from healing effectively. It's a common misconception that Vaseline or petroleum jelly is used on new tattoos. The ointment used does resemble the consistency of Vaseline, but it's not the same thing.
- Don't slather ointment onto the tattoo. You only need a small, pea-sized amount for most tattoos. It's important to let the tattoo heal as quickly and naturally as possible, which it can't do if its constantly covered in goop.
- Don't immediately wash your tattoo. If you used sterile products, you should let the tattoo alone and let the inflammation calm down a bit before you try to clean it. Cover the tattoo and leave it alone.
-
2Bandage up.[14] Use a clean, soft gauze bandage to completely cover the tattoo. Be gentle, as the area will likely be somewhat tender from the tattooing process. Bind it in place with medical tape or stretch wrapping, loosely.
- Leave the bandage on the tattoo for at least the first two hours, if not the rest of the day. This is a very important part of the process. Don't start messing with it, just because you want to see your work. Wait.
-
3Clean your workspace. Throw away the ink in your vessel, the needle from the gun, the gloves, and the rest of the equipment that you used. This stuff cannot be reused, if you want to give yourself sterile, clean, and effective tattoos. Only use new, clean products when you're giving a tattoo.
-
4Remove the bandage and gently clean the tattoo with water. The first time you clean your tattoo, use a small amount of cool water to gently clean the surface of the tattoo using your hand. Don't soak the tattoo, or run it under water. This is very important.[15]
- Avoid soaking the tattoo for the first 48 hours of the job. After the first rinse, use soap and warm water to clean the tattoo gently that night before you go to bed. After two days, you can start cleaning it normally, when you shower.
- Keep a thin layer of ointment on the tattoo 2-3 times a day for about two weeks. Keep a close eye on things to make sure there are no signs of infection, and visit a medical professional immediately if you think your tattoo may be infected.
Community Q&A
-
QuestionWhat about the pain?
 Community AnswerPain is part of getting a tattoo. If you're not willing to deal with the pain, don't do it.
 -
QuestionCan I use a plaster spray for bandaging?
 Community AnswerNo. You'll need plastic wrap or a plastic bandage to prevent all kind of dirt from getting to your new tattoo and to prevent blood, color and other liquids from staining your clothes and. Also, you shouldn't put anything extra besides the tattoo cream on your tattoo, as it might cause infections or disturb the healing process.
 -
QuestionDoes getting a tattoo cause cancer?
 Community AnswerNo, getting a tattoo will not give you cancer but if not treated properly it can cause infection.
Warnings
- Never re-use or share a tattoo needle. Treat every drop of blood as though it's poisonous.⧼thumbs_response⧽
- If you slip up and injure yourself while giving yourself a tattoo, stop and seek medical attention immediately. It's better to be a bit embarrassed at a hospital than to end up getting sick or scarring yourself.⧼thumbs_response⧽
- There are home tattoo kits available online that include basic tools and ink. If you choose this route, be aware that not all of them come with complete or comprehensible instructions. Follow this guide closely, and be absolutely sure to sterilize everything before you use it.⧼thumbs_response⧽
- Tattoos always hurt. Some places hurt more than others, but in the end there's no getting around this fact. Be aware of this before you try giving yourself one.⧼thumbs_response⧽
- Always be careful if you have had no prior experience, so check with professionals if you are worried.⧼thumbs_response⧽
- If you're under 18, don't give yourself a tattoo. Your body may still be growing even if you can't tell, which can lead to inconsistent and lopsided tattoos in adulthood. This is to say nothing of the questionable legality of tattoos on minors, or the way your parents will respond when they (inevitably) figure out what you've done.⧼thumbs_response⧽
- Don't do this if you can afford to get a tattoo inked professionally. There's no comparison in terms of comfort, quality, and speed.⧼thumbs_response⧽
References
- ↑ https://www.betterhealth.vic.gov.au/health/ConditionsAndTreatments/home-tattooing
- ↑ https://www.vice.com/en_us/article/qvdq3b/how-safe-are-stick-and-poke-tattoos
- ↑ https://www.washingtonpost.com/lifestyle/style/this-diy-tattoo-trend-will-make-you-wince--or-want-one-yourself/2016/01/05/2b252418-b315-11e5-a76a-0b5145e8679a_story.html?utm_term=.ffb85b66095c
- ↑ https://www.healthcentral.com/article/twelve-tips-on-how-to-prepare-for-getting-a-tattoo
- ↑ https://www.healthcentral.com/article/twelve-tips-on-how-to-prepare-for-getting-a-tattoo
- ↑ https://www.ncbi.nlm.nih.gov/pmc/articles/PMC3746601/
- ↑ https://authoritytattoo.com/how-to-make-a-tattoo-stencil/
- ↑ https://www.familyeducation.com/life/splinters/removing-splinter
- ↑ https://www.youtube.com/watch?v=js6J5O2gGpM
- ↑ http://www.themorningnews.org/article/how-to-give-a-tattoo
- ↑ https://www.youtube.com/watch?v=FlApMw1YNmM
- ↑ https://www.youtube.com/watch?v=FlApMw1YNmM
- ↑ https://www.medicalnewstoday.com/articles/319980.php
- ↑ https://www.medicalnewstoday.com/articles/319980.php
- ↑ https://authoritytattoo.com/how-to-clean-a-tattoo/
- Videos provided by Hellhound30x
About This Article
Before you can give yourself a tattoo, you'll need to purchase some supplies, like a tattoo gun and tattoo or Indian ink. Once you have the supplies, look online for a stencil, which will help you draw the outline for your tattoo. When you're ready to start tattooing, sterilize your equipment to guard against infection. You should also make sure your working area is clean so it's as safe as possible while you create the tattoo. As you work, wash your needle regularly to remove excess ink, which will help create the clearest possible lines. For tips on how to clean and care for your tattoo once it’s complete, keep reading!

