This article was co-authored by Melissa Jannes. Melissa Jannes is a Licensed Esthetician and the owner of Maebee's Beauty Studio in Philadelphia, a single practitioner space providing quality services with individualized attention. Melissa is also a National Educator for Universal Companies. She received her esthetics degree at The Beauty School of Middletown in 2008 and is licensed in both New York and Pennsylvania. Melissa won the "Best of Beauty" award from Allure magazine in 2012 for the quality of her bikini waxing.
There are 15 references cited in this article, which can be found at the bottom of the page.
This article has been viewed 22,051 times.
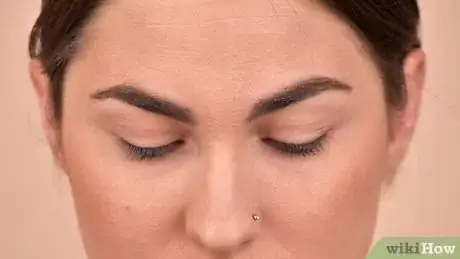
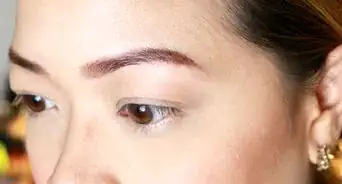
Eyebrows, eyebrows—it seems like they’re everywhere and always on point. If you struggle with shaping your brows and getting them to look wonderfully even, there are a few helpful tips that can up your brow game and get them Instagram-ready. Grab an eyebrow pencil and a mirror—even brows are just a few minutes away!
Steps
Mapping and Shaping
-
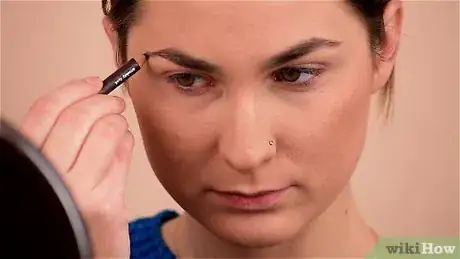
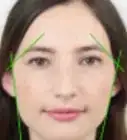
1Mark the tail end of your brows on each side. To make this easy, grab a brow pencil (or eyeliner, or lip liner—you get the idea). Line it up diagonally between your left nostril and the outer corner of your eye—where the pencil hits your brow bone is where the tail should end. Repeat on the righthand side; just move the pencil over to your right nostril. Make a mark with your pencil at this point on either side.[1]
- Using your face's natural symmetry to shape your brows makes them beautifully even and proportional.
- If you’d rather not deal with shaping your brows freehand, check out eyebrow stencils. They’re a smart way to experiment with different shapes and styles, and following a pre-made outline guarantees your brows will come out evenly every time.[2]
-
2Measure the distance between your brows to make sure they’re even. Grab that brow pencil and hold it vertically over the center of your nose. Take a close look at how far your brow on either side is from the pencil and make a mark where each of them should start.[3]
- A good rule of thumb is to look at where the inner corner of your eye hits and make your eyebrow start at that same point on your brow bone. Though, some people prefer their brows to begin further in toward the bridge of their nose. Test out the different options to see which you like best!
- Because our faces aren’t perfectly symmetrical, one brow might be a little further away from the brow pencil than the other one.
Advertisement -
3Pencil in your arches at the same point on each side of your face. Take the brow pencil and line it up with the tip of your nose. Make a diagonal line so it goes across the center of your eye, all the way to your brow bone. Where the pencil hits is where your natural arch should go. Make a mark at this point on both sides.[4]
- This tip helps you get those arches in the same spot on each side, thus creating more even brows.
- If you find your arches look unnaturally high once you fill in your brows, you can remedy this by extending the ends out just a little further. This’ll save you time from having to completely redo your brows.[5]
-
4Trim overlong hairs with a pair of brow scissors. Take a spoolie brush (a small comb for your eyebrows—find one at your local beauty store), and push your brow hairs straight up. Carefully trim any hairs that extend past your brow line.[6]
- If your eyebrows tend to the shorter side, feel free to skip this step!
-
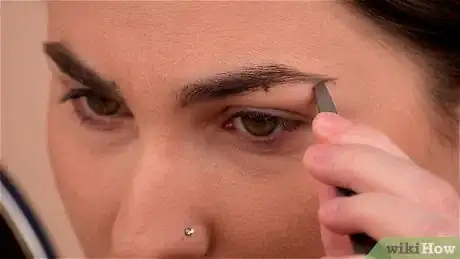
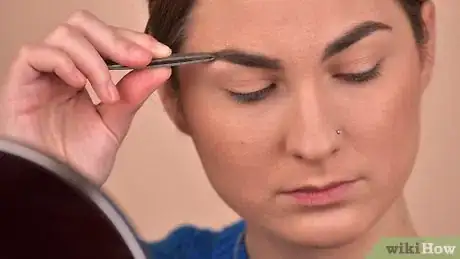
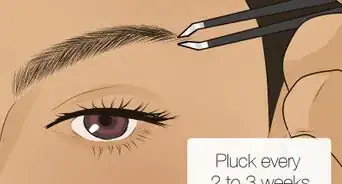
5Pluck stray hairs that are outside of your shaped brow line. Now that you’ve marked the shape of your brows, you’re ready to pluck. Leave anything inside the shaping alone, and instead, look for hairs creeping below, above, or to the sides. Getting these hairs out of the way makes your brows look neater.[7]
- To make this process as pain-free as possible, pluck your eyebrows after a hot shower. Your hair will be softer and easier to tweeze.
- While magnifying glasses seem like a great idea, they can lead to over-plucking. Put them to the side and use your regular bathroom or bedroom mirror to spot those stray hairs.
- If possible, do your eyebrows in natural light. If that isn’t an option, avoid dimly-lit rooms and make sure to turn on any overhead lights.
Filling and Finishing
-
1Choose a product a shade darker than your natural brow color. Whether you use an eyebrow pencil, cream, pomade, or wax, picking the right color makes the difference between brows that wow and brows that are lackluster. Using a shade that is darker than your natural brow color gives your eyebrows more definition and makes them pop.[8]
- It’s possible your brows might end up several shades darker than the hair on your head. For example, it’s common for people with blonde hair to have dark brown eyebrows.
-
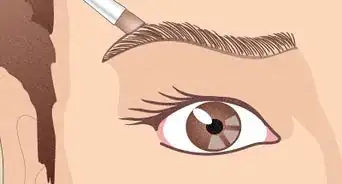
2Use short, flicking motions to fill in your brows. Long, heavy strokes make your brows look overly dark and clunky. For even brows that look natural, practice using a light hand to replicate strands of eyebrow hairs.[9]
- This rule goes for any application method, like wands, brushes, and pencils.
- If you’re new to shaping your eyebrows, this process might feel a little foreign, but that’s okay! With practice, you’ll get the steps down and learn to shape your brows with just a few minutes.
- If you over-apply and fear your brows have gone from full to fake-looking, don’t worry! Use a spoolie brush or cotton swab to diffuse and soften the product. Use light, short motions to avoid smearing the makeup around your brows.[10]
-
3Go with the grain as you fill in your eyebrows. Meaning, follow your eyebrow’s natural growth pattern. If it helps, take a close look at your eyebrows and pay attention to how the hair is growing. Generally, you’ll notice an upwards and diagonal pattern. Mimic that pattern to fill in your brows so they look realistic.[11]
- Do your best to stay inside the eyebrow map you made earlier.
- If you find your pencil or brush pushing your eyebrows askew, you’re probably not going with the grain.
-
4Smooth and blend your brows by going over them with a spoolie brush. Think of the spoolie brush as your finishing tool. Brush with the grain of your hair, and gently go over your brows until they look softer and there are no more discernible lines from the shaping process.[12]
- Keep a spoolie brush with you while you’re out and about. It can come in handy to brush brows back into shape and give them a quick refresh during the day.
- If you don’t have a spoolie brush, use a cotton swab.[13]
-
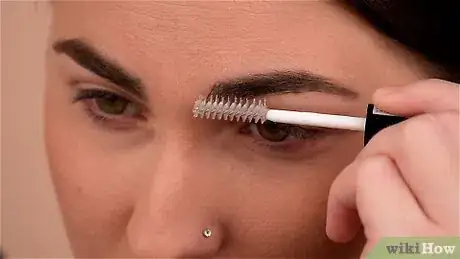
5Swipe a lightweight gel over your brows to hold hairs in place. These gels come in bottles with wand applicators, making them super simple to apply. Use clear gel or colored, just depending on your preference. If you use colored gel, match it to the color of your eyebrow pencil. Make sure to let the gel dry before getting dressed or doing anything that might smudge it.[14]
- You can find eyebrow gel at your local drug store.
Products to Try
-
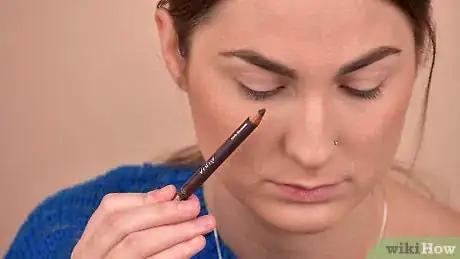
1Opt for a classic eyebrow pencil for natural, soft-looking brows. The fine tip of the pencil gives you optimal control over shaping, and you can layer as much product as you want to get the right depth of color.[15]
- Make sure you have a pencil sharpener handy if you don’t get the twist-up variety!
- If you have a lot of space to fill in, look for a fork-tip pencil. It’ll help you cover more surface area quicker.[16]
-
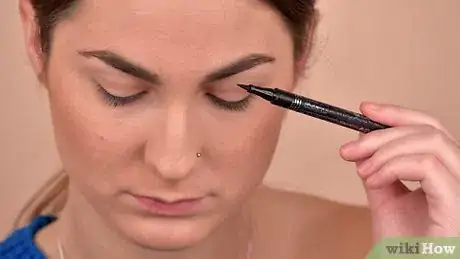
2Use a brow marker if you live in a more humid climate. This kind of product is great in warmer areas because it stays in place better than some other products. Use a light tough to replicate the look of natural hairs.[17]
- Some products, like pencils or pomade, might smear or smudge in high humidity.
-
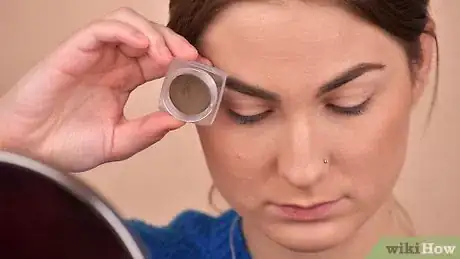
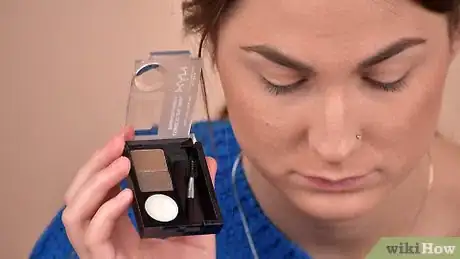
3Fill in sparse spots with brow powder for a fuller finish. Brow powder can give you a softer, more natural look than using a pencil.[18] Brow powder is an excellent option if your brows tend to be on the thinner side and you need something to cover the skin beneath them. Use an angled brush and short strokes to apply the powder to your brows.[19]
-
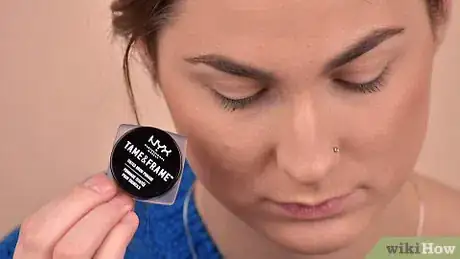
4Choose brow pomade for bold, defined brows. Grab an angled brush and a pomade that’s a single shade darker than your natural brow color. Use short, light strokes to apply the pomade.[22]
- Pomade is a nice option to create a defined look when you don’t want to wear much makeup.
-
5Tame wilder brows with clear wax to keep the shape perfectly even. Pick up a specialty brow wax pencil and use it to line the bottom of your eyebrows. For extra staying power, use it along the tops of your brows, too.[23]
- Wax is an excellent product for those who want super even brows but don’t want to sacrifice on length.
- Most waxes are clear, so you’ll want to use a separate product to fill in sparse areas first.
Professional Options
-
1Have your eyebrows threaded and shaped so all you do is fill them in. Having someone else shape your brows for you is luxurious and removes some of the guesswork when shaping them. Make sure to visit someone experienced at threading for the best results.[24]
-
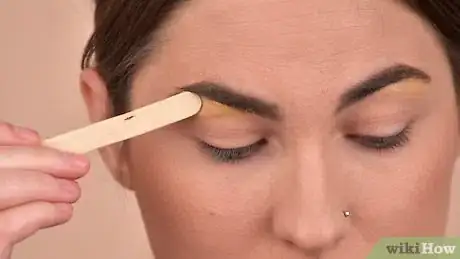
2Schedule a waxing appointment to add definition to your brows. You can also do this at home yourself, but if you’re a newbie, it might be safer to have a professional do it for you the first time—it’s easy to get wax where you don’t want it accidentally! This option is best for people with thick, heavy brows who need to have a significant amount of hair removed.[27]
- 5 days before a wax, stop using any retinol or acne products. They tend to make your skin super-sensitive and make it more likely that your skin will react to the waxing.[28]
- Most people need to get their eyebrows waxed every 3-4 weeks.
-
3Get your brows microbladed for semi-permanent shaping. This process can be expensive and doesn’t last forever, so you’ll have to get it redone every 12-36 months, but it’s a fantastic option for people who want super even brows and don’t want to worry about the upkeep.[29]
- Make sure to do your research and book an appointment with an experienced and well-reviewed professional!
Expert Q&A
Did you know you can get expert answers for this article?
Unlock expert answers by supporting wikiHow
-
QuestionHow do you define your eyebrows?
 Melissa JannesMelissa Jannes is a Licensed Esthetician and the owner of Maebee's Beauty Studio in Philadelphia, a single practitioner space providing quality services with individualized attention. Melissa is also a National Educator for Universal Companies. She received her esthetics degree at The Beauty School of Middletown in 2008 and is licensed in both New York and Pennsylvania. Melissa won the "Best of Beauty" award from Allure magazine in 2012 for the quality of her bikini waxing.
Licensed Esthetician & Brazilian Wax Educator
-
QuestionHow can I fill in my brows so they look even?
 Melissa JannesMelissa Jannes is a Licensed Esthetician and the owner of Maebee's Beauty Studio in Philadelphia, a single practitioner space providing quality services with individualized attention. Melissa is also a National Educator for Universal Companies. She received her esthetics degree at The Beauty School of Middletown in 2008 and is licensed in both New York and Pennsylvania. Melissa won the "Best of Beauty" award from Allure magazine in 2012 for the quality of her bikini waxing.
Licensed Esthetician & Brazilian Wax Educator
Things You’ll Need
- Brow scissors (optional)
- Spoolie brush
- Eyebrow pencil
- Other eyebrow products (optional)
References
- ↑ https://www.cosmopolitan.com/style-beauty/beauty/how-to/a42963/reasons-your-brows-look-bad/
- ↑ https://www.cosmopolitan.com/style-beauty/beauty/how-to/a42963/reasons-your-brows-look-bad/
- ↑ https://www.thetrendspotter.net/how-to-shape-eyebrows/
- ↑ https://www.goodhousekeeping.com/beauty/a26477177/how-to-shape-eyebrows/
- ↑ https://www.marieclaire.com/beauty/makeup/advice/g3273/biggest-brow-mistakes-and-how-to-fix/?slide=3
- ↑ https://www.goodhousekeeping.com/beauty/a26477177/how-to-shape-eyebrows/
- ↑ https://www.realsimple.com/beauty-fashion/makeovers-tips/how-to-shape-eyebrows
- ↑ https://www.goodhousekeeping.com/beauty/a26477177/how-to-shape-eyebrows/
- ↑ https://www.cosmopolitan.com/style-beauty/beauty/how-to/a42963/reasons-your-brows-look-bad/
- ↑ https://www.marieclaire.com/beauty/makeup/advice/g3273/biggest-brow-mistakes-and-how-to-fix/?slide=2
- ↑ https://www.cosmopolitan.com/style-beauty/beauty/how-to/a42963/reasons-your-brows-look-bad/
- ↑ https://www.realsimple.com/beauty-fashion/makeovers-tips/how-to-shape-eyebrows
- ↑ https://www.marieclaire.com/beauty/makeup/advice/g3273/biggest-brow-mistakes-and-how-to-fix/?slide=2
- ↑ https://www.realsimple.com/beauty-fashion/makeup/fuller-brows
- ↑ https://www.finefeatherheads.com/best-eyebrow-product-for-your-natural-brow-condition/
- ↑ https://www.realsimple.com/beauty-fashion/makeovers-tips/how-to-shape-eyebrows
- ↑ https://www.allure.com/gallery/which-eyebrow-products-to-use-guide
- ↑ Melissa Jannes. Licensed Esthetician & Brazilian Wax Educator. Expert Interview. 30 August 2019.
- ↑ https://www.cosmopolitan.com/style-beauty/beauty/how-to/a42963/reasons-your-brows-look-bad/
- ↑ https://www.goodhousekeeping.com/beauty/a26477177/how-to-shape-eyebrows/
- ↑ Melissa Jannes. Licensed Esthetician & Brazilian Wax Educator. Expert Interview. 30 August 2019.
- ↑ https://www.allure.com/gallery/which-eyebrow-products-to-use-guide
- ↑ https://www.allure.com/gallery/which-eyebrow-products-to-use-guide
- ↑ https://www.cosmopolitan.com/style-beauty/beauty/how-to/a42963/reasons-your-brows-look-bad/
- ↑ https://www.allure.com/story/what-is-eyebrow-threading
- ↑ https://www.glamour.com/gallery/how-to-get-perfect-eyebrows
- ↑ https://www.thetrendspotter.net/how-to-shape-eyebrows/
- ↑ https://www.southernliving.com/fashion-beauty/beauty-makeup/eyebrow-plucking-tips
- ↑ https://www.glamour.com/story/what-is-microblading-microshading-microfeathering
- ↑ https://www.goodhousekeeping.com/beauty/makeup/a33256/common-eyebrow-mistakes-fixes/
- ↑ https://www.cosmopolitan.com/style-beauty/beauty/how-to/a42963/reasons-your-brows-look-bad/
- ↑ https://www.realsimple.com/beauty-fashion/makeovers-tips/how-to-shape-eyebrows
- ↑ Melissa Jannes. Licensed Esthetician & Brazilian Wax Educator. Expert Interview. 30 August 2019.
