This article was co-authored by Tami Claytor. Tami Claytor is an Etiquette Coach, Image Consultant, and the Owner of Always Appropriate Image and Etiquette Consulting in New York, New York. With over 20 years of experience, Tami specializes in teaching etiquette classes to individuals, students, companies, and community organizations. Tami has spent decades studying cultures through her extensive travels across five continents and has created cultural diversity workshops to promote social justice and cross-cultural awareness. She holds a BA in Economics with a concentration in International Relations from Clark University. Tami studied at the Ophelia DeVore School of Charm and the Fashion Institute of Technology, where she earned her Image Consultant Certification.
This article has been viewed 52,096 times.
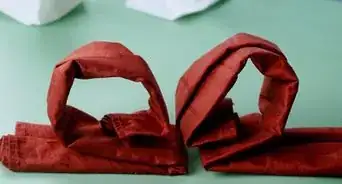
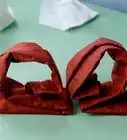
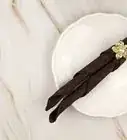
If you're having a fancy event, formally folded napkins can add an elegant touch. These folds look best with cloth napkins that have been pressed and starched, but you can use paper napkins in a pinch. Choose from among several classic folds: the bishop's hat, the rose fold, the candle fold and the three pocket fold.
Steps
Bishop's Hat Fold
-
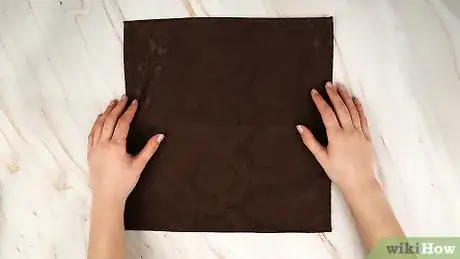
1Lay the napkin flat on the table. Arrange it so that the bottom corner of the napkin is pointing toward your chest, and the top corner is pointing away from you.
- For best results, press the napkin first so it doesn't have any creases. If you want it to stand up straight, use starch.[1]
- If you're using a patterned napkin, the patterned side should be facing down, and the less colorful side should be facing up.
-
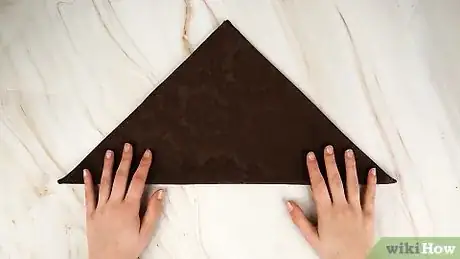
2Fold it in half diagonally. Bring the bottom corner up to meet the top corner. The napkin should now look like a triangle, with the bottom edge facing you and the top pointing away from you. Press the folded edge with a hot iron.Advertisement
-
3Fold in the corners. With the bottom edge of the triangle facing you, take the right corner and fold it up to the tip of the triangle. Take the left corner and fold it up to the tip of the triangle. The napkin should now look like a small square, with a seam running down the middle. Press the folded sides of the square with a hot iron.
-
4Fold up the bottom corner. Arrange the square so that the the bottom corner is facing you, and the seam is running right down the middle from top to bottom. Fold up the bottom corner so that the tip rests about one inch from the top corner. Press the folded edge with a hot iron.
-
5Fold down the point. Take the tip of the corner you folded up, and fold it down so that it touches the bottom edge of the triangle. The napkin should now look like a little sailboat, with a trapezoidal base and two triangle masts. Press the folds with a hot iron.
-
6Flip the napkin over. Be careful to make sure all of the folds stay in place.
-
7Fold in the sides. Fold the left side of the triangle in toward the middle, then fold the right side on top. Tuck the right side into the small triangular pocket on the left side. Press the folds. Do you see the bishop's hat shape appearing?
-
8Flip the napkin over. Make sure all of the folds stay in place, and the right side remains tucked into the left side.
-
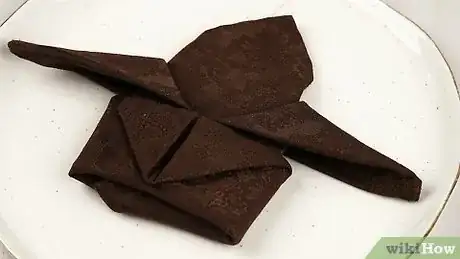
9Pull down the front flap to make two wings. The tip of the bishop's hat is separated into two sections. Pull one section down and to the right, and the other down and to the left. Press the folds with a hot iron.
-
10Customize the napkin. You can either rest it upright on a plate or lay it flat. Insert a menu or place card into the center fold, or leave it plain. The elegant bishop's hat fold looks fancy either way.
Rose Fold
-
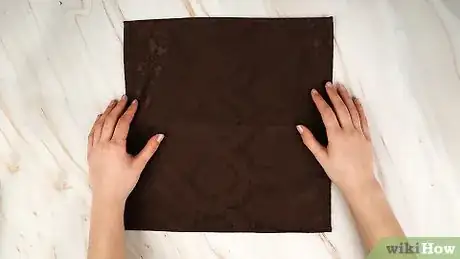
1Lay the napkin flat on the table. Arrange is so that the bottom corner of the square is pointing toward you, and the top corner is pointing away from you.
- This fold can be completed with a wrinkly napkin, since wrinkles and creases add texture and make it look more interesting. However, if you're worried about your guests using wrinkly napkins, you may press the napkins first.[2]
- If you're using a patterned napkin, start with the patterned side facing down against the table.
-
2Fold it in half diagonally. Bring the bottom corner up to meet the top corner. The napkin should now look like a triangle, with the bottom edge facing you and the top pointing away from you.
-
3Roll the bottom edge toward the tip. Starting with the bottom edge facing you, roll the napkin into a long hot-dog shape until you reach the top corner. You'll finish with a long tube-shaped napkin with pointy ends.
-
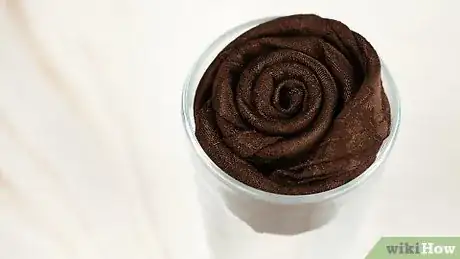
4Roll one end toward the other. Start with either pointy end and begin rolling it toward the other end. Keep going until the entire tube has been rolled into a spiral. The napkin should now be shaped like a rose. Use your fingers to adjust the shape to make it look more rose-like. Tuck the end into the folds on the underside of the rose.
-
5Place it in a cup for display. This fold looks best displayed in a shallow cup or nestled into a saucer to keep it from coming unrolled.
Candle Fold
-
1Lay the napkin flat on the table. Arrange it so that the bottom corner of the napkin is pointing toward your chest, and the top corner is pointing away from you.[3]
- For best results, press the napkin first so it doesn't have any creases. If you want it to stand up straight, use starch.
- If you're using a patterned napkin, the patterned side should be facing down, and the less colorful side should be facing up.
-
2Fold it in half diagonally. Bring the bottom corner up to meet the top corner. The napkin should now look like a triangle, with the bottom edge facing you and the top pointing away from you. Press the folded edge with a hot iron.
-
3Fold the long side up by an inch. Take the bottom edge of the triangle and simply fold it up. Use a hot iron to press the fold.
-
4Roll up the napkin from one corner to the other. Start at either corner and tightly roll the napkin toward the other corner. Make sure the bottom edge rolls up evenly, so that the napkin will be able to stand up.[4] When you're finished rolling, tuck the corner into one of the folds near the base.
-
5Display it in a glass. Since the candle fold is long and slim, it can easily tip over. The best way to display it is in a narrow water glass. You could also simply rest it sideways across a plate.
Pocket Fold
-
1Lay the napkin flat on the table. Arrange it so that the bottom edge of the napkin is facing your chest, and the top edge is facing away from you.
- For best results, press the napkin first so it doesn't have any creases. If you want it to stand up straight, use starch.
- If you're using a patterned napkin, the patterned side should be facing down, and the less colorful side should be facing up.
-
2Fold the napkin in half. Bring the bottom edge up to meet the top edge, so that the crease is facing you. Press the fold with a hot iron.
-
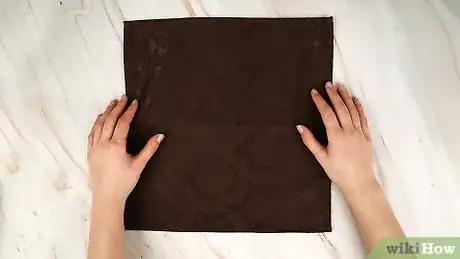
3Fold the left side to the right side. The napkin will now be in the shape of a small square, with all of the corners layered on top of one another. Press the folds with a hot iron.
-
4Roll down the top layer. Situate the square in front of you so that the napkin's corners are in the top right corner. Take just the top layer from the stack of corners, and roll it diagonally down toward the center. Stop rolling with the top layer is just past the center of the napkin, forming a diagonal line from the top left to the bottom right corner. Use an iron to press the roll flat.
-
5Fold down the second layer. Take the next layer from the stack of corners, and fold it down diagonally so that the tip is tucked under the roll you just made. Leave about an inch of the layer untucked. The width of the untucked portion of the layer should be the same as the width of the roll. Use a hot iron to press the fold.
-
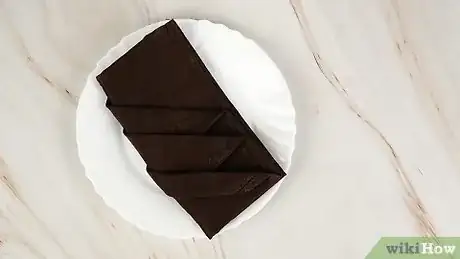
6Fold in the corner of the third layer. Take the corner and fold it under, rather than folding it down like you did for the first two layers. Tuck the corner under so that the width of the untucked portion of the layer is the same as the width of the roll and the folded second layer. This will give the appearance of three pockets stacked in a row. use a hot iron to crease the fold.
-
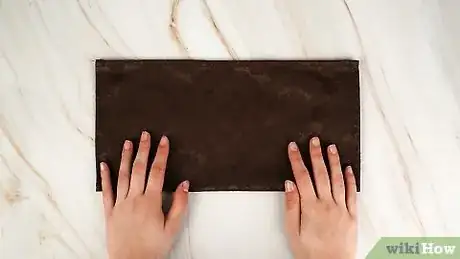
7Fold the left edge under. Take the left edge of the napkin and fold it under so that the ends of the folds are hidden and the napkin is rectangular in appearance. Use a hot iron to crease the fold.
-
8Display it on a plate. Since the fold provides three pockets, consider tucking in a menu, silverware or a flower.
Expert Q&A
-
QuestionWhat are some different shapes I can make by folding a napkin?
 Tami ClaytorTami Claytor is an Etiquette Coach, Image Consultant, and the Owner of Always Appropriate Image and Etiquette Consulting in New York, New York. With over 20 years of experience, Tami specializes in teaching etiquette classes to individuals, students, companies, and community organizations. Tami has spent decades studying cultures through her extensive travels across five continents and has created cultural diversity workshops to promote social justice and cross-cultural awareness. She holds a BA in Economics with a concentration in International Relations from Clark University. Tami studied at the Ophelia DeVore School of Charm and the Fashion Institute of Technology, where she earned her Image Consultant Certification.
Etiquette Coach There are a lot of different things you can fold your napkins into including flowers, boats, and origami designs.
