This article was co-authored by Luigi Oppido and by wikiHow staff writer, Hunter Rising. Luigi Oppido is the Owner and Operator of Pleasure Point Computers in Santa Cruz, California. Luigi has over 25 years of experience in general computer repair, data recovery, virus removal, and upgrades. He is also the host of the Computer Man Show! broadcasted on KSQD covering central California for over two years.
There are 14 references cited in this article, which can be found at the bottom of the page.
This article has been viewed 37,707 times.
Your keyboard is a crucial component for your computer, and over time, it may not work as well as it used to. Adjusting your keyboard settings might fix the problem. If your computer doesn't recognize your keyboard after certain updates, reinstall the keyboard drivers. If you have keys that stick down when you press them, removing and cleaning them may be the solution. If keys still don’t work when you press them, then you can take apart your keyboard and try wiping the circuits clean. When you’re finished, your keyboard should type as usual!
Things You Should Know
- If certain keys are stuck, sticky, or otherwise not working, you can usually remove the keys and wipe out dust, grime, and debris.
- Disable Sticky Keys and Filter Keys in Windows and macOS if pressing keys leads to unexpected behaviors.
- Reinstalling Windows keyboard drivers can help if your keyword is suddenly not recognized or responding.
Steps
Adjust Your Settings
-
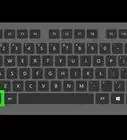
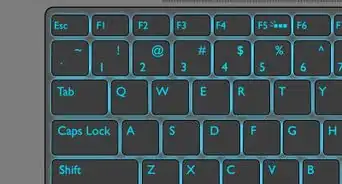
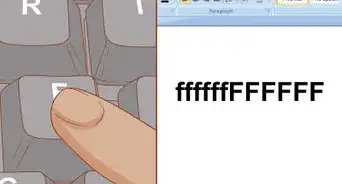
1Increase the repeat delay if a key presses multiple times. The repeat delay refers to the amount of time between keystrokes and when a character appears on screen. Go into the keyboard settings on your computer and increase the repeat delay by 1 notch to see if it fixes your problem. If your keyboard still detects multiple keystrokes, continue to increase the repeat delay.[1]
- On a Windows computer, you can access the keyboard settings in the Control Panel.
- On Mac, go into the System Preferences and select the Keyboard option to access the controls.
-
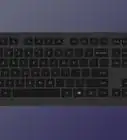
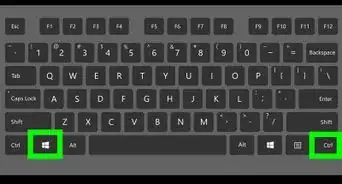
2Turn off Sticky Keys so buttons aren’t being “held down.” Sticky Keys keeps modifier keys, such as Control, Alt, or Command, “held down” so you don’t have to press them every time. Go into the Ease of Access or Accessibility menus on your computer to find the Sticky Keys option and unselect the box that turns them on.[2]
- On a Windows computer, search for “Ease of Access” in the Start menu and select “Make the keyboard easier to use” from the list.
- On a Mac, go into System Preferences, select Accessibility, and then click on Keyboard from the list on the left.
- If Sticky Keys is already turned off, then there may be another problem with your keyboard.
Advertisement -
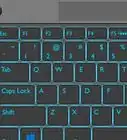
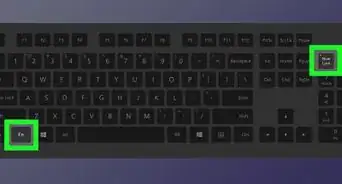
3Unselect the Filter Keys or Slow Keys setting if it takes a while for letters to appear. The Filter Keys or Slow Keys option changes the amount of time from when you type a character and when it appears on screen. Locate the option in the Accessibility menus of your computer and uncheck the box that turns the option on. Test typing on your keyboard to see if the response time is faster.[3]
- On a PC, search for “Ease of Access” in the Start menu and choose the “Make the keyboard easier to use” option to find the Filter Keys button.
- For Mac, open the System Preferences, click on Accessibility, and click on the Keyboard option from the list on the left.
-
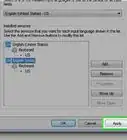
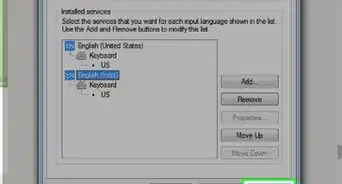
4Change the input language if you’re typing the wrong characters. Sometimes, your computer may recognize your keyboard as a different language, but you can easily switch it in the menus. Access the keyboard settings on your computer and find the Inputs setting to see what language your computer recognizes for the keyboard. Select the language you’re switching to so your keyboard will type the right characters.[4]
- On a PC, access the Control Panel and select the Keyboard option to change the language.
- On a Mac, open the System Preferences, click on the Keyboard option, and then select Input Sources from the top menu.


Reinstalling Windows Drivers
-
1Access the Device Manager from the Start Menu to find the keyboard driver. Navigate to the Start menu on your screen and right-click on it to view a list of menu options. Select the “Device Manager” option to open a list of all the device drivers installed on your computer. Locate “Keyboards” in the list and click on the folder to open it.[5]
Tip: This fix does not work for a Mac keyboard software is already built into the system and cannot be changed. If the keyboard is unresponsive, try cleaning it or restarting your computer.
-
2Uninstall the keyboard software from your computer. Right-click on the keyboard you’re using from the list in the Device Manager and find the “Uninstall” option in the list. Click it and confirm the action to remove the drivers for your keyboard from your computer. If you try the keyboard while the driver is uninstalled, it should not work at all.[6]
- If your keyboard still works, then uninstall any other keyboard drivers that appear in the list.
-
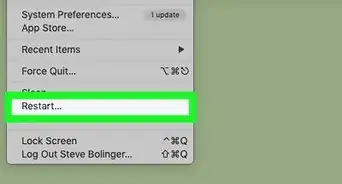
3Restart your computer to see if the drivers reinstall automatically. Open the Start menu on your computer again and look for the “Restart” option to power down your computer. Select it from the menu and wait for your computer to completely restart. Once the computer boots back up, the driver should immediately start reinstalling so you can use your keyboard again.[7]
- When your computer starts, open a Notepad program to try out the keyboard.
-
4Install the keyboard drivers manually if you need to. Access the Device Manager by right-clicking on the Start button and selecting it from the pop-up menu. Right-click on the Keyboards folder on the list in the Device Manager and select “Scan for hardware changes” to start installing the drivers. Wait until the driver is completely installed before trying to type in a document or website.[8]
- If the keyboard still doesn’t work, then there may be a problem with the keyboard’s hardware instead of your computer’s software.
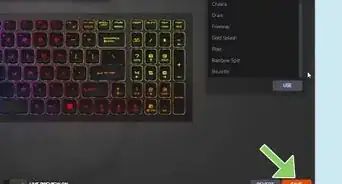
- Test your keyboard in multiple programs to see if it’s responsive. Some keys, like the function keys on the top row, may not work in every program.[9]


Cleaning the Keys
-
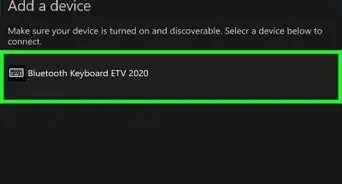
1Unplug the keyboard from your computer. If you’re using a Bluetooth keyboard, turn it off or remove the batteries if you can so you don’t accidentally shock yourself while you’re using it. If you have a corded keyboard, unplug the USB cord from your computer so it doesn’t have power anymore.[10]
-
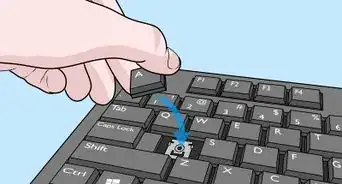
2Slide a flathead screwdriver underneath the key that’s sticking to pop it out. Position the end of a flathead screwdriver on any side of the key you want to remove. Carefully slide the screwdriver underneath the key so you lift it up. Gently lower the screwdriver handle to raise the key away from the keyboard and pop it out of place. Repeat the process for any additional keys that you need to remove from the keyboard.[11]
- You can also use a butter knife or another flat, blunt object if you don’t have a screwdriver with you.
- Some keyboards may have keys that are inset deeper, so they may be more difficult to remove, but you can still get underneath them with a screwdriver.
Tip: If you’re taking off multiple keys, take a picture of the keyboard before you remove any so you can remember where they go when you put it back together.
-
3Wipe the area under the key with a cotton swab soaked with rubbing alcohol. Dip the end of a cotton swab in rubbing alcohol and shake off any excess liquid so it doesn’t drip too much. Scrub the area underneath the key with the cotton swab, focusing on any areas where you notice dirt or sticky residue from spills. Work the cotton swab into the hole on the keyboard as well since it could also be sticky.[12]
- Rubbing alcohol evaporates quickly so it won’t damage your keyboard when you clean with it.
- If you can’t fit a cotton swab into the spot on the keyboard, lay a paper towel over the area and press down on it with the end of your screwdriver to wipe the keyboard clean.
-
4Clean the bottom of the key you pulled out to remove any dirt. Check the bottom of the key you pulled out to see if it has any dust or sticky residue on it. Use your cotton swab with rubbing alcohol to wipe around the bottom of the key so it doesn’t stick down when you press it. Set the key face-up on a piece of paper towel to let it dry completely.[13]
- Clean the key even if it doesn’t feel sticky on the bottom since it may still stick inside the keyboard.
-
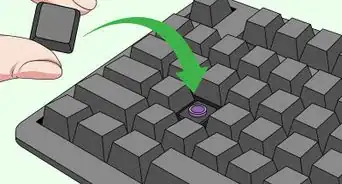
5Let the rubbing alcohol dry completely before popping the key back in. Wait for about 5 minutes for the rubbing alcohol to evaporate and dry on your keyboard. Set the key back into place and press down on it firmly so it snaps back into the keyboard. Test pressing the key multiple times to see if your keyboard functions properly.[14]
- If your key is still sticky, try removing it and some of the other keys around it to clean more thoroughly.
- If the key is unresponsive when you press it, then there may be a problem with the circuits.


Wiping the Circuits
-
1Unscrew the back of the keyboard to separate the top and bottom. Unplug your keyboard and flip it upside-down so you can see the bottom. Use either a Phillips-head or flathead screwdriver to loosen the screws on the bottom of the keyboard. Set the screws in a small container so you don’t lose them. Once you take off all of the screws, find the seam between the top and bottom pieces and gently pull them apart until they separate.[15]
- Not all keyboards can be taken apart easily. If you can’t unscrew or pull your keyboard apart, then you may need to take it to a professional tech service to fix it.
-
2Remove the rubber piece covering the circuits. Flip your keyboard over so it’s right-side up, and set the top piece with the keys attached to it aside for now since you don’t need it. The next layer under the keyboard will be a rubber sheet with raised bumps that helps protect the keys and the circuits. Lift the rubber piece up and out of the keyboard and set it face-up.[16]
- If the rubber piece looks dirty, you can clean it with rubbing alcohol and a soft, microfiber cloth.
-
3Separate the circuit sheets to clean between them. The circuits will be underneath the rubber piece, and they will come on 2 clear sheets that press against one another. Slide a fingernail around the edge of the circuit sheet to separate them from one another. Be careful not to scratch any of the lines on the circuit sheets since this could easily damage them.[17]
- Don’t try to force the circuit sheets apart since they may be connected together in a corner of the keyboard.
-
4Wipe the circuits with a soft microfiber cloth.[18] Use a lint-free microfiber cloth between the circuit sheets and wipe away any dust or dirt you see between them. Focus on any areas of the circuit where there are marks or dirt on the lines, since it could cause keys to stop working since it interrupts the circuit’s connection. Continue wiping each side of both sheets until they’re clean.[19]
- Don’t scratch the circuit, since you may leave a mark and damage it yourself.[20]
- If you notice certain keys aren’t working, then focus on the area of the circuit where those keys would line up with it.
Tip: If marks won’t come up with your microfiber cloth, then you can use rubbing alcohol as well. Make sure the sheets are completely dry before putting them together again.
-
5Put the keyboard back together to test it. Put the circuit sheets back together and set the rubber piece face-up on top. Set the top half of the keyboard with the keys on top and press it down to secure them in place. Before you put in the screws, you can plug in your keyboard and test it with your computer to see if it works. If it does, reattach the screws so you can use your keyboard again.[21]
- If your keyboard still doesn’t work, then you can try cleaning it again or you may need to replace it.


Warnings
- Taking apart a keyboard could possibly void any warranties you may have for it.⧼thumbs_response⧽
Things You’ll Need
Cleaning Sticky Keys
- Flathead screwdriver
- Cotton swab
- Rubbing alcohol
Wiping the Circuits
- Screwdriver
- Microfiber cloth

References
- ↑ https://www.pcmag.com/article/315831/how-do-i-fix-my-laptop-keyboard
- ↑ https://www.pcmag.com/article/315831/how-do-i-fix-my-laptop-keyboard
- ↑ https://www.pcmag.com/article/315831/how-do-i-fix-my-laptop-keyboard
- ↑ https://www.pcmag.com/article/315831/how-do-i-fix-my-laptop-keyboard
- ↑ https://www.maketecheasier.com/laptop-keyboard-not-working-fixes/
- ↑ https://www.maketecheasier.com/laptop-keyboard-not-working-fixes/
- ↑ https://www.maketecheasier.com/laptop-keyboard-not-working-fixes/
- ↑ https://www.maketecheasier.com/laptop-keyboard-not-working-fixes/
- ↑ https://www.computerhope.com/issues/ch000305.htm
- ↑ https://youtu.be/ZORD4y7dL08?t=45
- ↑ https://youtu.be/ZORD4y7dL08?t=103
- ↑ https://youtu.be/ZORD4y7dL08?t=131
- ↑ https://youtu.be/ZORD4y7dL08?t=171
- ↑ https://youtu.be/ZORD4y7dL08?t=267
- ↑ https://youtu.be/mC5P7IGR8-M?t=58
- ↑ https://youtu.be/mC5P7IGR8-M?t=196
- ↑ https://youtu.be/mC5P7IGR8-M?t=212
- ↑ Luigi Oppido. Computer & Tech Specialist. Expert Interview. 31 July 2019.
- ↑ https://youtu.be/mC5P7IGR8-M?t=235
- ↑ Luigi Oppido. Computer & Tech Specialist. Expert Interview. 31 July 2019.
- ↑ https://youtu.be/mC5P7IGR8-M?t=280
About This Article