This article was co-authored by Art Fricke. Art Fricke is a home renovation and repair specialist and the owner of Art Tile & Renovation based in Austin, Texas. With over 10 years of experience, he specializes in bathroom and kitchen renovations. Art focuses on a single contractor approach to customized renovation work, and performs projects such as installing custom tile showers, fixing tiled shower leaks, replacing cracked tiles, and installing floor and wall tile.
There are 7 references cited in this article, which can be found at the bottom of the page.
This article has been viewed 106,241 times.
Fixing a chipped bathtub is a do-it-yourself project that will save you from hiring an expensive professional. Whether your tub just has a few small chips, or it is badly damaged and needs to be refinished, these are both projects that you will find kits for at your local home improvement store. With a little elbow greasy, your tub will look like new in just a matter of days!
Steps
Repairing Small Chips with Epoxy
-
1Buy a 2-component epoxy kit for chip repair. Look in the adhesive or bathroom repair section of a home hardware store. Buy a kit that comes with both the catalyst and hardener that you will mix together to create the epoxy.[1]
- Most epoxy chip repair kits come in shades of white to match the most common color of bathtubs. Try to choose a kit that will closely match the shade of your bathtub, or 2 kits that you can mix together to create the right color.
- Epoxy repair kits work to fix chips in all kinds of bathtubs including ceramic, porcelain, acrylic, fiberglass, and enamel tubs.
-
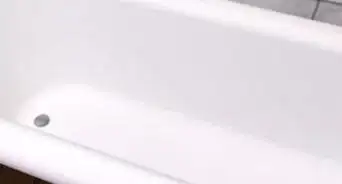
2Scrub the damaged area with a sponge and soap or tub cleaner, then dry it. Use warm water and dish detergent or a household tile and tub cleaner to clean the chipped area. Thoroughly dry the area with a clean rage after you finish cleaning it.[2]
- You can also use acetone or rubbing alcohol to clean the area. Any product that removes grease and soap scum will work to clean the chip.
Advertisement -
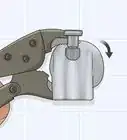
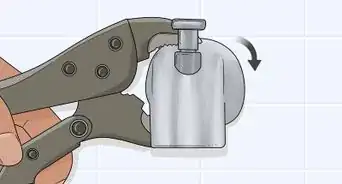
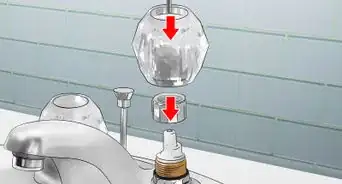
3Follow the directions on your epoxy kit to mix the 2 components together. Some epoxy kits come with a mixing tray and stirring stick for you to use. Mix the epoxy in a disposable tray with a toothpick or matchstick if your kit didn't come with the mixing supplies.[3]
- It's a good idea to set the tray on a piece of cardboard or some scraps of paper to catch any spills.
-
4Apply the epoxy to the chip with a small spatula, paint brush, or bottom of a matchstick. Scoop up a small amount of the epoxy with your chosen utensil. Spread it carefully in a thin layer over the chip by working in 1 direction and smooth out any spots where it pools.[4]
- Make sure that anything you use to apply the epoxy is disposable. It will be hard to get the epoxy off of anything it touches.
- It's easiest to start with a small amount of epoxy and add more layers than it is to put too much on and remove it.
-
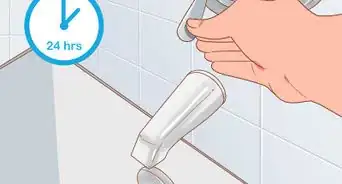
5Let the epoxy dry, then sand down the surface with 400-600 grit sandpaper. Follow the directions on your epoxy kit to let it fully dry. Gently sand the surface with 400- or 600-grit sandpaper until it feels smooth like the rest of the tub.[5]
- Some epoxy will set in 2-3 hours, at which point you can sand. Other kits may advise you to wait up to 24 hours before sanding.
- You can add another layer of epoxy after sanding if you can still feel the chip. Then repeat the process.
- Keep in mind that while this is will help hide small chips, you may still be able to notice the patch. This will be especially obvious if you try to fill a number of chips with the epoxy.[6]


Refinishing Badly-Damaged Tubs
-
1Buy a bathtub refinishing kit at a home improvement center. Save yourself time by buying a whole kit that has everything you need to refinish your tub. Most kits come with tub cleaner, sandpaper, primer, refinishing paint, a paint tray, a brush, and a roller.[7]
- Check that the kit comes with a durable resin coating for your tub. Some cheaper kits come with an epoxy coating, which chips and discolors faster.
- Refinishing kits can cost from about $30-$100 USD.
- Tub refinishing kits work to refinish all kinds of bathtubs including ceramic, porcelain, acrylic, fiberglass, and enamel tubs. The kits will provide a new porcelain-like finish to these kinds of tubs.
-
2Ventilate the bathroom, cover the floors, and put on protective gear. Open up all the windows and put a fan in the bathroom to ventilate it. Cover the floors with heavy-duty plastic sheets to keep them safe during the refinishing process. Put on a face mask and goggles.[8]
- You can also drape plastic sheets over fixtures like the toilet and sink to protect them.
-
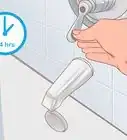
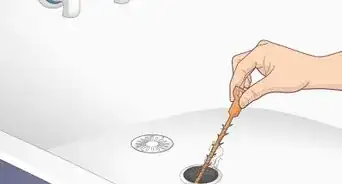
3Clean the bathtub with the cleaner from the kit. Read the directions on the cleaner to apply it to the tub and use a sponge to scrub the tub clean. Rinse the tub out, then go over it with the sponge and cleaner 2 more times to remove any soap scum and stains before you refinish it.[9]
- If your kit did not come with cleaner, then purchase an industrial strength bathtub cleaner to use.
- Let the tub completely air dry, or speed up the process with towels and a hair dryer.
-
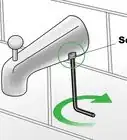
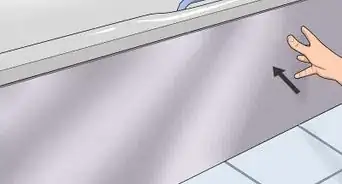
4Sand the whole tub with the sandpaper in your kit to remove the old finish. Start with the lowest-grit sandpaper from your refinishing kit and sand the whole surface of the tub in circular motions by hand, or with an electric sander. Work your way up to the highest-grit sandpaper in your kit until the tub is completely smooth.[10]
- Your refinishing kit should come with sandpaper to use. If your kit didn't come with sandpaper, then start with 400-grit sandpaper and work your way up to 2000-grit. Increase the grit of the sandpaper in increments of 200 until you reach 1000-grit sandpaper, then go up in increments of 500 until you end using 2000-grit sandpaper.
-
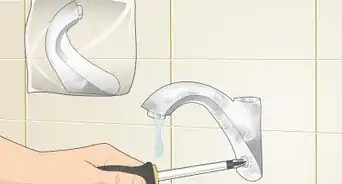
5Repair any chips or cracks in the tub with a 2-component epoxy chip repair kit. Follow the instructions to mix the two parts of the epoxy in a small tray. Use a small brush, spatula, or the bottom end of a matchstick to apply thin layers of epoxy to any chips. Wait 2-3 hours until the epoxy dries and sand the patches down with 2000-grit sandpaper to match the finish of the rest of the tub.[11]
- This will ensure that the tub has no chips or cracks and seal the surface before you apply the new finish.
- Get a 2-component epoxy chip repair kit from the bathroom remodeling or adhesive section of a home improvement store if your kit did not come with it.
-
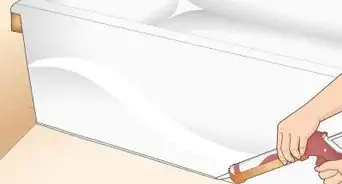
6Put painter's tape on the walls and around any plumbing fixtures. Tape along the edges of the tub where they touch the walls and around the faucet and other fixtures. Even if you have a steady hand, it's easy for paint to go astray![12]
- Painter's tape is the blue masking tape that you can find at hardware and paint stores.
-
7Apply 1 coat of primer with a brush and roller. Use a roller to roll on the primer onto the large, flat sections of the tub like the floor and sides, then use a brush to get into the corners and curved parts. Let it dry for at least 2-3 hours before you start to paint on the new finish.[13]
- Priming the surface is an important part of ensuring that the new finish adheres correctly so that you end up with the correct texture. Make sure that the primer is completely dry to the touch before you paint over it.
-
8Paint on 2-3 coats of the new finish with a brush and roller. Always paint in 1 direction when you apply the new coat to your tub. Roll on the new finish to the floors and sides in even back-and-forth rolls until the flat area is completely covered. Fill in the corners and curves of the tub with even back-and-forth brush strokes. Let each coat dry for at least 30 minutes before you put the next coat on.[14]
- Some kits may come with a spray-on finish. If you use a sprayer instead of a brush or roller, try to spray evenly and in 1 direction. Make sure your walls and fixtures are well-protected by tape where there is a risk of paint spray hitting them.
-
9Let your bathtub sit for 2-3 days before you use it. The new finish needs to set completely before you run water over it. Consult your kit's directions for the exact drying time for your specific finish.[15]
- If you don't let the finish dry long enough, you could end up with streaks and bubbles in the new coating and you will need to start the process over again.
- Your new DIY finish will last for years, but keep in mind that professional finishes will last even longer.
- The chemicals used in this process can be dangerous, so it may be a good idea to stay somewhere else for a few days while the tub cures.[16]


Expert Q&A
Did you know you can get expert answers for this article?
Unlock expert answers by supporting wikiHow
-
QuestionHow do you fix a chip in a porcelain tub?
 Art FrickeArt Fricke is a home renovation and repair specialist and the owner of Art Tile & Renovation based in Austin, Texas. With over 10 years of experience, he specializes in bathroom and kitchen renovations. Art focuses on a single contractor approach to customized renovation work, and performs projects such as installing custom tile showers, fixing tiled shower leaks, replacing cracked tiles, and installing floor and wall tile.
Home Renovation & Repair SpecialistIf you just have a small, isolated chip, you can get enamel fix from a home improvement store. Just dab a little on, then let it dry. However, keep in mind that you'll probably still be able to see the patch, especially if you're trying to cover a number of chips.
Support wikiHow by unlocking this expert answer.
Things You'll Need
Repairing Small Chips with Epoxy
- 2-component epoxy chip repair kit
- Sponge
- Soap or household tub and tile cleaner
- Disposable tray and mixing stick
- Small spatula, brush, or matchstick
- 400-600 grit sandpaper
Refinishing Badly-Damaged Tubs
- Bathtub refinishing kit (tub cleaner, sandpaper, primer, refinishing paint, a paint tray, a brush, and a roller)
- 2-component epoxy chip repair kit
- Small spatula, brush, or matchstick
- Face mask
- Goggles
- Fan
- Heavy-duty plastic sheets
- Painter's tape


References
- ↑ https://www.familyhandyman.com/plumbing/how-to-fix-a-chipped-sink/view-all/
- ↑ https://www.homeadvisor.com/r/fiberglass-shower-repair/
- ↑ https://www.homeadvisor.com/r/fiberglass-shower-repair/
- ↑ https://www.familyhandyman.com/plumbing/how-to-fix-a-chipped-sink/view-all/
- ↑ https://www.housebeautiful.com/uk/renovate/diy/advice/a904/bath-repair-fix-chipped-bathtub/
- ↑ Art Fricke. Home Renovation & Repair Specialist. Expert Interview. 14 August 2020.
- ↑ https://www.homeadvisor.com/cost/bathrooms/refinish-a-bathtub/
- ↑ https://www.bobvila.com/articles/bathtub-refinishing/
- ↑ https://www.improvenet.com/a/how-to-refinish-reglaze-a-bathtub
- ↑ https://www.homeadvisor.com/cost/bathrooms/refinish-a-bathtub/
- ↑ https://www.homeadvisor.com/cost/bathrooms/refinish-a-bathtub/
- ↑ https://www.homeadvisor.com/cost/bathrooms/refinish-a-bathtub/
- ↑ https://www.homeadvisor.com/cost/bathrooms/refinish-a-bathtub/
- ↑ https://www.homeadvisor.com/cost/bathrooms/refinish-a-bathtub/
- ↑ https://www.improvenet.com/a/how-to-refinish-reglaze-a-bathtub
- ↑ Art Fricke. Home Renovation & Repair Specialist. Expert Interview. 14 August 2020.
- ↑ Art Fricke. Home Renovation & Repair Specialist. Expert Interview. 14 August 2020.
About This Article

If you have a small chip in your bathtub, you can fix it with an epoxy kit. Before you start, scrub the damaged area of your tub clean with a sponge and some soap and water. Follow the directions on your epoxy kit for mixing the 2 components together. Once they’re mixed, use a small spatula or a paintbrush to spread a thin layer of the epoxy over the chip. Wait for it to fully dry, which should take at least 2-3 hours, then use sandpaper to buff out the dried epoxy until its smooth. If your bathtub is badly damaged, you can use a bathtub refinishing kit to restore the finish. You’ll need to sand the whole tub to remove the old finish, repair all the cracks with epoxy, then paint on new primer and finish. To learn how to prevent paint from getting on you tile, read on!