This article was co-authored by wikiHow Staff. Our trained team of editors and researchers validate articles for accuracy and comprehensiveness. wikiHow's Content Management Team carefully monitors the work from our editorial staff to ensure that each article is backed by trusted research and meets our high quality standards.
There are 13 references cited in this article, which can be found at the bottom of the page.
This article has been viewed 47,596 times.
Learn more...
Old audio cassette tapes can run into a number of problems that call for some cassette tape surgery. For example, the tape might tear and break, requiring you to splice it back together. Another common issue is for the tape to come unraveled from one of the wheel hubs, in which case you can splice it to the end of the tape on a new wheel hub from a blank cassette tape. Either way, you can get the job done with a few simple tools and a delicate touch!
Steps
Disassembling a Cassette Tape
-
1Unscrew the cassette case, if it has screws, using a small Phillips screwdriver. Use a tiny Phillips-head screwdriver to remove the screws in the two top corners of the cassette tape. Set the screws aside somewhere where you won’t lose them, such as in a small dish or cup.[1]
- If you don’t see any screws, your cassette is the type that is glued together.
- Issues that you will need to take a cassette tape apart to fix include a ripped or broken tape and a tape that has come off one of the wheel hubs.
-
2Pry the cassette apart using a tiny flathead screwdriver, if it is glued together. Insert the edge of the flathead screwdriver into the crack where the front and back pieces of the case are glued together on one side of the cassette. Work it back and forth in a lever motion along the crack to gently break the two halves apart.[2]
- If you can’t pry the cassette case apart with your hands after separating the halves on one side, repeat the process with the screwdriver for the other sides of the cassette until you can pull them apart.
Tip: If you are having trouble separating the pieces with just a flathead screwdriver, try carefully running the blade of a boxcutter or utility knife along the cracks to slice through some of the glue.
Advertisement -
3Open the cassette tape horizontally so the spools don’t fall out. Place the tape horizontally on a flat surface before you open it up. Pull the top half off and try to leave the bottom half flat on your work surface.[3]
- This will keep the wheel hubs in place so you don’t accidentally drop them out and cause more damage to the tape.
Splicing a Broken Tape
-
1Use small, sharp scissors to cut off the damaged ends of the broken tape. Put the two halves of the cassette tape flat on the cutting board with the insides facing up at you. Be careful not to uncoil the tape from the wheel hubs.[4] Carefully trim off as little of the tape as possible, so you are only removing the damaged parts of the tape where it ripped and broke. This will allow you to tape the two pieces neatly back together.[5]
- If you don’t have a pair of small, sharp scissors, you can carefully cut the damaged ends off using a boxcutter or utility knife and your cutting board.
- Depending how much damaged tape you have to cut off, there could be a noticeable skip in the audio of the tape after you splice it back together.
-
2Tape one end of the broken tape down on the cutting board. Straighten out one of the sides of the broken tape flat against the cutting board and carefully tape it down. Leave the end you trimmed exposed.[6]
- Make sure that the broken end of the tape is completely flat and not curling at all, so that it is easy to work with when you’re splicing the other broken end to it.
-
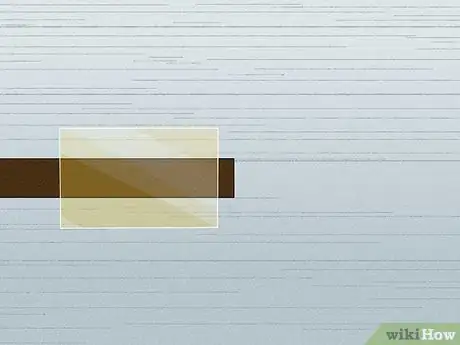
3Use cellophane tape to splice the two sides of the cassette’s tape together. Carefully line up the end of the other side of the broken tape with the end of the side you just taped down. Press a piece of cellophane tape down over them to splice them together.[7]
- The spliced pieces will be held down on the cutting board by the cellophane tape at this point.
-
4Peel up the cellophane tape and flip the cassette’s tape over on the cutting board. Use your fingernails to gently peel the cellophane tape up from the cutting board, being careful not to unsplice the two halves of the cassette’s tape that you just stuck together. Flip over the tape so you can splice together the other side.[8]
- The sticky side of the cellophane tape and the side of the cassette’s tape that has no cellophane tape on it should now be facing upwards towards you.
-
5Put a piece of cellophane tape on the other side of spliced tape. Double-check to make sure the ends of the broken tape are still lined up and stuck together. Carefully stick a new piece of cellophane tape over the exposed sides of the cassette’s tape to finish splicing the broken ends together.[9]
- This should hold the broken tape securely together and limit the chances of it coming undone in the future.
-
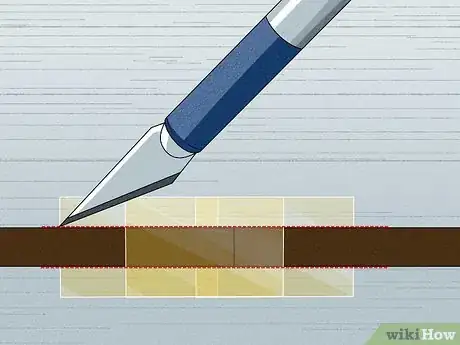
6Trim the excess cellophane tape off using a boxcutter or utility knife. Hold the tape flat against the cutting board. Carefully trim the excess cellophane tape that is hanging off the sides of the spliced tape, right up to the edge of the tape.[10]
- You can now put the cassette tape back together.
Putting a Tape Back on the Wheel Hub
-
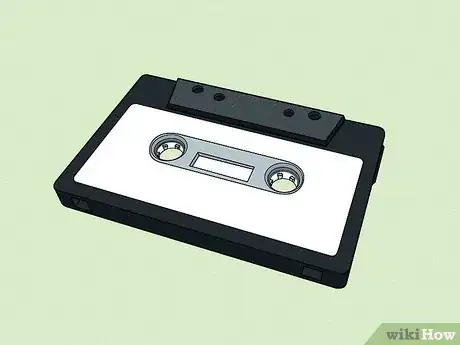
1Buy a new blank cassette tape to use for parts and open it up. Purchase a blank cassette that is held together by screws. Unscrew it using a Phillips screwdriver and take it apart, just like you did for the cassette tape you want to fix.[11]
- If you have a cassette tape that has come off one of the hubs, it is very difficult to reattach it to the same hub. Using a new wheel tape from a blank cassette that already has tape attached to it will allow you to splice the old tape to it to attach it to a new hub more easily.
-
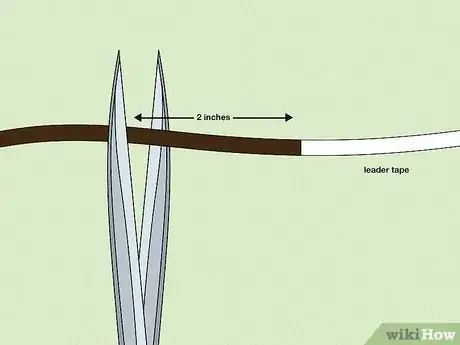
2Cut the new cassette’s tape 1–2 in (2.5–5.1 cm) from the end of the tape. The plastic, non-magnetic end of the tape that secures the magnetic tape to the wheel hub is called the leader tape. Remove the spool that has the leader tape exposed from the cassette and cut the tape 1–2 in (2.5–5.1 cm) from the end of the leader tape using small, sharp scissors.[12]
- This will give you a new spool with a clean-cut piece of tape to splice the tape from your old cassette to, so that it is attached to the new wheel hub.
-
3Remove the wheel hubs from your old cassette. Lift out the empty wheel hub and throw it away. Take out the wheel hub that has the tape spooled around it and set it down in front of you.[13]
- It’s best to do this on a cutting board on a flat work surface in front of you.
-
4Splice the tape from the new wheel hub to the tape on the old hub. Line up the cut end of the new blank tape with the end of the tape from your old cassette. Tape them carefully together using cellophane tape.[14]
- See the above method for complete instructions on how to splice cassette tape together.
-
5Place the wheel hub back in the cassette case. Carefully put each wheel hub back into the old cassette so that the holes in the middles of the hubs line up with the holes in the cassette case. Use a pencil to wind the wheel hubs so the tape is not loose and all over the place.[15]
- You can now reassemble the cassette tape.
Tip: You could use the new cassette body instead of the old one if it’s easier. For example, if the old cassette was glued together, it might be better to use the new screw-together cassette case. However, you might want to use the old cassette if it has labels and other information on it.
Reassembling a Cassette Tape
-
1Line up the tape with the rollers and pressure pad at the top of the cassette case. Make sure the tape is spooled tightly so it is straight and flat at the top. Place the tape over the rollers that are located in each of the top corners. Put the tape underneath the pressure pad, which is in the center of the top of the cassette.[16]
-
2Screw the cassette case together if it has screws. Snap the two halves of the cassette case back together and place the tiny screws back in the holes in the corners of the case. Use a small Phillips screwdriver to tighten them all the way.[17]
-
3Glue the cassette case together if it doesn’t have screws. Put a small dot of superglue in each corner on the edge of one half of the cassette case. Snap the two halves of the case together and hold them together for 30 seconds.[18]
- It’s best not to glue all the way around the cassette tape, just in case you have to take it apart again in the future.
Warnings
- Be careful not to let the tape spools drop out when you open up a cassette tape. You could end up causing more damage to the tape.⧼thumbs_response⧽
- If you have a cassette tape with all the tape pulled out and tangled, unfortunately, you won’t be able to fix it.⧼thumbs_response⧽
Things You’ll Need
Disassembling a Cassette Tape
- Phillips screwdriver or flathead screwdriver
Splicing a Broken Tape
- Cutting board
- Cellophane tape
- Small scissors
- Boxcutter or utility knife
Putting a Tape Back on the Wheel Hub
- New blank cassette tape
- Cutting board
- Cellophane tape
- Small scissors
- Boxcutter or utility knife
- Pencil
Reassembling a Cassette Tape
- Phillips screwdriver (optional)
- Super glue (optional)
References
- ↑ http://www.dvdyourmemories.com/blog/how-to-fix-an-audio-cassette-audio-cassette-repair-guide/
- ↑ https://www.youtube.com/watch?v=oUVmV8sA-5E&feature=youtu.be&t=278
- ↑ https://www.audiorestored.com/latest-news/repairing-damaged-cassette-tapes
- ↑ https://www.youtube.com/watch?v=bAOMupfJTR0&feature=youtu.be&t=108
- ↑ https://everpresent.com/vhs-tape-repair-guide/
- ↑ https://www.youtube.com/watch?v=bAOMupfJTR0&feature=youtu.be&t=182
- ↑ https://www.youtube.com/watch?v=bAOMupfJTR0&feature=youtu.be&t=195
- ↑ https://www.youtube.com/watch?v=bAOMupfJTR0&feature=youtu.be&t=204
- ↑ https://www.youtube.com/watch?v=bAOMupfJTR0&feature=youtu.be&t=208
- ↑ https://www.youtube.com/watch?v=bAOMupfJTR0&feature=youtu.be&t=222
- ↑ https://www.youtube.com/watch?v=oUVmV8sA-5E&feature=youtu.be&t=346
- ↑ http://www.dvdyourmemories.com/blog/how-to-fix-an-audio-cassette-audio-cassette-repair-guide/
- ↑ http://www.dvdyourmemories.com/blog/how-to-fix-an-audio-cassette-audio-cassette-repair-guide/
- ↑ http://www.dvdyourmemories.com/blog/how-to-fix-an-audio-cassette-audio-cassette-repair-guide/
- ↑ https://www.youtube.com/watch?v=oUVmV8sA-5E&feature=youtu.be&t=836
- ↑ https://www.youtube.com/watch?v=bAOMupfJTR0&feature=youtu.be&t=337
- ↑ https://www.audiorestored.com/latest-news/repairing-damaged-cassette-tapes
- ↑ http://www.dvdyourmemories.com/blog/how-to-fix-an-audio-cassette-audio-cassette-repair-guide/


