X
This article was co-authored by Ashlea Henson. Ashlea Henson is a makeup and face painting artist and teacher with over 50,000 subscribers on YouTube. She is the Creative Administrator for Mimicks Face Painting and has the International Theatrical & Media Makeup Diploma.
This article has been viewed 67,668 times.
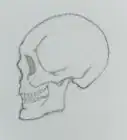
You can take a skeleton costume to the next level with a skull painted on your face. Painting a skull on your face may seem complicated, but you can learn how to do it even if you don't have any special training in painting faces. Paint your face to look like a skull for your next costume party or just paint your face for fun!
Steps
Part 1
Part 1 of 3:
Creating Your Skull Base
-
1Collect your materials. Painting your face to look like a skull is quite easy, but you will need a few special paint brushes and face paints to accomplish this look. Before you get started, you will need:[1]
- face paints in white, grey, and black
- a small paintbrush for outlining and detailing
- a thick paintbrush for filling in large areas
- a fine paintbrush for precise details
- a cup of water for thinning out face paint
-
2Outline your eyes. Use your small paintbrush and white paint to paint white lines all around your eye sockets. This is the area just below your eyebrows and about an inch or two below your lower eyelid. Try to trace along the bones around your eyes to create this outline.[2]
- If the face paint seems too thick, then you can just dip your brush into the water before dipping it into the paint.[3]
Advertisement -
3Create the mask outline around your forehead and cheeks. Next, use the small paintbrush and white face paint to create an outline that extends over your forehead and around your cheekbones as well. The outline should then curve down towards your lips and end at the corner of your lips.[4]
- Your outline should resemble the shape of a skull when you are done.
-
4Draw a triangle above each nostril. Use the white face paint and your thin paintbrush to create two triangles right above each of your nostrils. There should be one triangle above each nostril when you are done.[5]
-
5Fill in the outline. Next, switch to a larger brush to fill in the large area that you just outlined with white face paint. Do not fill in the triangles above your nostrils or the areas around your eyes. Leave these areas unpainted for now.[6]
- Allow this first coat of face paint to dry completely before you start shading or adding details.[7]
Advertisement
Part 2
Part 2 of 3:
Shading Your Skull
-
1Cover your eyebrows with grey face paint. Use your small paintbrush to paint over your eyebrows with grey face paint. You can even extend the paint past your eyebrows a bit so that it looks like you have extra bushy grey eyebrows.[8]
-
2Draw grey half circles. Use the grey face paint to draw a half circle in the middle of the white painted area below your eye. The ends of the half circle should be facing up towards your eye. Blend the half circle into the white paint so that it is somewhat blurry.[9]
- Repeat this process under your other eye.
-
3Shade the lower edges of the mask. Use grey face paint on your small brush to shade in the lower edges of the skull shape. This is the area just below your cheekbones. Make sure that you shade in both sides.[10]
-
4Create lines above your upper lip. Next, use the grey face paint and your thin brush to create vertical lines along the area above your upper lip. Do not draw these lines on your actual lip, just on the area above your lip.[11]
- Start by making one line in the center of the area above your upper lip and then move out from there.
Advertisement
Part 3
Part 3 of 3:
Detailing Your Skull
-
1Go over the grey areas with black. Switch to a thin brush and dip it into black face paint. Use the face paint to darken the grey areas that you just created. Go over each of the lines that you made with the grey paint to help define them a little more.[12]
-
2Paint your eye sockets black. Take your large brush and use it to paint the areas around your eyes with black face paint. Cover the eyelids and the areas under and beside your eyes with black face paint.[13]
- To make these areas extra dark, you can also add a bit of black eyeliner to your waterline on your lower eyelid.
- Since this design requires you to paint the areas around the eyes, it may not be the best design for young kids. Kids tend to rub their eyes and may get face paint into their eyes.[14] If you want to use this design for a young child, then consider leaving the areas around the eyes unpainted.
-
3Fill in the triangles above your nostrils. Use your small paintbrush to fill in the triangles above your nostrils. Be careful to keep the black paint inside of the white lines.[15]
- If the small brush seems too big to fill in the triangles, then you can also use the thin brush to fill them in.
-
4Outline the entire mask with black. Next, take your small paintbrush and use it to outline your entire mask with black face paint. Try to draw long continuous lines rather than short lines.[16]
- If necessary, go over the lines again to make them thicker.
-
5Create the teeth. Start in the center of your upper lip and draw a vertical black line. Then, continue making vertical black lines along the length of your upper lip and just above your upper lip as well. Close off the teeth with pointed tops.[17]
- After you have outlined all of your teeth, you can go over your teeth again with the black face paint to make them darker.
- Draw thin black lines extending from the top of the teeth as well to make them look more realistic.
- Add a dot of white face paint to the center of each tooth to highlight it.
Advertisement
Community Q&A
-
QuestionWhat facepaints should I use?
 Community AnswerYou can use any, as long as you read the ingredients and make sure it's not harmful to your skin.
Advertisement
Warnings
- Always test face paints on your wrist before you use them, especially if you are sensitive to face paints, makeup, or have other allergies. To test face paint on your skin, apply a small dab of each color that you will use onto your inner arm area. Wait for a couple of days and then inspect the area. If your arm looks red or irritated, then do not use the face paint.[18]⧼thumbs_response⧽
- Remove your face paint as soon as you are done wearing it. The longer that you wear face paint, the higher your chances of developing irritation from it. Wash it away with some gentle cleanser, warm water, and a washcloth as soon as you are done wearing it.[19]⧼thumbs_response⧽
Advertisement
References
- ↑ https://www.youtube.com/watch?v=jp4Szj_9HOI
- ↑ https://www.youtube.com/watch?v=jp4Szj_9HOI
- ↑ http://www.nelliebellie.com/facepainting/
- ↑ https://www.youtube.com/watch?v=jp4Szj_9HOI
- ↑ https://www.youtube.com/watch?v=jp4Szj_9HOI
- ↑ https://www.youtube.com/watch?v=jp4Szj_9HOI
- ↑ http://www.nelliebellie.com/facepainting/
- ↑ https://www.youtube.com/watch?v=jp4Szj_9HOI
- ↑ https://www.youtube.com/watch?v=jp4Szj_9HOI
- ↑ https://www.youtube.com/watch?v=jp4Szj_9HOI
- ↑ https://www.youtube.com/watch?v=jp4Szj_9HOI
- ↑ https://www.youtube.com/watch?v=jp4Szj_9HOI
- ↑ https://www.youtube.com/watch?v=jp4Szj_9HOI
- ↑ http://www.nelliebellie.com/facepainting/
- ↑ https://www.youtube.com/watch?v=jp4Szj_9HOI
- ↑ https://www.youtube.com/watch?v=jp4Szj_9HOI
- ↑ https://www.youtube.com/watch?v=jp4Szj_9HOI
- ↑ http://www.fda.gov/Cosmetics/ProductsIngredients/Products/ucm143055.htm
- ↑ http://www.nelliebellie.com/facepainting/
- https://www.youtube.com/watch?v=jp4Szj_9HOI
About This Article
Advertisement
