X
This article was co-authored by wikiHow staff writer, Jack Lloyd. Jack Lloyd is a Technology Writer and Editor for wikiHow. He has over two years of experience writing and editing technology-related articles. He is technology enthusiast and an English teacher.
The wikiHow Tech Team also followed the article's instructions and verified that they work.
This article has been viewed 20,212 times.
Learn more...
This wikiHow teaches you how to edit a screenshot after taking it on an iPhone or iPad. This is an iOS 11-only feature, so be sure to update your iPhone's or iPad's operating system to iOS 11 if you haven't already done so.
Steps
Part 1
Part 1 of 4:
Taking a Screenshot
-
1Find something that you want to screenshot. Go to a webpage, screen, or item that you want to take a screenshot of.
-
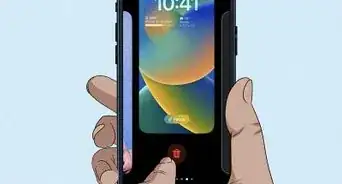
2Press the Home button and the Power button together. The Home button is the circular button at the bottom of your iPhone or iPad, while the Power button is the long, thin button in the top-right side of the iPhone or on the top of the iPad. Pressing these buttons at the same time takes a screenshot.Advertisement
-
3Wait for the screenshot to appear. After a brief moment, you should see a preview of the screenshot show up in the bottom-left corner of your iPhone or iPad screen.
-
4Tap the screenshot. It's in the bottom-left corner. Doing so will open the screenshot, from which point you can begin editing it.


Advertisement
Part 2
Part 2 of 4:
Editing the Screenshot
-
1Crop your screenshot. Tap and drag one of the corners or sides of the blue outline around the screenshot inward.
- You can also place your fingers on the screenshot and pinch them away from each other to zoom in.
- You can revert any change that you make by tapping the backward-facing arrow that's in the top-right corner of the screen.
-
2Draw on the screenshot. Select a pen style at the bottom of the screen, then tap and drag your finger around the screenshot. You have three drawing options available:
- Medium lines - Tap the far-left pen.
- Thick lines - Tap the highlighter-like pen.
- Thin lines - Tap the pencil-like icon.
- You can also erase lines by tapping the pencil eraser icon and then tapping and dragging over lines you've already drawn.
-
3Change the pen color. Tap the white circle near the bottom-right corner of the screen, then tap the color that you want to use and tap the pen icon on the left side of the row of dots.


Advertisement
Part 3
Part 3 of 4:
Adding Effects
-
1Tap +. It's in the bottom-right corner of the screen.
-
2Add text to your screenshot. Tap Text in the pop-up menu, tap and hold the "Text" box on the screenshot, tap Edit, and then type in your preferred text.
- You can also tap the text after you've typed it to change the color or font at the bottom of the screen.
-
3Add a signature to the screenshot. Open the + menu again, tap Signature, and use your finger to sign the field at the bottom of the screen. Tap Done to save your signature.
- You can tap and drag the signature around the screenshot.
-
4Magnify part of your screenshot. Open the + menu again, tap Magnifier, and tap and drag your magnifier around the screenshot.
- You can enlarge the screenshot by tapping and dragging the blue dot in or out.
- You can also increase or decrease the magnification by dragging the green dot clockwise or counterclockwise, respectively.
-
5Place shapes in your screenshot. Open the + menu again, then tap a shape at the bottom of the menu to place it in the screenshot.
- You can resize a shape by tapping and dragging the blue dot on it, or you can drag the shape around the screenshot to reposition it.


Advertisement
Part 4
Part 4 of 4:
Saving the Screenshot
-
1Make sure your screenshot is sufficiently edited. Add any effects, drawings, or alterations that you need to complete your screenshot's editing before continuing.
-
2Tap Done. It's in the top-left corner of the screen.
-
3Tap Save to Photos when prompted. This option is at the bottom of the screen. Doing so will save your edited screenshot to your iPhone's or iPad's Photos app.


Advertisement
Community Q&A
-
QuestionHow do I remove a sentence on my screen shot with an Apple iPad?
 Raymond MakCommunity AnswerTap the text, and it will show 3 buttons. Press 'Delete' to delete the text.
Advertisement
Warnings
- If you don't have iOS 11, screenshotting something will simply add the screenshot to the Photos app without giving you an option to edit it first.⧼thumbs_response⧽
Advertisement

About This Article
Jack Lloyd
wikiHow Technology Writer
This article was co-authored by wikiHow staff writer, Jack Lloyd. Jack Lloyd is a Technology Writer and Editor for wikiHow. He has over two years of experience writing and editing technology-related articles. He is technology enthusiast and an English teacher. This article has been viewed 20,212 times.
How helpful is this?
Co-authors: 4
Updated: October 2, 2017
Views: 20,212
Categories: Screenshots | IPhone
Advertisement