This article was co-authored by wikiHow Staff. Our trained team of editors and researchers validate articles for accuracy and comprehensiveness. wikiHow's Content Management Team carefully monitors the work from our editorial staff to ensure that each article is backed by trusted research and meets our high quality standards.
There are 9 references cited in this article, which can be found at the bottom of the page.
This article has been viewed 33,323 times.
Learn more...
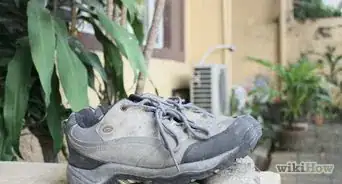
Running shoes often endure heavy wear and tear over the course of their use and can end up looking dull or worn. Adding some dye to an old pair of running shoes, or just some shoes that you want to change, can make them look brand new and fresh. If you’re looking for a fun and easy DIY project, try dyeing your running shoes!
Steps
Preparing the Materials
-
1Use an all-purpose dye for dyeing your running shoes. Most shoe materials can be dyed using an all-purpose dye. You can purchase all-purpose dye at a craft store or an online retailer.
-
2Test dye a small patch of your running shoes beforehand. Make sure your shoes are suitable for the dyeing process by testing a small patch before dyeing the entire shoe. If the test dye sets then you should be able to successfully dye your running shoes. If it doesn't you might want to try a different dye.[1]
- Keep in mind that many shoes have been treated with a surface finish during the manufacturing process making it difficult for the shoe to absorb a new dye.[2] If your test dye doesn’t set it might have a surface finish on it.
Advertisement -
3Set up a clean workspace. Find a clear area where you can set up your materials. Cover this area with a plastic drop cloth or several layers of newspaper to avoid any leakages. Wear rubber gloves when handling the dye to avoid staining your hands and be sure to wear clothes that you can get dirty in.[3]
-
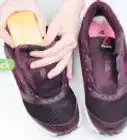
4Remove the shoelaces from your shoes. Be sure to remove your shoelaces if you don’t want them to be dyed along with your shoes.[4] Simply unlace both laces and set them aside until the dyeing process is finished.
- If you decide that you want your shoelaces to be dyed remove them from your shoes and add them in the dye mixture on their own to ensure an even dye.
-
5Take out your shoe insoles. If it's possible, remove the insoles of your shoes to avoid dyeing them. Reach into your shoe, pull out the insole and set it aside.
- If you have removable insoles its best to exclude them from the dying process as they could become misshapen.
-
6Protect the outer soles of your shoes. If you don’t want the soles of your shoes to be dyed, cover them with rubber cement or a layer of vaseline. These can be washed or peeled off after the dyeing process.[5]
-
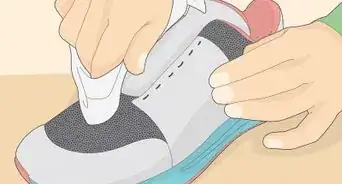
7Scrub away any smudges or stains from the shoes. You want to make sure they are clean so that the dye spreads evenly. Use warm water with soap and a sponge to clear away all marks.[6]


Creating the Dyebath
-
1Fill the bucket or sink with about 12 quarts of hot water. This should be enough water to completely submerge your running shoes. Heat the water beforehand to approximately 140 °F (60 °C) over the stove in a large cooking pot. Fill the sink or bucket with the hot water.
- Pour the water from the pot very carefully into the sink/bucket as not to splash yourself with hot water.
-
2Add the dye to the water. Following the instructions on the dye packet, pour the dye into the hot water in the sink/bucket. Stir the dye into the water until it looks dissolved. Use an old mixing spoon to stir in the dye.
- The dye can stain the vessel you are using during the dyeing process so be sure to use a bucket or sink that can get dirty. Also be advised that your mixing spoon will be dyed in the process so be sure to use a mixing spoon that you don’t mind getting dye on.
-
3Put a tablespoon of dish detergent into the dye mixture. Adding a small amount of dish detergent will help the dye spread evenly. Stir the detergent into the mixture slowly until it is well-mixed.
- You can use any kind of dish detergent you use to wash dishes with.
- Be sure to avoid making bubbles from stirring the detergent too fast.


Adding Your Shoes to the Dyebath
-
1Wet your shoes in warm water. Make sure your shoes are already wet before putting them into the dye mixture. Briefly run your shoes under warm tap water to wet them. This will allow the dye to seep into your shoes more easily.[7]
- Your shoes don’t need to be completely saturated with water at this point. You just want to make sure they are a little damp.
- Be sure to wet the entire shoe, even the inside, so that the dye fully absorbs into the shoe.
-
2Lower your shoes into the dye bath carefully. Using your gloved hands, put the shoes into the dye one at a time. Avoid dropping the shoes into the dyebath hastily as this could cause the dye to splash.
- The temperature of the dyebath is hot! Be cautious when lowering your shoes into the mixture as to not burn yourself.
-
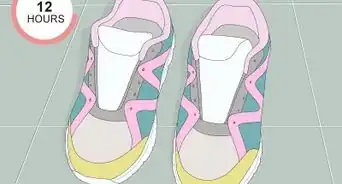
3Soak your shoes for about 1 hour. Let the shoes sit in the dye mixture for at least an hour to enable them to absorb the dye. Leave the shoes in the dye for as long as you want based on the level of color saturation you desire.
- For example, if you are dyeing your shoes blue and you want them to have a rich, dark blue appearance you can leave them in the dyebath for a longer amount of time. If you wish to dye your shoes a lighter shade of blue leave them in the dyebath for a shorter amount of time.
- Remember that you can always check the color saturation of your shoes during the dyeing process by carefully pulling them out and holding them over the the dyebath to judge. If you decide you want your shoes to be darker, slip them back into the dyebath.


Cleaning Up Your Dyed Running Shoes
-
1Rinse your shoes with cool water. After removing your shoes from the dye run them under cool tap water until the water begins to run clear. You want to make sure that any leftover dye is washed out from your shoes.[8]
-
2Pat the wet shoes with paper towels. There shouldn’t be any traces of dye on the paper towel. Your shoes will still be a bit damp but they shouldn’t be dripping wet.
- Avoid leaving your shoes dripping wet as any leftover dye can stain.
-
3Clean up the soles of the shoes. Take off the liquid cement or vaseline from the soles. If you used liquid cement you should be able to peel it off of the soles. If you used vaseline, take a wet paper towel and some soap and scrub off the leftover vaseline contents.
-
4Give your shoes a good wash. Finish the process by washing the shoes with warm water and soap or put them in the washing machine with a mild detergent.[9] Washing your shoes ensures that the dye fully sets into the fabric.
-
5Leave your shoes to dry. You can allow your shoes to air dry or you can put them in the dryer. Keep in mind that drying your shoes in the dryer can cause them to shrink. If you dyed your shoelaces leave them out to air dry. Allow your shoes to dry completely before wearing them.
- If you have a hairdryer handy you can use it to dry the insides of your shoes or any other hard to dry places.


Things You'll Need
- Pair of running shoes
- All purpose dye
- Sink or bucket
- Rubber gloves
- Paper towels
- Plastic drop cloth
- Newspaper
- Water
- Stove
- Large pot
- Old mixing spoon


References
- ↑ https://www.marthastewart.com/273320/dyed-canvas-sneakers
- ↑ http://thedreamstress.com/2011/06/tutorial-how-to-dye-fabric-shoes/
- ↑ https://www.craftsy.com/sewing/article/dyeing-clothes/
- ↑ https://oureverydaylife.com/how-to-dye-nike-shoes-12459464.html
- ↑ http://myfrugaladventures.com/2013/07/diy-tie-dye-childrens-shoes/
- ↑ https://www.thecountrychiccottage.net/dye-toms-shoes/
- ↑ http://www.theshoesnobblog.com/2017/05/a-guide-to-dyeing-your-own-shoes.html
- ↑ https://www.madeeveryday.com/tutorial-easy-fabric-dyeing/
- ↑ https://www.marthastewart.com/1110589/fit-be-dyed
About This Article