This article was co-authored by wikiHow Staff. Our trained team of editors and researchers validate articles for accuracy and comprehensiveness. wikiHow's Content Management Team carefully monitors the work from our editorial staff to ensure that each article is backed by trusted research and meets our high quality standards.
There are 7 references cited in this article, which can be found at the bottom of the page.
This article has been viewed 8,555 times.
Learn more...
Maple is one of the strongest hardwoods and has a fine, consistent grain that gives it a uniform, beautiful appearance. It’s a highly valued wood for flooring, cabinets, and furniture, but freshly cut maple needs to be properly dried before you can use it. Fortunately, it’s actually really easy to dry maple wood. All you need to do is give the wood the right conditions and enough time to dry without warping or cracking, and you’ll be able to use it for whatever you want!
Steps
Choosing a Place to Dry the Wood
-
1Look for a flat, shady location if you’re drying outside. If you plan to air-dry your maple wood outside, find a flat spot of ground so you’re able to make an even stack. Choose a location out of direct sunlight such as beneath of group of trees or under a roof so the heat and UV radiation doesn’t dry the wood unevenly, which can warp it and cause it to crack.[1]
- Try to avoid low spots that gather water as well so the wood doesn’t sit in standing water when it rains.
- If the ground is uneven, use a tamper or plate compactor to even it out.
- Don’t choose a sunny spot and plan to cover the wood with a tarp or sheet. The covering can trap moisture which can cause mold and bacteria to grow on the wood. The moisture can also affect how the wood dries.
-
2Choose a shed if you want to keep the wood covered. If you want to keep your maple wood out of the elements, then an outdoor shed is a great option. Clear out the shed so you have room to stack your wood and make sure the floor isn’t damaged or cracked so the stack won’t sink or fall through it.[2]
- You can also purchase an outdoor shed from your local home improvement store to use as a drying space.
Advertisement -
3Lay down a plastic sheet to keep the wood dry and clean. Whether you’re air-drying in outside or in a shed, cover the floor with a plastic sheet to keep the wood dry and to prevent any debris or plant growth that could affect airflow. Make sure the sheet is laid out smoothly and there aren’t any wrinkles.[3]
- If grass or weeds grow around the wood, they can affect the drying process.
-
4Use a dehumidification kiln for the quickest option. A dehumidification kiln is a sealed chamber that maintains a set temperature and humidity level that is optimal for drying wood. If you have access to a kiln, use it to dramatically reduce the time it takes your maple wood to dry.[4]
- A dehumidification kiln can dry wood in as little as 2 months whereas it may take 3-4 years to air-dry.
- You can hire a contractor to build a proper dehumidification kiln on your property.
- Dehumidification kilns can cost between $1,200-$5,000 USD and come in a variety of sizes that can hold different amounts of wood. If you plan to dry a lot of maple wood, you may want to invest in one.


Cutting the Wood
-
1Gather the maple wood as soon as it’s cut down. Gather maple logs and trees for processing and drying as soon as you can after they’ve been cut down or knocked down by a storm to help prevent rot or stains. Place the lumber near where you plan to process it so you’re able to do it all at once.[5]
- For instance, if you plan to process the wood on your property, have it delivered or haul it near where you’re going to cut it.
- Opening up the wood soon after it’s felled helps it dry better.
-
2Pull off any bark from the logs to prevent decay. Pull off the mark from the maple tree so fungal growth won’t decay or deteriorate the wood, which can damage and discolor it. Remove all of the bark from the lumber so you’ve got a clean, smooth surface.[6]
- Wear a sturdy pair of work gloves to make it easier to grip the bark without hurting your hands.
- You can also use a drawknife to shave off the bark.
-
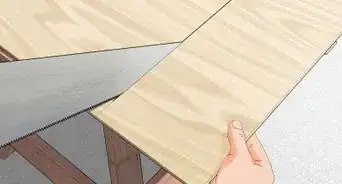
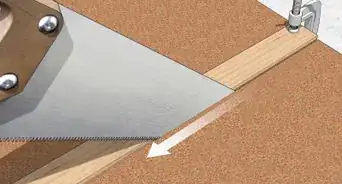
3Saw the logs into 4 by 4 inches (10 by 10 cm) boards. If you’re using a circular saw, cut the log into quarters and then saw the boards out of the quarters. If you’re using a bandsaw, push the logs through the saw to cut the boards out of them. Use a ruler or tape measure to measure out the boards so they’re uniform.[7]
- If you handsaw the boards, the wood may not dry evenly.
- Make sure the boards are the same size so they’re easier to stack and they dry evenly.
-
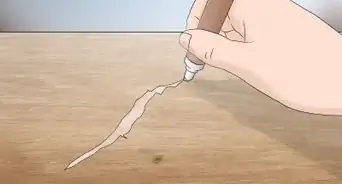
4Discard boards with branches or knots. Uneven boards can warp and crack as it dries, which can also affect the wood stacked above and below it. Discard boards with knots or uneven sections where branches grew so you’re left with uniform wood.[8]
- Knots are sections in the trunk where limbs once grew and they can cause dramatic warping as the wood dries.
-
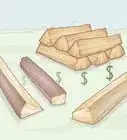
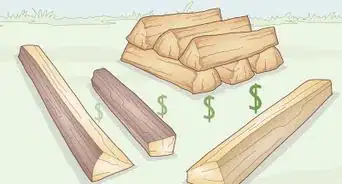
5Spread paraffin wax over the ends of the boards to seal them. Sealing the ends of the boards will help prevent the wood from drying out too quickly, which can cause splits to form in the boards. Melt the paraffin wax and use a paintbrush to spread a thick layer of paraffin wax over the ends of the boards so the moisture doesn’t escape too quickly and the wood dries evenly.[9]
- You can find paraffin wax at your local hardware store, department store, or by ordering it online.
- If you don’t have paraffin wax, use polyurethane, shellac, or latex paint to seal the ends.


Stacking and Drying the Wood
-
1Make a bottom layer of boards in an even row. Start your stack by arranging an even base layer of your boards. Space them out so there’s 6 inches (15 cm) between the boards and make sure they lie flat on the ground or the floor of the kiln.[10]
- Use a ruler or tape measure to make sure the boards are spaced out evenly.
- Your base layer is super important for your wood to dry consistently.
-
2Place stickers 16 inches (41 cm) apart on top of the boards. Stickers are small, 1 by 2 in (2.5 by 5.1 cm) in boards that add space between the boards in a stack to help increase ventilation. Space the stickers out evenly along the top of your boards so the next layer is evenly supported.[11]
- Stickers help all of the surfaces of the wood dry evenly so there isn’t warping.
- You can use any type of wood for your stickers, and you can find them at your local hardware store, home improvement store, or by ordering them online.
-
3Continue stacking the boards and placing stickers. Place another layer of boards on top of the base layer so they rest on the stickers. Lay another layer of stickers on top of them, and then stack another layer of boards. Keep laying your boards and placing stickers until all of your wood is stacked.[12]
- Make sure you place your stickers 16 inches (41 cm) apart for even spacing.
-
4Place cinderblocks on top of the stack to weigh it down. Lay a flat sheet of plywood over the top of your stack. Place cinderblocks along the rows of wood to help weigh them down and keep them from warping, cracking, or splitting.[13]
- The sheet of plywood will keep the cinderblocks from damaging the boards.
- As the wood dries and the moisture evaporates, the boards will start to shrink and buckle. It’s super important that you weigh them down to help prevent uneven drying and splitting.
-
5Allow the wood to dry undisturbed. If you’re air-drying your wood outside or in a shed, leave it alone to dry for about 3-4 years. If you used a kiln, leave it for about 2 months.[14]
- The general rule of thumb for air-drying wood is to allow 1 year of drying time for every 1 inch (2.5 cm) of wood.
-
6Use a moisture meter to test the wood. For lumber to be usable, it needs to have a moisture content between 5%-10%. A moisture meter is a device that detects the moisture content of wood. Place the moisture meter against the wood to get a reading.[15]
- Freshly cut lumber can range from about 45% moisture content to upwards of 80% if it was recently rained on.
- Once the wood is dry enough, you can keep it stacked outside or in a shed and use it whenever you need it.


Warnings
- Be very careful when you’re sawing boards out of lumber. You can injure yourself if the saw slips.⧼thumbs_response⧽
Things You’ll Need
- Paraffin wax
- Circular saw or bandsaw
- Sheet of plywood
- Cinderblocks
- 1 by 2 in (2.5 by 5.1 cm) stickers

References
- ↑ https://youtu.be/GbznI20otGY?t=26
- ↑ https://youtu.be/5sN4W_xGi7s?t=62
- ↑ https://www.fpl.fs.fed.us/documnts/fplgtr/fplgtr117.pdf
- ↑ https://www.fs.fed.us/nrs/pubs/rn/rn_nrs196.pdf
- ↑ https://www.wood-database.com/wood-articles/drying-wood-at-home/
- ↑ https://www.wood-database.com/wood-articles/drying-wood-at-home/
- ↑ https://www.fs.fed.us/nrs/pubs/rn/rn_nrs196.pdf
- ↑ https://www.wood-database.com/wood-articles/drying-wood-at-home/
- ↑ https://www.wood-database.com/wood-articles/drying-wood-at-home/
About This Article