wikiHow is a “wiki,” similar to Wikipedia, which means that many of our articles are co-written by multiple authors. To create this article, 34 people, some anonymous, worked to edit and improve it over time.
This article has been viewed 307,570 times.
Learn more...
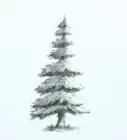
Drawing a forest is actually almost as easy as drawing a tree, you'll understand how following these steps. Let's begin!
Steps
A Sketch-Style Forest
-
1Draw 2 lines.
-
2Add one shorter line.Advertisement
-
3Add 2 more lines.
-
4Draw more lines and draw a part of the tree.
-
5Add more lines to mark branches. Draw short lines to mark bushes in front.
-
6Around the drawing draw four lines and draw more branches and leaves, as shown.
-
7Using a razor gum, make some lines softer.
-
8Start coloring the drawing using two or more shades of brown for the trees.
-
9Finished.


Basic Forest
-
1Start by drawing a line for the floor.
-
2Draw two curves covering the floor line and six more behind it, as you can see they always go from thin to thick, top to bottom.
-
3Draw a few more behind the first row of trees.
-
4Draw a third row on the back.
-
5Now is the perfect time to add details, like bushes and mushrooms.
-
6To make these rows of trees look real keep in mind that the farther they are the dimmer the color on them will look, use a pallid yellow and green to make the background look gloomy.


Inhabited Forest
-
1Draw the ground. If you want a grassy forest, draw some spikes that vary in size and direction.
-
2Draw some trees. If the tree is closer, make it larger. If it is farther away, make it smaller and behind the ones that are closer, to add perspective to your drawing.
-
3Add some details that bring the forest to life. For plants, you could add some mushrooms, bark textures, bushes and small plants. For animals, add insects, mammals, maybe even an owl or two. If you'd like to add people, you could include children collecting acorns or picking berries.
-
4Add color. Remember that the trees behind the ones in front are in the shadows and gradually make it a darker color. Color shadows, spots that you want to be bright, and other little features.


Community Q&A
-
QuestionWhat is razor gum? Is it just an eraser?
 Community AnswerIt is a special kind of eraser that can be molded to erase fine details and not large swaths of drawing.
 -
QuestionHow do I draw a simple winning drawing?
 Shahzaib KhanCommunity AnswerFollow the method above and add your own tweaks and ideas. Use your imagination!
 -
QuestionHow do I draw a rainforest scene?
 Community AnswerYou could draw the scene above, but then use your imagination to add things like raindrops, wild animals and more plants on the floor.
About This Article
If you want to draw a sketch-style forest, start by drawing 2 vertical lines on a sheet of paper. Add in several lighter, shorter vertical lines, but vary the angle slightly so the trees will look more natural. Draw angled lines coming from the trees to form branches, and add short lines near the bottom of the drawing to create bushes in front of the trees. Use bushy, curvy lines to make the leaves. Once you have the outline drawn, color the trees using various shades of green and brown. To learn how to draw a basic forest, keep reading!