This article was co-authored by Adam Shuty and by wikiHow staff writer, Dan Hickey. Adam Shuty is a Certified Strength and Conditioning Specialist and owner of ATOMIC Total Fitness, a fitness training studio in New York, New York. With over 15 years of experience, Adam specializes in weightlifting, strength and conditioning, and martial arts. Adam holds a BS in Industrial Engineering from Virginia Polytechnic Institute and State University. In 2014, Adam appeared on the Live With Kelly and Michael Show as one of the top five fitness instructors in the country.
There are 16 references cited in this article, which can be found at the bottom of the page.
wikiHow marks an article as reader-approved once it receives enough positive feedback. This article received 109 testimonials and 100% of readers who voted found it helpful, earning it our reader-approved status.
This article has been viewed 3,456,602 times.
Your New Year’s Resolution this year was to finally learn how to do a split, but now NYE is only a week away and you haven’t even started training! Is it possible to get a split in before the ball drops? If you’re already somewhat flexible, you just might be able to get it done (and even if you’re not very flexible, you can make noticeable progress in just one week too!). With consistent practice and the right stretches, the splits are within anyone’s reach. In this article, we’ll show you the best daily stretches to get in shape for the splits fast, plus walk you through how to slide into both a front and middle split. Let’s get to work!
Things You Should Know
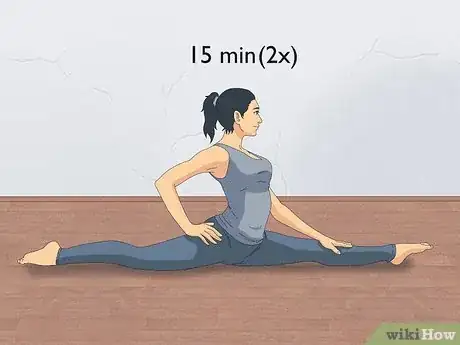
- Stretch for about 15 minutes, twice a day to improve flexibility. Do stretches like straddle stretches, toe touches, butterflies, and lunges for 30-60 seconds each.
- Do a cardio warmup before practice sessions and stretch within your limits to avoid injury (even if that means it takes more than a week to get the splits).
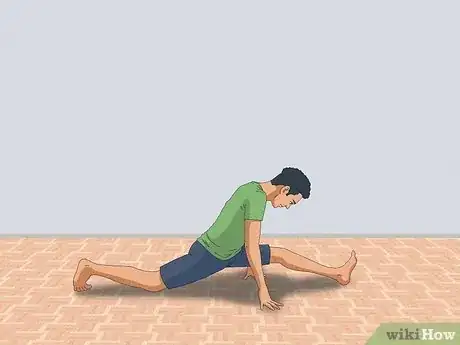
- To do a front split, get in a lunge position and slowly extend your leg in front of you. Keep your hands on the ground on either side of your leg for support.
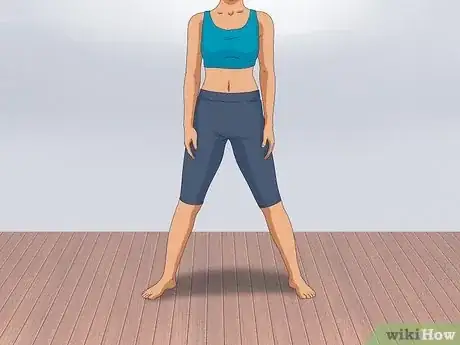
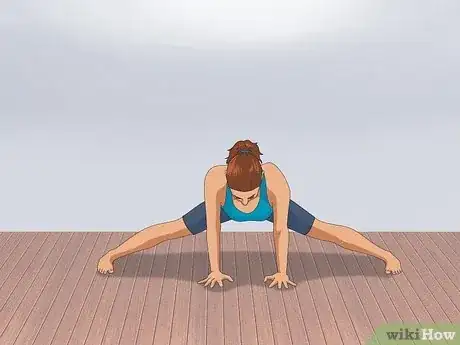
- To do a middle split, stand facing forward and spread your legs wide to the sides. When you’re low enough, put your hands on the ground for support.
Steps
Daily Stretches
-
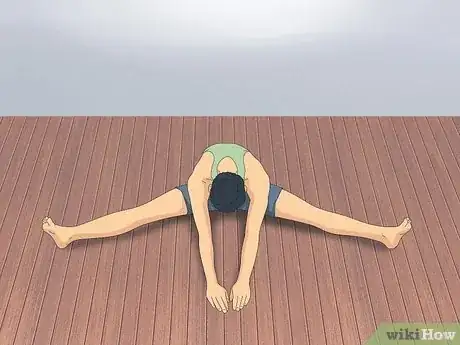
1Start with a seated straddle stretch, also known as a V-stretch.[1] Sit on the floor and spread your legs into a wide “V” shape, then lean to the right and reach as far as you can down your leg, trying to touch your toes. Keep your back as straight as possible and hold the position for 30-60 seconds. Repeat on your left leg.[2]
- Place your feet against a wall if it helps you spread them wider and get a deeper stretch.
- After stretching to both sides, extend your arms straight in front of you and bend forward. Try to touch your chest to the floor and hold for 30-60 seconds.
- Straddle stretches work your hamstrings, inner thighs, lower back, and calves. They’re great for gymnasts, dancers, and anyone who wants to do a split.
-
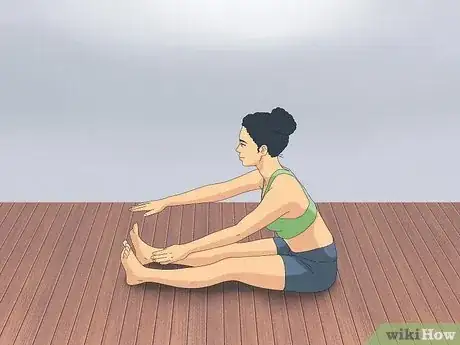
2Do seated or standing toe touches for your calves and lower back. Sit on the floor with your legs extended in front of you and your toes pointed at the ceiling. Lean forward and reach as far as you can, trying to grab your ankles or touch your toes. If this feels easy, try to wrap your fingers around the soles of your feet. Hold for 30-60 seconds.[3]
- Think about touching your chest to your legs to help keep your back straight.
- If you’re standing, keep your feet together and reach down to your toes. Keep your knees straight and put your weight on the balls of your feet.
- To increase your stretch, bend your arms and try to touch your toes with your elbows.[4]
Advertisement -
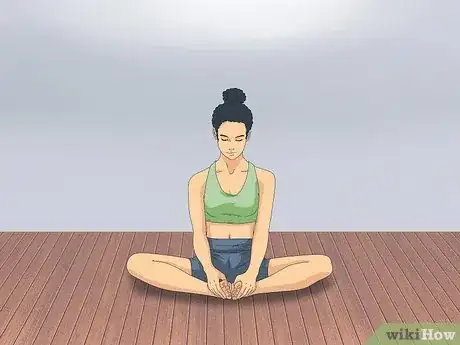
3Work on your butterfly stretch to target your groin and inner thighs. Sit on the floor and press the soles of your feet together, forming a diamond shape with your legs. Push your knees down towards the floor (using your elbows if needed) while you draw your heels closer in toward your groin. Try to sit upright with your back as straight as possible and hold the position for 30-60 seconds.[5]
- To deepen the stretch, put your palms on the floor in front of your toes and stretch forward as far as possible.
-
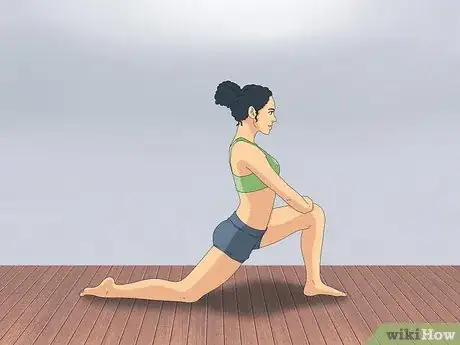
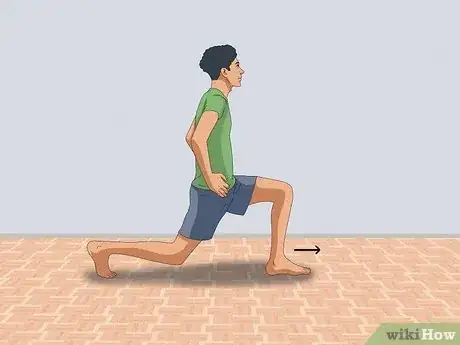
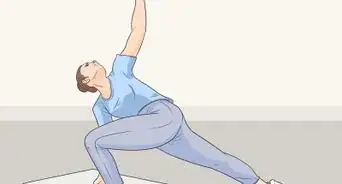
4Practice lunge stretches to loosen your hips. Start with your left knee on the ground (preferably on a cushion or towel) and step forward with your right foot. Bend both knees until your right thigh is parallel to the floor and your left shin is touching the ground. Put your hands on your hips, keep your back straight, and lunge forward to stretch your hip and upper thigh.[6]
- Hold the stretch for 30-60 seconds, then repeat on your other leg.
-
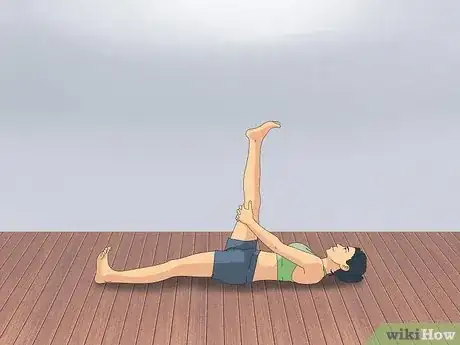
5Stretch out your hamstrings for 30-60 seconds each. Lie down on your back and straighten one leg up into the air at a 90 degree angle (use an outer corner of a wall or a door frame to hold your leg up if needed). Straighten your leg as far as possible until you feel a stretch along the back of your thigh.[7]
- To deepen the stretch, grab your ankle or toes and pull your leg towards your face (keeping your leg straight).
- Hamstrings are the muscles on the back of your thigh. Loose, flexible hamstrings are essential for good middle and front splits.
-
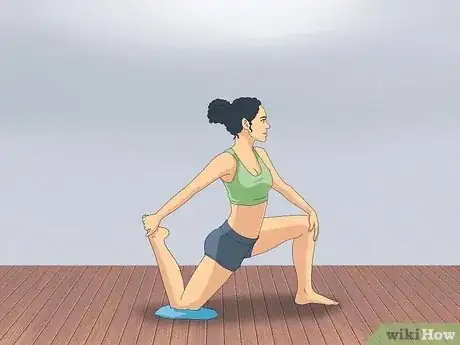
6Loosen up your quadriceps for 30-60 seconds each. Kneel down in a lunge position, resting your back knee on a cushion or towel. Keep your back straight, reach backward, and grab the foot of your back leg. Pull it up toward your behind until you feel a stretch in your quad.[8]
- Hold for 30-60 seconds, then switch legs and repeat.
- Alternatively, stand up (putting one hand on a wall for support) and pull your foot up and back, keeping your back straight and your stomach core firm.
- Quadriceps are the large muscles on the front of your thigh. Even though they don't contract in a split, keeping them loose helps prevent injury.
-
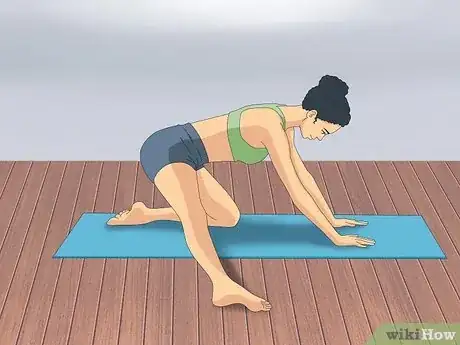
7Work on a kneeling adductor stretch to loosen your groin muscles. Stand with your feet wider than your shoulders, then come down onto your right knee, fully extending your left leg out to the side. Keep your hands on the floor in front of you for support. Sit back onto your right leg until you feel a stretch on the inside of your thigh.[9]
- Hold the stretch for 30-60 seconds, then repeat on the other leg.
- Your adductors are the long muscles on the inside of your thigh that pull your legs in toward your body. Loose adductors are essential!
Doing a Front Split
-
1Begin a front split from a lunge position. After you’ve warmed up and stretched, practice your front split to see how far you can go and monitor your progress. Get in a lunge position and extend your preferred leg out in front of you. Keep your back knee bent so your shin and the top of your back foot are resting on the ground.[10]
- Keep your hips square and facing straight forward.
- Support your back knee with a cushion or towel if it’s more comfortable. It doesn’t matter which forward leg you start with, since you’ll practice both ways.
- Wear socks to help your front foot glide across the floor more easily.
-
2Slide your front heel forward slowly to lower yourself down. As you get lower, place your hands on either side of your front leg to balance and support yourself.[11] If needed, place yoga blocks, chairs or other objects on either side of you to hold on to.[12]
- Support most of your weight with your hands to keep extra tension off of your hip and leg muscles.
- Move your front heel just a few inches or centimeters forward at a time, keeping your hips pointing forward.
-
3Focus on relaxing your muscles and breathing deeply as you stretch. As you get closer to your maximum split, pause and hold yourself up by your hands. Take even, deep breaths and allow your muscles to relax forward on the exhale. Repeat this several times, seeing if you can lower yourself all the way to the ground.[13]
- As you get lower, allow your back leg to straighten farther behind you.
- The looser you can keep your muscles during a split, the less likely you are to injure yourself.
-
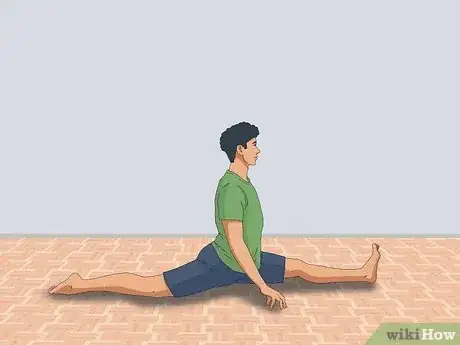
4Get as low as you can and hold your max stretch for 20-30 seconds. Only stretch as far as feels comfortable—if you feel pain, come out of the splits immediately since you’ve overextended yourself and take a day or so off to recover. Use your hands to raise yourself up, then let your muscles relax for a moment. Repeat the splits with your other leg forward.[14]
- It’s OK if you don’t get down to a full split on your first try. Keep stretching and practicing consistently until you can get it comfortably and safely.
- Once you can lower yourself completely to the ground with your legs at 180 degrees, you’ve accomplished your split!
Doing a Middle Split
-
1Begin middle splits in a standing position. Stand tall with your feet wider apart than your shoulders and your toes pointing forward. Take a few deep breaths to relax and loosen up your muscles. Make sure you’re wearing socks to help your feet slide over the floor more easily.[15]
-
2Slide your feet wider apart very gradually. Keep breathing and focus on relaxation as you get lower. Let your hips sink down toward the ground as your feet get wider apart. Keep sliding this way until you’re in the widest stance you can make without needing your hands on the ground to support yourself.[16]
-
3Bend over and put your hands on the ground once you’re halfway down. Continue lowering yourself down to the ground slowly, letting your feet turn outward as you get lower. Keep your toes pointed. As you get even lower, drop to your elbows for support.[17]
- For extra support, do a middle split over a stack of pillows under your groin. Remove pillows as you get more comfortable until you can split without them.[18]
- Focus on breathing deeply and steadily while you stretch. Try to keep all of the muscles in your body as relaxed as possible.
-
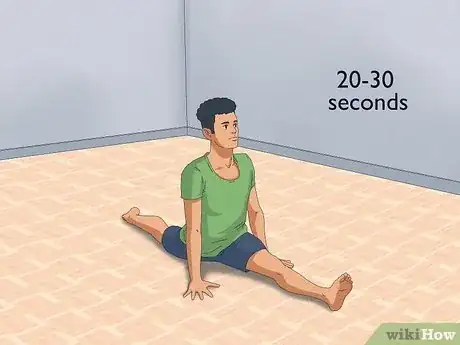
4Get as low as you can and hold your max stretch for 20-30 seconds. Continue slowly lowering yourself down as far as you can go, taking care not to overextend yourself (you should feel a deep stretch, but not any pain). Hold yourself in this position, then raise yourself up and let your muscles relax.[19]
- It’s OK if you don’t get it on your first try. Keep stretching daily and practicing until you’re all the way to the ground!
Practicing Safely
-
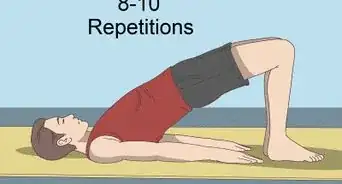
1Do a cardio warmup for at least 5 minutes before you stretch. Go for a jog, jump rope, or do some jumping jacks to get blood pumping through the muscles you need for the splits. Warming up is critical for injury prevention, and it also helps you get a deeper stretch![20]
- A good warmup improves your overall muscle performance and flexibility, plus it makes a torn muscle less likely.
-
2Try to stretch and practice the splits twice a day for about 15 minutes.[21] Consistency is the key to mastering the splits quickly, so set aside time to warmup and stretch daily (or at least 4 times a week to see progress). If you’re already fairly flexible, you may be able to do the splits in a week with fewer stretching sessions than if you’re inflexible or a beginner.[22]
- If you feel sore, take a day off of stretching to let your muscles recover. If you try to push through the pain, you could injure yourself and delay your splits.
- If you’re able to stretch more than twice a day, go for it!
-
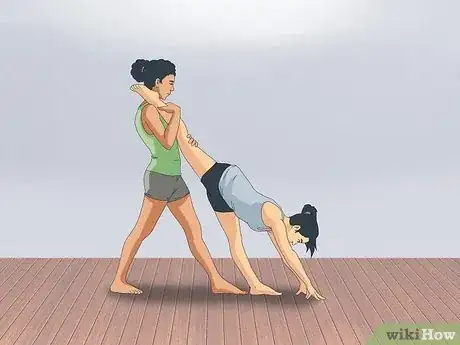
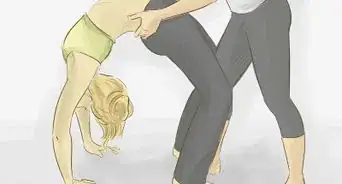
3Ask a friend or workout buddy to help you with assisted stretches. Assisted stretches involve a second person holding or lightly pushing on your shoulders, limbs, or other areas to help you get a deeper stretch. Choose someone you trust and communicate exactly how you want them to push you. Tell them to stop if you feel any pain or you go beyond your limits.[23]
- For example, a friend could push your knees down during a butterfly stretch or pull on your leg during a hamstring stretch.
- Try starting a competition with your flexibility friend to see who can get into the splits first. A little challenge makes great motivation!
-
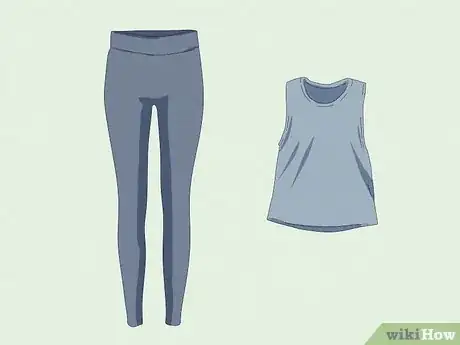
4Wear comfortable, athletic clothes that stretch along with your body. Choose loose or baggy, pants, shorts, or shirts, or go for stretchy materials if you prefer something form fitting. Wear socks, too—your feet will slide easily across the floor, making it simpler to get into the splits or do certain deep stretches.[24]
- Make sure you’re comfortable in whatever you wear. You’ll be putting in a lot of practice, so it’s important to feel good.
- Wearing baggy or stretchy clothes will also prevent your pants from ripping once you eventually hit the splits.
-
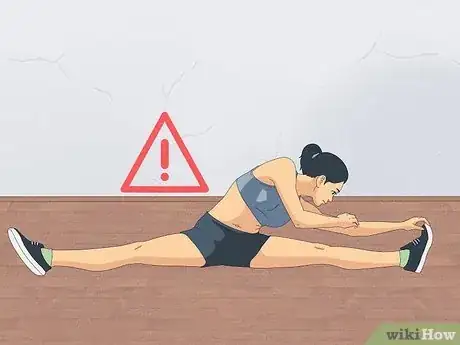
5Prioritize your safety over speed. Stretch within your limits, even if that means it takes more than a week to get the splits. Everyone’s body is different, and conquering the splits quickly can be challenging. Take a whole day off if you feel pain, and only stretch mildly if you wake up feeling sore.[25]
- Remember, you’ll only slow down your progress more by pushing yourself too hard and straining or tearing a muscle.
- The splits should feel like a good, deep stretch. If you feel pain, it means you’re stretching beyond your current limits.
Expert Q&A
Did you know you can get expert answers for this article?
Unlock expert answers by supporting wikiHow
-
QuestionHow can I make my splits perfect?
 Adam ShutyAdam Shuty is a Certified Strength and Conditioning Specialist and owner of ATOMIC Total Fitness, a fitness training studio in New York, New York. With over 15 years of experience, Adam specializes in weightlifting, strength and conditioning, and martial arts. Adam holds a BS in Industrial Engineering from Virginia Polytechnic Institute and State University. In 2014, Adam appeared on the Live With Kelly and Michael Show as one of the top five fitness instructors in the country.
Certified Strength & Conditioning Specialist
-
QuestionWhen you start to feel pain under your knee, is it a good or bad thing?
 Michele DolanMichele Dolan is a BCRPA certified Personal Trainer in British Columbia. She has been a personal trainer and fitness instructor since 2002.
Certified Fitness Trainer
-
QuestionI have been trying for like for years, am I doing something wrong?
 Michele DolanMichele Dolan is a BCRPA certified Personal Trainer in British Columbia. She has been a personal trainer and fitness instructor since 2002.
Certified Fitness Trainer
Warnings
- Always warm up and stretch before going into a split. If you go into a split cold, you could tear or strain a muscle or ligament.⧼thumbs_response⧽
- Stop stretching or get out your splits immediately if you feel pain.⧼thumbs_response⧽
References
- ↑ Adam Shuty. Certified Strength & Conditioning Specialist. Expert Interview. 26 August 2020.
- ↑ https://bonejoint.net/blog/lunges-and-straddles-help-build-leg-strength-and-flexibility/
- ↑ https://www.today.com/health/how-do-seated-toe-touch-correctly-t216923
- ↑ Adam Shuty. Certified Strength & Conditioning Specialist. Expert Interview. 26 August 2020.
- ↑ https://www.insider.com/guides/health/fitness/how-to-do-the-splits
- ↑ https://goodstretch.uk/stretching-for-splits/
- ↑ https://www.mayoclinic.org/healthy-lifestyle/fitness/multimedia/stretching/sls-20076840?s=3
- ↑ https://www.mayoclinic.org/healthy-lifestyle/fitness/multimedia/stretching/sls-20076840?s=4
- ↑ https://www.insider.com/guides/health/fitness/how-to-do-the-splits
- ↑ https://www.sportsrec.com/do-splits-men-8367224.html
- ↑ https://www.sportsrec.com/do-splits-men-8367224.html
- ↑ https://www.insider.com/guides/health/fitness/how-to-do-the-splits
- ↑ https://www.sportsrec.com/do-splits-men-8367224.html
- ↑ https://www.sportsrec.com/do-splits-men-8367224.html
- ↑ https://www.insider.com/guides/health/fitness/how-to-do-the-splits
- ↑ https://www.insider.com/guides/health/fitness/how-to-do-the-splits
- ↑ https://youtu.be/o_Jj0U_tGtc?t=393
- ↑ https://youtu.be/o_Jj0U_tGtc?t=413
- ↑ https://youtu.be/o_Jj0U_tGtc?t=397
- ↑ https://web.mit.edu/tkd/stretch/stretching_5.html
- ↑ Adam Shuty. Certified Strength & Conditioning Specialist. Expert Interview. 26 August 2020.
- ↑ https://goodstretch.uk/stretching-for-splits/
- ↑ https://www.cnn.com/2022/03/11/health/assisted-stretching-improve-flexibility-wellness/index.html
- ↑ https://medlineplus.gov/ency/patientinstructions/000817.htm
- ↑ http://www.prolianceorthopedicassociates.com/know-limits-exercise-safely/
- Videos provided by BodyBook: Health and Fitness
About This Article
To learn to do the splits in a week, practice twice a day for 15 minutes at a time, starting with a light warm-up and stretches. Sit on the floor with your legs wide apart and stretch to the side to touch your right foot, then your left foot. Stretch your hamstrings by standing and reaching for your toes, then open up your hips with a butterfly stretch. Go into the splits by kneeling and extending one leg in front of you. Lower yourself down slowly, placing your hands on the ground to hold your weight. Relax your muscles and hold at your lowest point for 30 seconds. To learn more from our Personal Trainer co-author, like how to have a friend help you practice the splits, keep reading the article!
