This article was co-authored by Michiko Takatani and by wikiHow staff writer, Hunter Rising. Michiko Takatani is a Sexual Health, Yoga & Tantra Specialist and the Founder of Solar Tantra School. With nearly 20 years of experience, she specializes in a combination of Kundalini yoga and Tantra. She holds a Kundalini Yoga Certification from the Kundalini Research Institute. Additionally, her Solar Tantra School in New York has a 5-star rating.
There are 13 references cited in this article, which can be found at the bottom of the page.
This article has been viewed 81,936 times.
If you’re interested in trying yoga, the mountain pose (Tadasana) is one of the first foundational positions you can master. Mountain pose helps improve your posture, relieve sciatica pain, and tones your core and leg muscles. Even though the pose may look like you’re just standing up, there are a lot of little intricacies to get the most out of the stretch. We’ll walk you through the basic pose and give you a few variations to try to make it easier or harder!
Steps
Basic Pose
-
1Stand up straight with your feet together. Lay your yoga mat someplace quiet where you can relax and focus on your stretches. Plant your feet near the end of your mat so your big toes and heels are touching one another. Spread your toes wide apart and press them down into the mat. Focus on balancing your weight evenly between the balls of your feet and your heels so you feel the most grounded.[1]
- If you have a little trouble keeping your balance with your feet together, it’s okay to stand with them hip-width apart instead.[2]
- Practice in front of a mirror if you can so you can check your posture. Make sure you aren’t leaning forward as you’re standing.
-
2Flex your thighs to straighten your legs. Bring your attention to the muscles in your legs, starting from your foot. Squeeze your inner thigh muscles and slightly lift up your kneecaps. Keep your knees just slightly bent so you don’t lock them.[3]
- As you draw your focus to your legs, try to keep them as straight as possible while easing the tension away. You’ll get a better stretch if you stay loose instead of rigid.
Advertisement -
3Push your hips forward to lower your tailbone. Turn your focus toward your hips and mentally note how they’re positioned to the rest of your body. Then, slowly shift your hips so they line up directly over your ankles. Imagine your pelvis is a bowl full of water that you don’t want to spill. That way, you can visualize the position a little easier.[4]
- Avoid sticking your bum out while you’re doing this pose.
-
4Engage your core and lower back to keep your spine straight. Flex your abs and lower back muscles before you check your posture. If you’re leaning a little too far forward or backward, readjust so your spine lines up above your tailbone. When you’re back in position, release some tension from your core and feel the weight sink to the ground.[5]
- Take deep breaths through your nose as you’re finding the right position for your pose so you feel calmer.
- It’s okay if you feel like you’re falling out of the correct posture. Just gently focus on your muscles again and make slight adjustments to straighten out your body.
-
5Roll your shoulders back to stretch your torso. If you’re hunching forward, lift your shoulders up toward your ears and roll them backward. Drop and relax your shoulders so your sternum pushes forward and your back stays in line with your hips and legs.[6]
- Keep your spine in a neutral position so you aren’t arching forward or backward.
-
6Extend your arms down at your sides with your palms facing out. Relax your arms and let them hang freely at your side. Focus your attention on the weight you feel hanging down from your shoulders. Note the feeling running up from your feet, through your body, and down into your arms. Wiggle your fingers and turn your hands so your palms face forward and away from your body.[7]
-
7Look straight ahead so your chin is parallel to the floor. Push your head back so your neck is in line with the rest of your spine. Relax the muscles in your face and jaw so you feel relaxation throughout your entire body. Avoid looking around or moving your head throughout the duration of this stretch.[8]
- Find a spot to focus on at eye level in front of you and maintain your gaze so you don’t look anywhere else.
-
8Hold the pose for 5–8 breaths. You can keep your eyes open or closed while you’re performing this pose. Take deep breaths in through your nose and slowly exhale through your mouth. Stay aware of how aligned and centered your body feels so you can practice mindfulness and feel. On your last breath, completely relax your body to exit the pose.[9]
Variations
-
1Practice the pose against a wall to correct your alignment. Stand so your heels, bum, shoulders, and skull all touch the wall. Plant your feet first and mentally work your way up through your body to bring focus to each of your muscles. The wall helps ensure you keep your back straight so you’re less likely to lean one way or the other.[10]
-
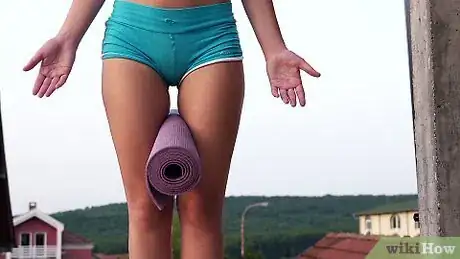
2Squeeze a yoga block between your thighs to activate your adductor muscles. A yoga block is a thick piece of foam that can help you get into poses correctly. Put the block right between your inner thighs so the long edge is parallel to the floor and squeeze it tightly. Continue going into the rest of your pose as normal, but focus on the feeling in your leg muscles. That way, it’ll be easier for you to flex them without the block later on.[11]
- Avoid pushing your tailbone down and moving your hips forward. If you accidentally do this, squeeze your muscles tighter near the front of the block.
-
3Lace your fingers behind your back for a deeper shoulder stretch. Reach your arms straight down by your sides and slowly bring them just behind your tailbone. Put your palms together if you can; otherwise, it’s okay to just lace your fingers. Pull the weight down through your arms to open up your shoulders and chest for the pose.[12]
- Keep your shoulders down and relaxed. If you’re shrugging them up near your ears, take a deep breath and release your tension on the exhale.
-
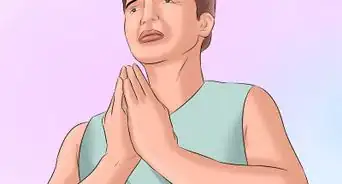
4Put your hands in prayer position to draw focus toward your heart. When you reach your arms while mentally moving through your body, put your palms together in the center of your chest. Touch your thumbs against your sternum and point your fingers straight up. Open up your shoulders so you can spread your chest.[13]
- Prayer position, on anjali mudra, helps you feel more centered and conscious of your inner self.
-
5Raise your arms straight up to lengthen your spine. Start with your arms at your side and spread your fingers wide apart. Slowly raise both of your arms in front of you, keeping your elbow straight. Keep lifting your arms until your fingers point up in the air above your shoulders. Hold the position for 5–10 counts before relaxing.[14]
- This stretch helps engage your stomach muscles and keep your spine straight.
-
6Stand on your tiptoes for improving your balance. Spread your toes and push them into the ground so you have better support. After straightening your back and neck, slowly shift your weight onto your toes and lift your heels off of the mat. Maintain your posture and don’t let your body lean forward or backward. Hold the pose for 5–10 breaths, or until you can’t any longer.[15]
- If you’re wobbling doing this variation, try practicing against a wall for support.
Warnings
- While this is a simple yoga pose, talk to your doctor before trying advanced positions to make sure it’s safe for you to do.⧼thumbs_response⧽
Expert Interview
Thanks for reading our article! If you'd like to learn more about yoga poses, check out our in-depth interview with Michiko Takatani.
References
- ↑ https://www.yogajournal.com/poses/mountain-pose/
- ↑ https://yogainternational.com/article/view/mountain-pose
- ↑ https://youtu.be/2HTvZp5rPrg?t=52
- ↑ https://www.yogabasics.com/asana/mountain/
- ↑ https://youtu.be/2HTvZp5rPrg?t=80
- ↑ https://youtu.be/NYhH8Gr35cI?t=290
- ↑ https://mindful.stanford.edu/2015/04/mountain-pose/
- ↑ https://www.yogajournal.com/poses/mountain-pose/
- ↑ https://www.yogabasics.com/asana/mountain/






-Step-16.webp)


