X
wikiHow is a “wiki,” similar to Wikipedia, which means that many of our articles are co-written by multiple authors. To create this article, volunteer authors worked to edit and improve it over time.
This article has been viewed 47,463 times.
Learn more...
Salon-style sculptured nails can be difficult to reproduce at home, but doing so is not impossible. It's best to start with basic forms and color schemes during your first few tries, but once you perfect your technique, you can eventually sculpt more complex shapes.
Steps
Part 1
Part 1 of 3:
Part One: Prepare the Natural Nail
-
1Sanitize the nail. Wash your hands with mild soap and warm water, then dry them with a lint-free towel.[1]
- Washing your hands will remove most bacteria and debris, but for more thorough cleansing, you should also scrub the area around and beneath the nail plate with a sanitized nail brush or soft toothbrush.
- Note that all of your tools should be sanitized before use, as well.[2]
-
2File the edge. Use a 180-grit nail file to shape the free edge of the nail. Keep the edge uniform in shape and length.
- Ideally, you should keep the free edge fairly short when applying sculpted nails. The artificial nail tip will be very thick where it meets your natural nail, and keeping the free edge short can minimize the risk of damage.
Advertisement -
3Etch the nail. Scuff the surface of the nail using a 240-grit soft file. Work the file in the direction of the nail growth until you no longer see any natural shine.[3]
- Etching the nail makes it easier for the artificial nail product to adhere to the surface of the natural nail.
- Filing the nail from side-to-side could damage the nail plate layers. As a result, air, contaminants, and debris can wedge themselves into the nail bed and ruin the design of the finished nail.
- After etching the nail, use a manicure brush to remove any dust from the surface of the nail.
-
4Soften and push back the cuticle. Soak the nails in warm water to soften your cuticles, then carefully push the cuticles back to reveal the entire nail surface.
- Mix a little mild detergent into the warm water before submerging your nails. Keep the nails completely submerged for one to three minutes.
- Dry the nails, then use a cuticle stick to gently push the cuticles back. Remove any translucent skin from the surface of the nail.
-
5Prime the nail surface. Brush a light, even coating of nail primer over the entire surface of the natural nail.
- The primer should remove oil and other moisture from the natural nail, allowing the artificial nail product to adhere more effectively. Do not touch the primed nail with your fingers since doing so could add more oil to the surface and cancel out the effect of the primer.
- Only use small amounts of primer since too much can irritate the nail and surrounding skin. It might be a good idea to lightly dab the loaded brush on a sanitized towelette to remove excess primer before applying the primer to your nail.


Advertisement
Part 2
Part 2 of 3:
Part Two: Sculpt the Artificial Nail
-
1Choose a nail form. The best nail form will depend upon the shape of the nailbed. If the nail form doesn't fit properly, it will be difficult to apply the sculpted nail and the finished product will be more easily broken.
- Regular nailbeds can use standard nail forms. Nails with high free edges may require oval forms, however. Additionally, nails that are flat or severely curved usually require square forms.
-
2Remove the backing. Peel the nail form from its backing, then poke out the center of the form.
- Place the removed center on the back of the form, centering it over the area that will face away from the natural nail. Doing so will give the form more support.
-
3Curve the form. Pinch the matching corners of the form to gently curve it, roughly matching the curve of the form to the curve of the natural nail.[4]
- Carefully rip the back of the form so that it will fit over the finger more easily.
- Ease the form into the right "c-curve" shape by gently rolling the center up and down. You may wish to pinch the outer corners of the form together to hold this curve, but avoid doing this if pinching the corners will distort the bend of the curve.
-
4Fit the form under the free edge. Guide the form so that the center opening fits beneath the free edge of the nail. Use a light touch to avoid distorting the shaped c-curve.[5]
- The ripped back end of the form should be wrapped around the finger and beneath the natural nail.
- Secure the form beneath the fingertip to ensure a tight fit.
-
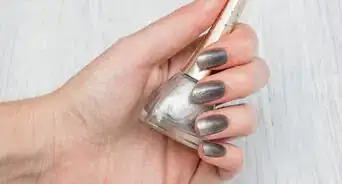
5Pour the monomer. Hold your nail brush vertically over a dappen dish, then slowly pour a small amount of acrylic monomer down the side of the brush and into the dish.[6]
- Monomer is the artificial nail liquid. It allows the colored acrylic nail powder to solidify into beads, and those beads are what you'll apply to the nail and form.
- Dip the brush into the monomer, then drag it over the side of the dappen dish to release excess liquid.
-
6Apply white powder to the form. Lightly touch the tip of the brush to the white nail powder. Allow the powder to absorb the nail liquid, then shape it over the free edge of the nail and onto the applied form.
- Note that you do not need to use white powder. Use any color nail powder you want, but it should be the color you plan to use for the tip of the sculpted nail.
- After positioning the bead over the free edge and form, tap down on the center of the bead with the side of your brush, spreading it over the entire free edge.
- Continue patting the bead with the side of your brush to sculpt the desired shape. Use the edge of the brush to push in the sides and align the edge of the artificial nail to the edge of the natural nail grove.
- Push along the seam of the bead with the tip of the brush to create a curve, then use the side of the brush to even out the tip of the artificial free edge.
-
7Place clear powder over the stress area. Reload the brush with nail liquid and dip it into clear powder. Once the powder absorbs the liquid, apply the bead to the stress area of the nail.
- Place the bead directly beneath the sculpted white tip. Pause for three seconds, then pat the bead over the edge of the white tip. This edge is known as the "stress area" since it is the spot that is weakest to potential breaks.
- Use the side of the brush to evenly smooth the clear product over the entire stress area and white tip.
-
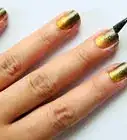
8Apply pink powder to the center of the nail. Reload your brush with nail liquid and dip the tip into pink powder. After the powder absorbs the liquid, apply the ball to the center of the natural nail. Shape it over the top of the nail.
- If you do not want to use pink powder, use nail powder in whichever color you want for the main body of the nail.
- Place the ball halfway down the surface of the natural nail, keeping it away from the sculpted white edge. Let the ball flow naturally for three seconds.
- Use the side of the brush to stroke the color across the top half of the nail. Brush the ball to both sides of the nail, then draw up the color so that it meets the edge of the sculptured white tip.
-
9Apply pink powder to the cuticle area. Use more nail liquid and pink powder to create another bead of product. Apply this product to the lower half of the natural nail, then use your brush to spread it.
- Place this bead halfway between your lower cuticle and the edge of your previous bead. Allow the bead to flow naturally for three seconds.
- Use the side of the brush to evenly stroke the product over the rest of the exposed natural nail.
- Do not get any product directly on the cuticle. In fact, you should use a clean brush tip to gently direct the product away from the cuticle itself.
-
10Allow the powder to cure. Allow the sculpted acrylic to cure for several minutes before continuing. The product is fully cured once it feels dry and as hard as your natural nail.
- The exact curing time will vary depending on the nail liquid and nail powder you use. Check the label for precise guidelines.
- As the nail cures, you can use a c-shaping stick to perfect the shape of the side walls and new free edge.
-
11Remove the form. Once the nail product has cured, you can peel away the form. The form should lift away easily without causing any damage to the sculpted nail.


Advertisement
Part 3
Part 3 of 3:
Part Three: Finish the Sculptured Nail
-
1File into the final shape. Using a 180-grit nail file and 240-grit nail file, smooth the edges of the sculpted nail to even out any inconsistencies.
- Start with the 180-grit file, then work over the side walls of the nail. Once the sides look good, file down the free edge.
- Swap to your 240-grit file and work over the surface of the nail. Sand away any uneven lumps in the artificial nail surface.
- Tilt the 240-grit file slightly and continue working over the surface of the nail to perfect the contour. Use a clean nail brush to wipe away any dust when finished.
-
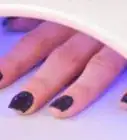
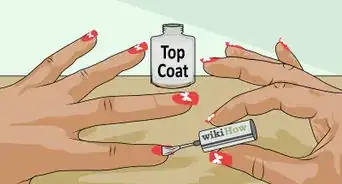
2Seal the nail. Apply a non-cleansing gel sealer over the finished nail, then cure the sealer under heat for two minutes.
- Brush a thin layer of the seal over the entire nail just as you would apply a top coat of polish. Start at the cuticle, then gradually work down toward the free edge.
- Place the nail beneath an LED heat lamp for two minutes to allow the sealer to cure. Note that some sealers may require more or less curing time, so it's best to check the label instructions before proceeding.
-
3Apply cuticle oil to the nail. Dab a small bead of cuticle oil onto the center of the nail. Use your fingers to rub the oil over the nail and into your cuticles.[7]
- You only need a small droplet of oil for each nail. It should help condition your cuticles while giving the artificial nail a slight shine.
-
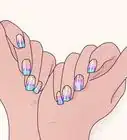
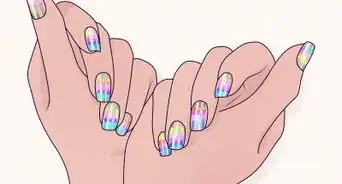
4Examine the finished nail and repeat as needed. This step completes the first sculpted nail. Repeat the sculpting process until all nails are evenly decorated.
- You can prepare your natural nails all at once, but the actual sculpting and finishing portions of the process must be completed one-by-one.


Advertisement
Things You'll Need
- Mild soap
- Water
- Shallow dish
- Lint-free towel
- Nail brush
- 180-grit nail file
- 240-grit nail file
- Cuticle stick
- Nail primer
- Adhesive nail forms
- Kolinsky nail brush
- Dappen dish
- Acrylic monomer (nail liquid)
- Acrylic polymer powder (nail powder), any colors
- C-shaping stick
- Gel sealer
- LED heat lamp
- Cuticle oil
Warnings
- Some monomers may stink up your workspace.⧼thumbs_response⧽
- Only use HEMA acrylic. MMA acrylic may harm your nails.⧼thumbs_response⧽
Advertisement
References
- ↑ https://www.cdc.gov/handwashing/when-how-handwashing.html
- ↑ https://www.cdc.gov/healthywater/hygiene/hand/nail_hygiene.html
- ↑ http://www.hooked-on-nails.com/artificialnails.html
- ↑ https://www.youtube.com/watch?v=sxdT7GelPl0
- ↑ https://www.youtube.com/watch?v=sxdT7GelPl0
- ↑ https://www.youtube.com/watch?v=6ovJkOK-1Lg
- ↑ https://www.youtube.com/watch?v=2_oWUt44MzQ
About This Article
Advertisement