This article was co-authored by Kelsey Morey. Kelsey Morey is a Professional Hair and Makeup Artist, Model and the Owner and Founder of Haus of Pretty based in Westport, Connecticut. With more than ten years of experience, she specializes in balayage, hair care, color care, and photoshoot styling. Kelsey received her training from Brio Academy of Cosmetology and John Casablancas Modeling and Career Center. She also completed her apprenticeship with Warren Tricomi luxury salons.
This article has been viewed 21,179 times.
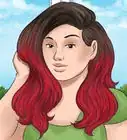
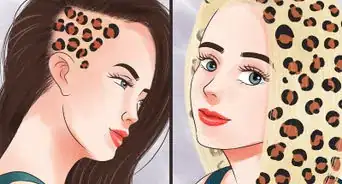
Balayage is a special hair technique that combine ombre with highlighting. When it comes to doing blonde balayage, there are two routes that you can take. If you have brown or black hair, you can use bleach and the balayage technique to make your hair appear blonde. If you have blonde hair, you can use dye and a reverse balayage technique to add dimension to your hair.
Steps
Using Balayage to Go Blonde
-
1Protect the client's skin and clothing. Have the client sit in a chair, then drape a dyeing cape around his or her shoulders. It would be a good idea to apply some petroleum jelly to the skin around their hairline, ears, and neck.
- Protect your skin by putting on a pair of plastic gloves.
- It is highly recommended that you get someone to balayage your hair for you since the dyes are very strong and may cause inconsistent results if you do it at home.
-
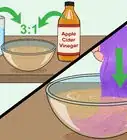
2Prepare your bleach in a non-metal bowl. Plan on using a 1 to 1½ ratio of bleach and 40 volume developer. Consider adding 1/8-ounce (30 milliliters) of Olaplex as well to further protect the client's hair against damage.[1]
- Keep in mind that 40 volume developer is strong, so you may consider using a less potent developer, such as 10, 20, or 30. These will take longer to produce a blonde but will be less harsh.
Advertisement -
3Pull all of the hair up into bun, except for the bottom-most layer. Use the handle of your tinting brush to create a clean, even part.[2]
- The hair must be dry. Do not bleach wet hair.
-
4Gather a thin, horizontal section of hair, and hold it by the tips. Slide the handle of your tinting brush through the section of hair, separating the top layer from the bottom. Leave the bottom layer alone and hold the top layer by the ends. It will taper down into a triangular shape.[3]
-
5Paint the sides and ends of the section with your tinting brush. Hold the brush so that the bristles are oriented vertically as you paint the sides. Do not extend the bleach to the roots. Rotate the brush so that the bristles are horizontal as you paint the ends.[4]
-
6Blend the bleach into the center of the section. Use light, feathery strokes to fill the center of the V with more bleach. Do not extend this as high as the bleach on the edges.[5]
-
7Wrap the section with aluminum foil or plastic wrap. You can also place a sheet of plastic under the section, and another sheet on top. Once you have the section wrapped, gently set it down.[6]
- This is important, because it will keep the rest of the hair from getting bleached.
-
8Let down another layer of hair, and paint it using the same method. As you continue to let down layers of hair, you will need to work in larger sections. You can make them as narrow as 2 to 3 inches (5.08 to 7.62 centimeters) to as wide as the width of the head.[7]
- Never extend the bleach on the side edges to the roots.
- Only paint the top layer of hair on each section, not the underside.
- Remember to wrap each section as you finish it.
-
9Allow the bleach to process. Use the time recommended on the package as a guideline. Check back on the hair every 5 minutes or so; everyone's hair reacts to bleach differently, and the client's hair may bleach sooner than what's written on the package.[8]
- Do not pin the hair up or cover it with a shower cap, or you'll mess up the blending.
- Remember that a higher number developer will lighten your hair faster than a lower number developer.
-
10Rinse the bleach out, then follow up with a toning shampoo. You can use a pre-mixed purple or blue shampoo to even out the tone of your blonde.[9]
- Read the instructions on the toner. Some brands need to be rinsed out immediately while others need to be left in for about 10 minutes.
- Make sure that you rinse the bleach out completely.
-
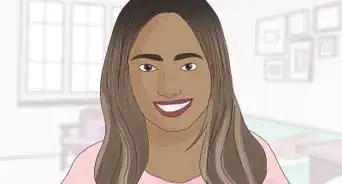
11Dry and style the hair. Because of how harsh bleach is on hair, it is recommended that you avoid heat styling it for a while. If you really want to, consider doing a gentle blow-out with a hair drier and a round, barrel brush.


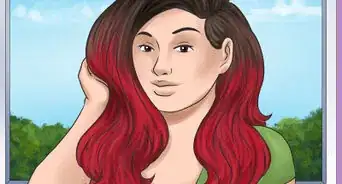
Adding Dimension to Blonde Hair
-
1Protect your clothing, skin, and workspace. Cover your counter with newspaper or a plastic bag. Put on an old shirt you don't care about, or drape a dyeing cap/old towel around your shoulders. Apply petroleum jelly around your hairline and neck, and slip on a pair of plastic gloves.
-
2Mix your dye. Purchase a dye kit, and mix the dye according to the instructions inside. Use a color that's darker than your own, such as dark blond, light brown, or ash brown.[10]
-
3Brush and part your hair down the center. Check the label on your packet of dye first to find out if your hair needs to be wet or dry. If your hair needs to be wet, get it wet.[11]
-
4Apply the dye to your part and hairline, then brush to blend it out. Apply the dye to your part using the applicator bottle. Blend the dye down both sides of your part with a comb. Next, smooth your hair back, away from your face. Squeeze out more dye along your hairline, then comb your hair back.[12]
-
5Create a diagonal part going from your forehead towards your nape. Use the handle of a rat-tail comb to part your hair. Start at the center part, about an inch (2.54 centimeters) from the hairline, and finish at the back of your head. Follow the natural line of your hair as best you can.[13]
- Comb the hair that's on top out of the way.
- Do this on just one side of your head for now: left or right.
-
6Apply dye to your roots, then blend it down. Run dye right along the part. Blend it down into your hair with a comb, just like you did with your part and front hair line.[14]
-
7Continue dyeing your hair in diagonal rows. Use the handle of your rat-tail comb to part your hair again, about 1 inch (2.54-centimeters) above the first row. Apply the dye and blend it out with your comb. Keep going until you reach the crown of your head.[15]
- Remember: only apply the dye to the roots. The combing part will blend the dye out as much as required.
- You can also use this technique to do touchups.
-
8Repeat the process on the other side of your head, then do the back. Apply the dye in angled rows to the other side of your head first, starting from the bottom and working your way up. When you are done, part your hair down the center, and apply the dye to each side of the part. Remember to blend it out with your comb.[16]
-
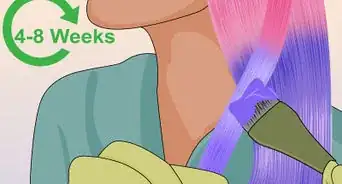
9Allow the dye to develop. Do not pin your hair up or tuck it under a shower cap, as this might mess up your blending. Instead, allow the dye to sit in your hair for the time recommended on the package. For more brands of dye, this will only be 20 to 25 minutes.[17]
-
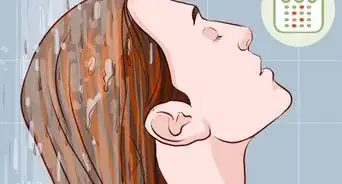
10Rinse the dye out with cold water, then follow up with conditioner. Lean your head back as you rinse the dye out. Once the water runs clear, apply a conditioner to your hair. Let it sit for 2 to 3 minutes, then rinse it out as well.[18]
- Use the conditioner that came with your dye kit. If you did not get one, use a sulfate-free conditioner or one meant for color-treated hair.
-
11Dry and style your hair as desired. It would be best if you skipped the heat-styling for now, however. If you want to hair straight hair, consider doing a blow-out with a hair dryer and a round-barrel brush.[19]


Expert Q&A
-
QuestionHow do I tell a stylist how I want my balayage to look?
 Kelsey MoreyKelsey Morey is a Professional Hair and Makeup Artist, Model and the Owner and Founder of Haus of Pretty based in Westport, Connecticut. With more than ten years of experience, she specializes in balayage, hair care, color care, and photoshoot styling. Kelsey received her training from Brio Academy of Cosmetology and John Casablancas Modeling and Career Center. She also completed her apprenticeship with Warren Tricomi luxury salons.
Professional Hair and Makeup ArtistBring inspiration photos of hair that you like to show your stylist, and they'll be able to recommend the best treatments.
Things You'll Need
Using Balayage to Go Blonde
- Hair dyeing cape
- Plastic gloves
- Petroleum jelly
- Non-metal mixing bowl
- Bleach and 40 volume developer
- Olaplex (optional)
- Tinting brush
- Hair clips
- Plastic wrap or aluminum foil
- Hair toner
Adding Dimension to Blonde Hair
- Hair dyeing cape
- Plastic gloves
- Petroleum jelly
- Hair dye kit in dark blond, light brown, or ash brown
- Hair clips
- Rat-tail comb

-Hair-at-Home-Step-16-Version-5.webp)
References
- ↑ https://www.youtube.com/watch?v=GR9jFI6K8Zg
- ↑ https://www.youtube.com/watch?v=k9XS-Br2uuU
- ↑ https://www.youtube.com/watch?v=k9XS-Br2uuU
- ↑ https://www.youtube.com/watch?v=k9XS-Br2uuU
- ↑ https://www.youtube.com/watch?v=k9XS-Br2uuU
- ↑ https://www.youtube.com/watch?v=k9XS-Br2uuU
- ↑ https://www.youtube.com/watch?v=k9XS-Br2uuU
- ↑ https://www.youtube.com/watch?v=k9XS-Br2uuU
- ↑ https://www.youtube.com/watch?v=k9XS-Br2uuU
- ↑ https://www.youtube.com/watch?v=cbpPduFnljg
- ↑ https://www.youtube.com/watch?v=cbpPduFnljg
- ↑ https://www.youtube.com/watch?v=cbpPduFnljg
- ↑ https://www.youtube.com/watch?v=cbpPduFnljg
- ↑ https://www.youtube.com/watch?v=cbpPduFnljg
- ↑ https://www.youtube.com/watch?v=cbpPduFnljg
- ↑ https://www.youtube.com/watch?v=cbpPduFnljg
- ↑ https://www.youtube.com/watch?v=cbpPduFnljg
- ↑ https://www.youtube.com/watch?v=cbpPduFnljg
- ↑ https://www.youtube.com/watch?v=cbpPduFnljg
About This Article