This article was co-authored by wikiHow Staff. Our trained team of editors and researchers validate articles for accuracy and comprehensiveness. wikiHow's Content Management Team carefully monitors the work from our editorial staff to ensure that each article is backed by trusted research and meets our high quality standards.
There are 11 references cited in this article, which can be found at the bottom of the page.
This article has been viewed 15,039 times.
Learn more...
Build and mount your own clothing rack or create shelf space to display your clothes on a wall with just a few simple tools and materials! Use industrial pipes and pipe fittings to make your own clothing rack that you can mount to your wall and hang your clothes from, or install your own shelves that you can use to display your folded items. You can also use other DIY methods to display your clothes on a wall, such as adhesive hooks, pegboards, or even chains! Just as important as what you use to display your clothes is how you display them. If you’re displaying clothes for retail, make sure people can see them and use strategies to encourage people to buy more.
Steps
Hanging Clothes on a Wall
-
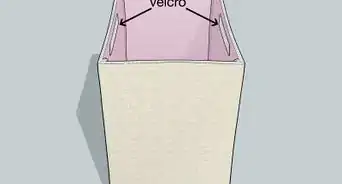
1Attach adhesive hooks to your wall to hang your clothes from. Adhesive hooks have a paper backing that you remove to expose a sticky adhesive. Stick the hooks onto your wall where you want to display your clothes. Put your clothes on hangers and then hang them from the hooks.[1]
- Adhesive hooks are usually not very large and may limit how many hangers you can fit on them.
- You can find adhesive hooks at home improvement stores, department stores, and online.
-
2Install a pegboard on your wall to attach your clothes onto. Nail or screw a pegboard onto your wall evenly and securely. Move the individual pegs around so you can hang your clothes from them to display them.[2]
- Pegboards are customizable and allow you to change the look of your display easily.
- Look for worn or older looking pegboards at yard sales or thrift stores to add a hip, distressed style to your display.
Tip: Arrange the clothes to form a pattern, such as a zig zag or a staircase for an interesting look.
Advertisement -
3Use a wall-mounted clothing rack to display your clothes. You can purchase a clothing rack that you can hang on your wall by either nailing it or screwing it in place with a power drill. Choose a rack that is large enough to suit your needs and hang it so it’s even and securely fastened to the wall by driving the nails or screws all the way into the wall. Put your clothes on hangers and hang them from the rack.[3]
- Don’t hang the rack too high or you won’t be able to reach it.
- You can find clothing racks at department stores and online.
-
4Hang clothing on hangers from a chain so they’re visible. Insert a nail into your wall near the ceiling and hang a chain from it. Put your clothes on hangers and slide the hangers into the links of the chain to display them.[4]
- You can display the clothes at a greater height so people can see what you have available.
- Make sure the clothes are hanging at too great of a height of you want people to be able to remove them from the chains.
- You can find chains at hardware stores, home improvement stores, and online.


Creating an Industrial Clothing Rack
-
1Measure and mark the mounting locations. If you’re installing racks to drywall, locate and mark 2 wall studs you can use to mount them to. For any other materials, choose the height you want the rack to be and mark the location, then use a ruler or tape measure to measure the second mounting site, and draw a straight line between them with a pencil so the racks will be even.[5]
- You can use a ruler, level, or straight edge to draw the straight line.
-
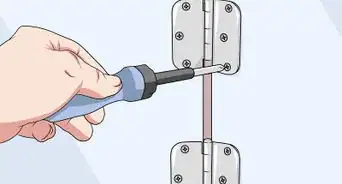
2Screw 1⁄2 inch (1.3 cm) flange fittings to the spots you marked. A flange fitting is a metal pipe fitting that is designed to fit 2 pipes together, but you can use them to mount your racks to your walls! Place the flange fitting over the 1 of the mounting sites you marked and use a power drill do drive 1 inch (2.5 cm) screws into each of the screw holes of the fitting. Then, attach the other flange fitting to the wall in the same fashion.[6]
- You can find flange fittings at hardware stores and online.
- If you’re drilling into a tile or concrete wall, drill pilot holes first, then drive the screws into the holes with a power drill.
-
3Attach 10 in (25 cm) pipe nipples to the flange fittings. Pipe nipples are short lengths of pipes with threaded ends. Screw-in the pipe nipple into the flange fittings so you can attach additional pipes to form your wall rack.[7]
- Screw the pipe nipples into each of the flange fittings.
- You can find pipe nipples at hardware stores, plumbing supply stores, and online.
- Make sure the nipples are firmly secured in the fittings.
Tip: You could call it a day and simply hang clothes on hangers from the pipe nipples if you want!
-
4Use 90-degree pipe elbows to hold a length of 1⁄2 in (1.3 cm) pipe. Pipe elbows are curved fittings that allow you to add bends to piping. You can connect the 2 flange fittings to form a clothing rack by attaching a pipe elbow to 1 of the pipe nipples, sliding a length of steel pipe into it, and then securing the pipe by adding a pipe elbow to the other pipe nipple. The pipe will be held securely between the 2 pipe elbows.[8]
- To fit the length of pipe, insert it into 1 elbow first, then attach the second pipe elbow to the other end of the length of pipe and pipe nipple.
- Choose a length of pipe that measures the distance between your 2 flange fittings.
- You can find 90-degree pipe elbows and 1⁄2 in (1.3 cm) pipe at hardware stores, plumbing supply stores, and online.
-
5Hang clothes from the industrial pipes to display them. Use hangers to hang shirts, pants, jeans, or any other items from the length of pipe between the 2 fittings. Place the hangers so the clothing hangs at an angle so you can see what it looks like without having to sift through them.[9]
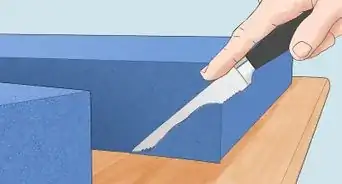
- You could also lay a board across the pipes and place folded clothes on them to display them.


Using Shelves to Display Clothes
-
1Locate and mark 2 wall studs if your wall is made of drywall. If you’re installing shelves to drywall, you need to support them by mounting them onto wall studs. Find a stud with a stud finder and mark its location with a pencil. Then, locate the adjacent stud and mark it with a pencil as well.[10]
- You can also locate studs by knocking lightly on the wall and listening for a higher, more solid sound that would indicate that a stud is behind the wall.
- If you have a plaster wall, use a stud finder to locate studs behind the thick surface.
-
2Hold a mounting bracket against the wall and mark the location. Mounting brackets are L-shaped metal pieces used to support shelves. Place 1 of the brackets against the wall at the height you want your shelf to be. Use a pencil to mark the location of the bracket on the wall.[11]
- If your wall is made of plaster or drywall, choose a location above a wall stud.
Tip: If you plan to mount multiple levels of shelves, place the bracket against the wall at each of the levels you want to place them. Then, measure the space between each of the brackets so you can install them evenly.
-
3Draw a straight line to the second stud and mark the location. Use a ruler, level, or straight edge to draw a straight line from the mark you made for the first bracket to the location you plan to install the second mounting bracket. The line must be even in order for the shelves to be installed evenly.[12]
- If you’re mounting the shelves to wall studs, make sure the second location is over a stud.
-
4Screw the mounting brackets to the wall with a power drill. Place the mounting bracket against the wall at the location you marked. Use a power drill to drive 1.25 in (3.2 cm) screws into each of the screw holes on the bracket. Make sure the brackets are secure in the wall by wiggling them with your hands.[13]
- Drive the screws all the way into the wall.
- If your mounting brackets came with screws, use them to install the brackets.
- If you’re drilling into tile or concrete, drill pilot holes into the wall, then drive the screws into place.
-
5Place the shelf on the mounting brackets and screw it into place. Rest the shelf on the mounting brackets and make sure it sits evenly. Use a drill to drive screws into the shelf so it’s anchored to the brackets.[14]
- Use a level to make sure the shelf is even.
- If you prefer, you could rest the shelf on the brackets without screwing it into place.
-
6Fold your clothing items and arrange them on the shelf. Take your shirts, pants, socks, or underwear, fold them, and stack them on the shelf to display them. Keep similar items grouped together and organize the stacks by sizes.[15]
- Fold t-shirts so you can see the design on top.


Displaying Retail Clothes on a Wall
-
1Avoid overfilling or cramming your wall space. Your customers need to be able to peruse and access your clothing items easily. Jamming up the wall space with as many clothes as possible will make it harder for them to shop or find something that they like. Keep items grouped together with about 4–6 inches (10–15 cm) of space between different items.[16]
- People can be overwhelmed by an overloaded display wall.
- Don’t keep all of your inventory out as well. Pull out more items as you need them.
-
2Make sure your items are within reach for your customers. Don’t place the clothes you want people to pick up and buy at a height too high for them to reach or they’re unlikely to purchase them. Keep your clothes at a height between 4–5 feet (1.2–1.5 m) so your customers can look through them and make their selection.[17]
Retail Tip: Have a display item at a greater height so people can see what items you have available from a greater distance.
-
3Display popular or clearance items more than once so people see them. Double expose any clothing items that you really want to sell, whether they’re popular items or you need to clear out your inventory. If you have extra wall space or an empty shelf, fill it with an item you want to get more attention.[18]
- Double exposing items can give customers the impression that they like it more, as well as increase the likelihood that they’ll see the item.
-
4Put together outfits to encourage people to buy more items. Put together an outfit on a mannequin displayed near your clothes or group items of an outfit together to get people to buy more than 1 item. For example, you could display jeans next to a shirt and jacket that make a good-looking outfit.[19]
- You could offer a discount for a customer purchasing the entire outfit to encourage them to buy and spend more.


Things You’ll Need
Creating an Industrial Clothing Rack
- Ruler, level, or tape measure
- Pencil
- 1⁄2 inch (1.3 cm) flange fittings
- 10 in (25 cm) pipe nipples
- 90-degree pipe elbows
- Power drill
- 1 inch (2.5 cm) screws
Installing Shelves
- Flat board for a shelf
- Mounting brackets
- Ruler, level, or straight edge
- Pencil
- Power drill
- 1.25 inches (32 mm) screws


References
- ↑ https://www.businessinsider.com/how-stores-get-you-to-spend-money-2018-8
- ↑ https://www.entrepreneur.com/article/223808
- ↑ https://bizfluent.com/how-2273556-display-merchandise-clothing-store.html
- ↑ https://bizfluent.com/how-2273556-display-merchandise-clothing-store.html
- ↑ https://youtu.be/YCmNwQAO8HQ?t=401
- ↑ https://youtu.be/YCmNwQAO8HQ?t=486
- ↑ https://www.bobvila.com/slideshow/9-cool-projects-you-can-make-with-pipe-and-fittings-52164#cabinet-hardware
- ↑ https://www.bobvila.com/slideshow/9-cool-projects-you-can-make-with-pipe-and-fittings-52164#cabinet-hardware
- ↑ https://youtu.be/HXibsVYfitc?t=299
- ↑ https://www.popularmechanics.com/home/interior-projects/g15857034/how-to-hang-things-on-the-wall/
- ↑ https://www.bobvila.com/articles/how-to-hang-shelves/
- ↑ https://www.bobvila.com/articles/how-to-hang-shelves/
- ↑ https://www.popularmechanics.com/home/interior-projects/g15857034/how-to-hang-things-on-the-wall/?slide=1
- ↑ https://www.bobvila.com/articles/how-to-hang-shelves/
- ↑ https://www.housebeautiful.com/lifestyle/organizing-tips/tips/g911/closet-organization-ideas/
- ↑ https://www.businessinsider.com/how-stores-get-you-to-spend-money-2018-8
- ↑ https://www.entrepreneur.com/article/223808
- ↑ https://www.businessinsider.com/how-stores-get-you-to-spend-money-2018-8
- ↑ https://www.businessinsider.com/how-stores-get-you-to-spend-money-2018-8
About This Article