X
wikiHow is a “wiki,” similar to Wikipedia, which means that many of our articles are co-written by multiple authors. To create this article, volunteer authors worked to edit and improve it over time.
This article has been viewed 118,661 times.
Learn more...
Sometimes video-game consoles can collect a lot of dust, leading to loud noise from the fan, and a lot of heat generated from the heat sink. This makes it crucial to often dismantle and clean the inside of your console in order to maintain its condition. Given that this can be a tedious and complex process, the following steps will demonstrate how to complete this process specifically for a PS4 Slim.
Steps
Part 1
Part 1 of 3:
Disassembling the PS4 Slim
-
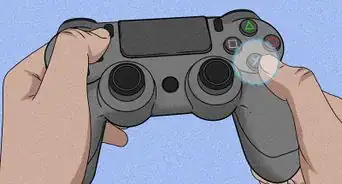
1Shut down and unplug the PS4 Slim. Place it on an open table in a clean environment.
-
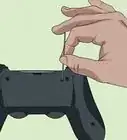
2Pull firmly on the front corners and front edge. Unclip the top cover, then slide it back to remove it.
- Keep in mind, newer PS4 Slims which have not been dismantled before may require more firmness when pulling.
Advertisement -
3Remove the cover to expose two metal plates: One shielding the fan and heatsink and another reflective metal plate on top of the battery pack.
-
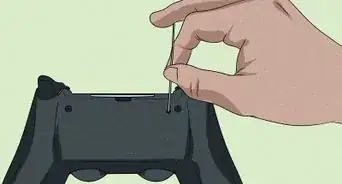
4Remove the screws. Preferably, use a T8 or T9 Security Torx to remove the two long screws holding in the reflective metal plate.
-
5Remove the reflective metal plate and unscrew the other long screws holding in the rest of the battery pack.
-
6Lift up the battery pack just enough to be able to uncover the lip of the pack. This will allow you to remove the metal plate shielding the fan and heatsink.
- Make sure you do not take out the entire battery pack, as there is no need to do so.
-
7Remove all the screws holding the metal plate and remove the plate to fully expose the fan and heatsink.


Advertisement
Part 2
Part 2 of 3:
Cleaning the PS4 Slim
-
1Clean the outer vents. Use a small brush and canned air to clean the outer vents and intake ports around the sides of the console.
-
2Clean the heatsink. Use the same brush to clean the heatsink, as well as canned air for a deeper clean.
-
3Clean the fan and blades. Use canned air and cotton swabs dipped in rubbing alcohol to thoroughly clean the fan and its blades.


Advertisement
Part 3
Part 3 of 3:
Reassembling the PS4 Slim
-
1Place the metal plate used to cover the fan and heatsink back into its proper spot. Screw back in the screws.
- This will be the most tedious part of the process, as it can be difficult to screw back in the screws due to their size.
-
2Firmly push down on the battery pack so it is fully locked back in place. Proceed to screw in the screws.
-
3Put the reflective metal plate on top of the battery pack in its original spot. Once again, screw back in the screws.
-
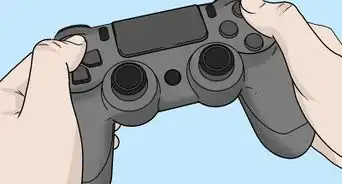
4Slide and snap the top cover back into place.


Advertisement
Things You'll Need
- Small brush
- Cotton Swabs
- Rubbing alcohol
- Canned air
- T8 or T9 security torx
- Electric screwdriver


References
About This Article
Advertisement