This article was co-authored by wikiHow Staff. Our trained team of editors and researchers validate articles for accuracy and comprehensiveness. wikiHow's Content Management Team carefully monitors the work from our editorial staff to ensure that each article is backed by trusted research and meets our high quality standards.
There are 9 references cited in this article, which can be found at the bottom of the page.
This article has been viewed 14,153 times.
Learn more...
Dog collars are practical accessories with an important function, but that doesn’t mean they have to be plain or dull. Have some fun with your pet’s everyday wear by adding some creative decoration, from studs to charms, tooling to fabric. Spruce your pooch up for a special occasion or express your dog’s personality and your own with stylish DIY embellishments to their collar.
Steps
Adding Easy Embellishments
-
1Bedazzle with rhinestones. Add some sparkle to your dog’s collar with rhinestones. Pick the colors and sizes you’d like, then adhere them to your dog’s collar using an extra-strong craft glue that’s appropriate for its material.[1]
- To ensure that the glue doesn’t show around the edges, use a toothpick to apply a small dot of it onto the back of each rhinestone before pressing the stone down where you'd like it on the collar.
- Be sure to let your dog’s collar dry overnight before you put it on them.
-
2Loop on hair ties. For a really simple DIY decoration, pick up some hair ties that have come pre-decorated with things like flowers, stars, or butterflies. Twist the bands two or three times around your dog’s collar until they fit snugly, and then adjust them to where you’d like them to be positioned.[2]Advertisement
-
3Add charms. Your dog already should have an identification tag on their collar, but why not add some bling with a charm or two? Get a dangling charm of your choice (from festive holiday symbols to sports team logos to skulls and crossbones), and loop it securely into the metal ring or buckle on your dog’s collar.[3]
-
4Illuminate it with lights. Clip-on lights offer a practical and fun addition to your dog’s collar. Get them in multiple colors and/or with flashing bulbs to make your dog stand out, even on the darkest nights.[4]
- Be sure that you get LED lights that are designed to be wearable. They should have plastic casings to protect your dog from the bulbs and prevent the lights from overheating.
-
5Decorate with fabric paint. Use a permanent, nontoxic fabric paint with a fine-point applicator to write words (like your dog’s name) and draw pictures (like bones) on your dog’s fabric collar.
- Pick a color or colors that will stand out against the color of your dog’s collar. For instance, if your dog’s collar is dark, choose light and bright colors like white or neon yellow. If your dog’s collar is a light or bright shade, pick dark colors like navy or black for your paint.
- Be sure to protect your work surface with plastic or newspaper. Let your decorated collar dry for at least 24 hours before you put it on your dog.


Decorating Leather Collars
-
1Add studs. This classic decoration will make your dog look stylish and tough. You can simply add a row of them, arrange them in a pattern, or even spell out your dog’s name.[5]
- Start by marking your design onto the top of the collar with scratches using an X-Acto blade. Then, use the X-Acto blade to cut parallel holes wherever you’d like your studs to go.
- Push each stud through its hole, and screw the tails in securely using a screwdriver or pliers. To ensure it’s snugly attached to the collar, tap each side of the stud with a hammer.
- Studs are available for purchase online and at most craft stores. Be sure to get ones that match the thickness of your dog’s leather collar.
- Remember not to add too much metal to your dog's collar. You don't want to weigh your dog's neck down with studs.
-
2Tool your collar. Tooling allows you to add durable designs and lettering to leather collars. You’ll need to get leather tools with letters and/or patterns that will give you the desired design. Then, soften the leather by using a spray bottle to mist it with water a few times. After you let it sit for two minutes, arrange the tool where you’d like it to be on top of the collar, and strike it firmly using a leather crafting mallet to imprint your design.[6]
- Remember that the tool pattern is the mirror opposite of what will appear on your dog's collar.
- Be sure to strike the tools against a hard surface.
- You can decorate the imprints with craft paint to add color.
- Let your freshly tooled collar rest overnight, and then apply a coat of leather stain that matches the collar’s color before putting it on your dog.
-
3Punch holes. Create cut-out designs on your dog’s leather collar using a leather hole punch. You can use this method to decorate without adding extra weight or potentially dangerous metal to your dog’s collar.[7]
- Mark where you’d like your holes on the collar first, using a piece of chalk. If you’re going for a precise design, use a gridded paper or ruler to ensure that your placement is accurate.
- Set the size and shape of hole you’d like on your leather hole puncher. Place the point where you’d like your hole to be on the leather, and compress the handles of the pliers to punch the hole by hand.
- If you don’t want to invest in a leather hole punch, you can also create holes using an awl (or, alternatively, a large nail) and a mallet. Position your collar over a scrap piece of wood. Then, place the awl’s point where you’d like your hole to go, and strike it firmly with a mallet to slowly drive a hole through the collar.


Sewing Simple Fabric Decorations
-
1Recycle a collared shirt. Measure your dog’s neck, and find an old shirt with a collar that’s about the same size or a bit bigger. Use a seam ripper to pick apart the stitches holding the collar to the body of the shirt. Button the collar over your dog’s existing collar.[8]
- You can also use a scissors to cut the collar away, but this method is not preferable since you’ll have to seam the cut edge to keep it from fraying.
- If you don’t have a collared shirt from your own wardrobe that’ll work, it’s easy to track a cheap one down at a thrift store where they’ll have multiple styles and sizes available.
-
2Add a fabric flower. Attach a fabric flower to your dog’s collar with a button snap closure. Sew one side of the closure to the base of the flower, and one side to your dog’s collar wherever you would like it to go. Then, simply snap the two together![9]
- It’s best to use a flower made from a fairly durable fabric. However, the nice part about this decoration method is that you can always change up the flower according to the occasion or as the old one wears out.
-
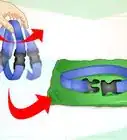
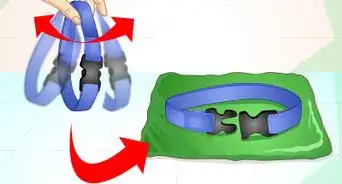
3Wrap with fabric. Add a splash of color and/or pattern to your dog’s collar by giving it a cloth makeover.[10]
- Cut a rectangular piece of fabric that is the length of your dog’s collar, and a centimeter more than twice its width. Fold and hem the short outside edges of your fabric so that it is the length of your dog’s collar minus the buckle and holes.
- With the back-side of the fabric facing out, fold your fabric in half along the long edge, and sew the two edges together to create a loop. Trim your thread, and flip the loop right-side out so that the seam is on the inside of the loop.
- Slip your dog’s collar through the tube of fabric with the seam at the back, and you’re done! If the shape isn't looking right, try pressing it with an iron to flatten the fabric and hold the folds.
-
4Add a bow tie. Give your dog a bit of hip or fancy flare by sewing them a bow tie. Use colorful, patterned fabrics to make their tie pop.
- Cut two rectangular pieces of fabric, one for your bow that’s twice as long as it is wide (for instance, 9” x 4.5”) and one for the tie with a proportion of about 4x5 (for instance, 2” x 2.5”).
- Fold over the long edges of both rectangles so that the patterned front-side of the fabric overlaps in the back. Press the folds into place using an iron on a setting appropriate to your fabric.
- Next, fold each piece in half with the overlapping back-side out and sew together along the short edges of the fabric to create two loops. Flip the fabric the right-side out to hide the seams inside the loops.
- Press your longer rectangular loop into a bow with the seam at the center. Slip your bow through the smaller "tie" loop to hold it in place in the center. Press your tie with an iron to encourage it to hold its shape.
- To attach your bow tie to your dog’s collar, simply slide the collar through the back of the tie loop, between it and the bow, and adjust it to the position you’d like on your dog’s neck.


Warnings
- Decorating leather collars often involves sharp tools. These crafts are probably not wise to do with children. Be cautious by reading each tool’s safety warnings, wearing gloves, and never cutting towards your body.⧼thumbs_response⧽
- Never use materials to decorate your dog’s collar that could be toxic to them or harmful to the environment.⧼thumbs_response⧽

References
- ↑ http://www.sheknows.com/pets-and-animals/articles/948401/diy-bling-dog-collar
- ↑ http://kolchakpuggle.com/2014/06/ridiculously-easy-diy-dog-collar-accessories.html
- ↑ http://www.poochieheaven.com/collars/collars-charms/dangling-charms/
- ↑ http://www.ubergizmo.com/2011/02/diy-led-dog-collar/
- ↑ http://makezine.com/2009/07/24/how-to_leather_dog_collar/
- ↑ http://www.ebay.com/gds/Top-5-Ways-to-Customize-a-Leather-Dog-Collar-/10000000178722340/g.html
- ↑ http://www.manmadediy.com/users/chris/posts/1676-how-to-3-ways-to-punch-a-hole-in-a-leather-belt
- ↑ http://craftbits.com/project/recycled-dog-collar/
- ↑ http://www.ebay.com/gds/Top-5-Ways-to-Customize-a-Leather-Dog-Collar-/10000000178722340/g.html
About This Article

To decorate your dog’s collar, add some sparkle with glue-on rhinestones, or loop on some hair ties with cute things like flowers, stars, or butterflies. You can also add some unique flair with some dangling charms or clip-on LED lights. For a sweet, personalized touch, use fabric paint to write your dog’s name and draw pictures of its favorite things, like bones or trees. To make your dog look sassy and tough in its leather collar, add some shiny metal studs. For more tips from our Veterinary co-author, like how to sew fabric decorations for your dog’s collar, keep reading!