This article was co-authored by wikiHow Staff. Our trained team of editors and researchers validate articles for accuracy and comprehensiveness. wikiHow's Content Management Team carefully monitors the work from our editorial staff to ensure that each article is backed by trusted research and meets our high quality standards.
There are 24 references cited in this article, which can be found at the bottom of the page.
The wikiHow Video Team also followed the article's instructions and verified that they work.
This article has been viewed 10,442 times.
Learn more...
Decorating glass bottles with tissue paper is a cost-effective way to create festive centerpieces, gifts, and decor. Tissue paper is easy to find and comes in a variety of colors and patterns so the possibilities are limitless when it comes to making interesting designs. You can wrap the bottle itself with loose paper in a few minutes or put some time into pasting the paper onto the bottle for a more polished look.
Steps
Wrapping a Glass Bottle with Tissue Paper
-
1Lay 2 sheets of wrapping paper onto your work area skewed at 45-degree angles. Use two different colors of wrapping paper and lay them so the corners make 45-degree angles with each other. That way, both sheets of wrapping paper will be visible. You can use 2 solid colors, 2 differently-patterned sheets, or 1 patterned sheet and 1 solid-colored one.[1]
- The color on the bottom is the main color that will be covering most of the bottle. The one on top will be the accent color sticking out from the top.
- If one side of the bottom tissue paper is more vibrantly-colored than the other, make sure the vibrant side is facing down so it will layer the outside of the bottle.
-
2Place the bottle in the center of the paper. Position the base of the bottle in the middle of the tissue paper. If you’re using square tissue paper that has been folded, you should see creases connecting toward the center—that’s the spot![2]
- The bottle doesn’t have to be perfectly centered, but try to center it as much as possible so the tissue paper sticks up evenly on all sides.
Advertisement -
3Lift up the tissue paper to wrap it around the bottle. Slide your hands under the tissue paper after you place the bottle and lift up the sides to lie flat against the glass. Some of the paper will get bunched up and that's okay—it adds texture and bulk to the centerpiece.[3]
- You may need to straighten out the paper as you bunch it up around the bottle so the accent color sticks out enough.
-
4Tie the tissue paper at the neck of the bottle with ribbon or string. Lay the bottle on its side and run a ribbon or string under the neck of the bottle or anywhere near the top. Flatten the tissue paper and tie a knot or a bow.[4]
- If you’re using the bottle as a temporary party decoration, it’s okay to use a rubber-band or elastic string. Just make sure to twist it around a few times so it stays it place.
-
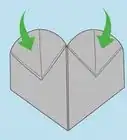
5Arrange the top of the tissue paper and add any finishing touches. Tease the tops of the tissue paper outward like flower petals or upward like flames—however you like! Feel free to add any finishing touches to the piece like balloons, glitter, or stick-on extras.[5]
- For instance, if the piece is going to be used as table decor for a birthday party, you might insert a stick balloon into the bottle’s opening.
- Avoid putting a candlestick in the top and lighting it because the tissue paper could catch on fire once the candle burns down.


Decoupaging a Glass Bottle
-
1Peel the label off of the bottle (if it has one) and scrub away any residue. If the bottle has a label or any stickers on it, peel those off as carefully as you can from 1 corner to remove the whole sticker. If there’s any residue left, scrub the bottle with steel wool to remove those bits.[6]
- Remove any sticky label residue by boiling the bottle in a mixture of water and baking soda for 5 minutes. Use 3 tablespoons (42 g) of baking soda for each 128 fluid ounces (3,800 mL) of water. The sticky bits may come off on their own while it’s in the water but, if not, a steel wool sponge will do the trick.
-
2Clean the inside of the bottle with dish soap or soda water and rice. Get rid of any residue from whatever was in the bottle by filling it 3/4 of the way full with soapy water and shaking it up. To remove stuck-on grime or stains, fill the bottle half-way full with soda water and ¼ cup (48 g) of uncooked rice and shake it vigorously for 1 or 2 minutes.[7]
- It may help to use a funnel to pour rice into small-neck bottles.
- Let the bottle dry completely after washing it.
-
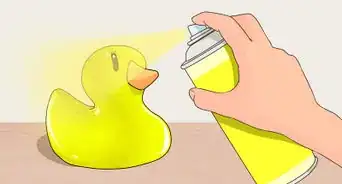
3Apply a base coat of acrylic paint if desired. For a standard white backdrop, dip a paintbrush into white paint and apply a thin, even layer onto the glass. Let it dry for 15 to 20 minutes and apply a second coat, if necessary. If you want the color of the tissue paper to pop, use a color on the 2nd coat that's opposite of the main color of your design on the color wheel.[8]
- For instance, if you're using orange and yellow tissue paper, use a blue or violet base coat to make those colors stand out.
- You may want to do this if you don't plan to cover the entire bottle with tissue paper.
- For a thicker, more opaque base-color, use a sponge to dab on the paint.
-
4Rip off strips or pieces of tissue paper to make a design. Use scissors to cut the tissue paper into small squares or cut out specific designs on the paper that you like. You can even mix and match different types of tissue paper (like matte, glossy, sparkly, and textured) to create a funky design.[9]
- For instance, you might cut out a collection of stars from 1 type of tissue paper and cut small strips of solid colors from another type to make a confetti-like background.
- For a more rustic look, ditch the scissors and tear the tissue paper with your fingers.
-
5Use a sponge brush to apply the Mod Podge to 1 section of the bottle. Pour about 1⁄4 cup (59 mL) of Mod Podge onto a disposable plate or bowl and dip the sponge brush into it. Apply it to the glass in long, even strokes from the top to the bottom or wherever you want to put the tissue paper.[10]
- You can also use a regular paintbrush.
- You can purchase matte or glossy Mod Podge at any craft store. Either option works well for this type of project.
- Only apply it 1 side at a time so you can still hold the bottle.
-
6Arrange small pieces of tissue paper onto the glass. Whether you've cut up or torn small bits of paper off to make a design, start applying those small pieces however you like. The glue won't dry for 1 hour, so don’t worry about having to work quickly.[11]
- If some of the tissue paper accidentally gets creased when you stick it on, use a balled-up strip of plastic wrap to smooth it down.
-
7Apply more Mod Podge to the next area to keep decorating the bottle. After you’ve stuck on a few pieces, apply Mod Podge to the area next to it so you can continue sticking on tissue paper. It’s best if you work consecutively around the bottle (or up and down) so you can build your design as you go without any spaces.[12]
- However, if blank spaces are part of your design, work on whatever areas you like in whatever order!
-
8Hold the bottle by the opening to turn it and decorate the other side. Hold the bottle with your fingers inside the opening and turn it so you can access the other side once you’re done decorating the first half. Apply more Mod Podge with the sponge brush and stick on more bits of tissue paper to suit your design.[13]
- You can also hold the bottle by the neck and work on that area once the main body of the bottle is finished.
-
9Cover the entire bottle with a thin coat of Mod Podge when you’re done. Once you’re finished sticking on the tissue paper, use the sponge brush to apply a thin layer of Mod Podge over the entire thing. Dip the brush into the Mod Podge and wipe off the excess before you apply it. It may look cloudy as it goes on, but it’ll dry clear so your design will look vibrant as ever![14]
- Be very frugal with this last layer of Mod Podge because applying it too thick can cause it to look slightly cloudy when it’s dry.
- This is important to ensure that all the tissue paper is firmly stuck on.
- Consider using glossy Mod Podge for a shiny finish.
-
10Allow the decorated bottle to dry for 24 to 48 hours. Place the bottle in a cool, dark spot to dry for 1 or 2 days. Make sure to leave it in an area that isn’t exposed to heat or sunlight because failing to do so can extend the drying time.[15]
- Don’t put the bottle on a table that may get nudged because the last thing you want is for your new beautiful piece to fall and break!


Creating Festive Decoupage Designs
-
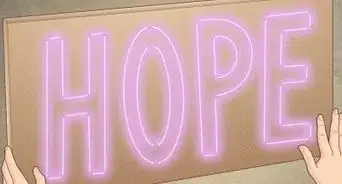
1Create a stained-glass look with various colors of tissue paper. Buy different colors of tissue paper and cut out an equal number of squares, circles, or triangles from each sheet. Don’t worry about sticking them on in an orderly fashion—stick as many on as you can. When you’re done sticking on the pieces, emphasize the stained-glass look by painting lines with black acrylic paint over the overlapping areas.[16]
- If you’re doing more than one layer, note that you’ll need to add more Mod Podge so the tissue paper sticks.
- For instance, you might use red, orange, yellow, green, blue, and purple tissue paper to create a stained-glass rainbow effect.
- You can also stick to different pastel colors of tissue paper for a softer, more elegant stained-glass effect.
-
2Paste on animal-print paper for a festive, themed look. Look for zebra, cheetah, leopard, giraffe, or tiger-print tissue paper to make the perfect jungle-themed gift or decor piece. Use just one pattern or use a mix of a few patterns if you can’t decide which one you like best![17]
- Consider painting the bottle with black, white, or red acrylic paint first and cutting the animal-print tissue paper into small oblong circles. Stick them on to make paw prints walking all around the bottle.
-
3Design your own paisley pattern by using a flower-punch cutter. Insert any color of tissue paper into the opening of a punch-cutter to make perfect floral shapes. Cut out as many as you like and paste them all over the bottle or incorporate a few of them into a larger design (like an outdoor garden scene).[18]
- You can buy punch-cutters online or at most craft stores.
-
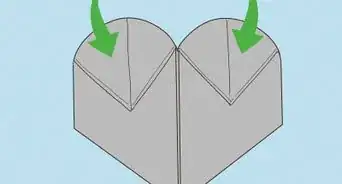
4Use tissue paper with hearts on it for Valentine's day decor. Head to any supermarket or drugstore to find seasonal gift wrap tissue. Cut out the individual hearts and arrange them randomly on the bottle or cut the paper into strips and put them on in a more deliberate fashion.[19]
- For instance, you might arrange them so they’re spiraling upward around the bottle from the largest to the smallest.
- You might also place hearts of equal size in a big circle around the circumference of the bottle.
- Note that if the tissue paper has glitter incorporated into it, those little bits will create a rough texture on the bottle.
-
5Make leaf-shapes out of the tissue paper for fall decor. Use scissors to cut leaflets out of green, yellow, orange, and red tissue paper. Arrange them onto the bottle in a feathered pattern (as if they’re coming off of a central stem) or as if they’re falling from the top of the bottle to the bottom.[20]
- Consider using popular leaf shapes like the maple, palm, or holly leaves.
-
6Cut out different sized circles for a modern, playful look. Use a pencil to trace circles of various sizes onto the tissue paper and then use scissors to cut them out as cleanly as you can. Arrange the dots on the bottle in a random fashion or in a more orderly design (like from largest to smallest).[21]
- A protractor can help you draw perfect circles, but if you don’t have one, use things like buttons, coins, and bottlecaps to trace the outline.


Warnings
Things You’ll Need
Wrapping a Glass Bottle with Tissue Paper
- Tissue paper (at least 2 colors)
- String or ribbon
- Stickers, stick balloons, or other accessories (optional)
Decoupaging a Glass Bottle
- Dish soap
- Sponge
- Water
- Stove
- Deep pot
- Baking soda
- Steel wool (optional, for cleaning)
- Acrylic paint (optional, for base coat)
- Soda water and uncooked rice (optional, for cleaning the inside)
- Mod Podge (or crafting glue)
- Scissors
- Sponge brush (or paintbrush)
- Disposable plate or bowl
- Plastic wrap (optional, for smoothing the tissue paper)
References
- ↑ https://youtu.be/7Z__DDmtLiQ?t=65
- ↑ https://youtu.be/7Z__DDmtLiQ?t=63
- ↑ https://youtu.be/7Z__DDmtLiQ?t=73
- ↑ https://youtu.be/7Z__DDmtLiQ?t=102
- ↑ https://youtu.be/7Z__DDmtLiQ?t=152
- ↑ https://www.thekitchn.com/remove-labels-from-jars-268489
- ↑ https://www.thekitchn.com/the-trick-bartenders-use-to-clean-out-glass-bottles-252293
- ↑ https://youtu.be/8qM1l3gvkls?t=101
- ↑ https://youtu.be/j0EgW8Xl4xQ?t=148
- ↑ https://youtu.be/QmnUnqAidXQ?t=19
- ↑ https://youtu.be/j0EgW8Xl4xQ?t=254
- ↑ https://youtu.be/j0EgW8Xl4xQ?t=331
- ↑ https://youtu.be/XN0cwF9mFHU?t=35
- ↑ https://youtu.be/j0EgW8Xl4xQ?t=716
- ↑ https://youtu.be/j0EgW8Xl4xQ?t=720
- ↑ https://youtu.be/QmnUnqAidXQ?t=18
- ↑ https://youtu.be/hS5zzdaP7Ik?t=145
- ↑ https://youtu.be/bEQz3jd-oRo?t=45
- ↑ https://youtu.be/j0EgW8Xl4xQ?t=751
- ↑ https://youtu.be/RAvildAKk6U?t=41
- ↑ https://youtu.be/ZNsF-x0D7tU?t=112
- ↑ https://www.home-ec101.com/stuck-on-you/
- ↑ https://www.mass.gov/service-details/candle-fire-safety
- ↑ https://www.hazwastehelp.org/ArtHazards/lungs.aspx
About This Article