This article was co-authored by wikiHow Staff. Our trained team of editors and researchers validate articles for accuracy and comprehensiveness. wikiHow's Content Management Team carefully monitors the work from our editorial staff to ensure that each article is backed by trusted research and meets our high quality standards.
There are 13 references cited in this article, which can be found at the bottom of the page.
This article has been viewed 44,433 times.
Learn more...
Cutting the front edge of a lace wig is actually fairly simple. Cut a straight line across with only slight curves for your hairline. Once that's done, you can pluck the front hairline so that it's not just straight across but has some variation, making the wig look more natural.
Steps
Cutting the Lace off the Front Edge
-
1Place the wig on a wig head for easy cutting. A wig head is a shaped head where you can store wigs or work on them. Putting the wig on it makes it easy to cut the lace off.[1]
- Put your hands inside the wig with your knuckles facing up and start at the back to pull the wig over the head.
- If you're using a wig head, it can help to clip the hair back out of the way.[2]
- If you don't have a wig head, you can hold the wig in your hand while you cut.[3]
- If you have a slightly curved hairline, you can place the wig on your head to judge how you want to cut it.
-
2Use sharp scissors for a neat line. The sharper your scissors are, the more likely you are to get an even, clean line. Also, make sure you're holding the lace somewhat taut as you cut, which will make it easier to cut.
- If you're holding the wig in your hand, turn it as needed to make it easier to cut a straight line.
Advertisement -
3Cut close to the hairline where the silicone band is. Some lace has a silicone band around it that attaches to the hairline on both sides. If you don't cut that off close to the hairline, it's going to show up when you wear your wig.[4]
- The silicone band will run parallel to the hairline, then curve into it. Where the band runs into the hairline, cut the lace much closer to remove the silicone band completely.
-
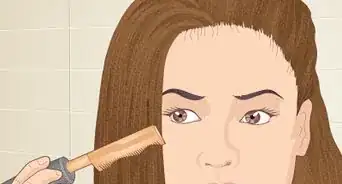
4Snip the rest of the lace near the hairline. Starting at the sideburns, cut the lace in a straight line across the wig. Get as close to the hairline as you can without cutting the wispy hairs.[5] You can leave up to 0.25 inches (6.4 mm) of lace in front of the hairline, though some stylists think this technique allows too much of the lace to show.[6]
- Use the hairline of the wig as your guide for cutting the line. If you need to add a bit of curve for your hairline, only add a slight variation, such as dipping down a bit in the middle for a widow's peak.


Plucking the Wig
-
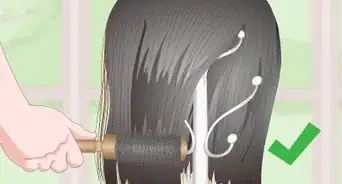
1Wet the hair and divide it into 3 sections. To make it easier to pluck, spray down the hairline to dampen it. Divide the hair at the temples by creating parts with a comb. Draw the first part from the right temple to the back of the head and the second part from the left temple to the back of the head. You now have 3 sections. Clip the hair back in these sections.[7]
- It helps to pin the hair to a wig head.
- Work with one section at a time.
-
2Separate the first row of hair from one section. Run the end of a rat-tail comb under the first row of hair in a single section, working from the temple down through the sideburns. The row should only be 3-6 hairs thick. Unclip all of the hair, then clip everything back again except for the first row you just separated out.[8]
-
3Pluck every other section with tweezers. Going along the row you just sectioned out, pull out every other small bit of hair, about 3-6 hairs at a time. In other words, pluck 3-6 hairs, then leave 3-6 hairs, and so on, going across the row. Use your hand to pull the hair away from the wig and throw it out.[9]
- You're trying to create a more natural-looking hairline by varying the edge of it.
-
4Section out the next row. Separate out another section of hair from the clipped part with a rat-tail comb, making it 3-4 hairs thick. Re-clip the rest of the hair in place, minus the row you just pulled out and the row you plucked underneath it.[10]
- Keep the new row separated from the one you just plucked.
-
5Pluck hair from the new row you sectioned out. Pull out every other section of hair in the row using your tweezers, taking out 3-6 hairs at time. Skip the next 3-6 hairs, then pluck the next set. Remove the hair with your hand to toss it out. Keep going until you reach the end of the row.[11]
- Do 3-4 rows this way.
-
6Repeat the plucking across the other 2 sections. Pluck the other 2 sections the same way, taking a little hair out of the clip at a time to pluck. Make sure you're going all the way to the end of the row in each section, so you don't leave parts unplucked.
- In the middle section, work from temple to temple.
-
7Clip all the hair back to pluck more sections out. Pull all the hair back again, including what you've plucked already. Look for more variation in the hairline now. Pluck along the hairline sporadically, moving along the hairline back and forth, to help add more variation. Just use your tweezers to pull out a small section of hair here and there.[12]
- Don't stay in one area too long, as you'll create bald spots.


References
- ↑ https://www.youtube.com/watch?v=jSFDTqUMcdk&feature=youtu.be&t=115
- ↑ https://www.youtube.com/watch?v=jSFDTqUMcdk&feature=youtu.be&t=111
- ↑ https://www.youtube.com/watch?v=mIXI3WG4rH4&feature=youtu.be&t=14
- ↑ https://www.youtube.com/watch?v=mIXI3WG4rH4&feature=youtu.be&t=14
- ↑ https://www.youtube.com/watch?v=jSFDTqUMcdk&feature=youtu.be&t=252
- ↑ https://www.youtube.com/watch?v=mIXI3WG4rH4&feature=youtu.be&t=34
- ↑ https://www.youtube.com/watch?v=-gtUinNEhyM&feature=youtu.be&t=226
- ↑ https://www.youtube.com/watch?v=-gtUinNEhyM&feature=youtu.be&t=304
- ↑ https://www.youtube.com/watch?v=-gtUinNEhyM&feature=youtu.be&t=316
About This Article

To cut a lace front wig, start by placing it on a wig head. If you don't have one, you can hold it in your hand instead. Then, cut the hair close to the hairline where the silicone band is so the silicone doesn’t show. Once you’ve cut around the silicone band, snip the rest of the hair in a straight line across the wig, starting at the sideburns. Keep as close to the hairline as you can without cutting the wispy hairs. For more tips, including how to pluck a lace wig once you’ve cut it, read on!