This article was co-authored by wikiHow staff writer, Eric McClure. Eric McClure is an editing fellow at wikiHow where he has been editing, researching, and creating content since 2019. A former educator and poet, his work has appeared in Carcinogenic Poetry, Shot Glass Journal, Prairie Margins, and The Rusty Nail. His digital chapbook, The Internet, was also published in TL;DR Magazine. He was the winner of the Paul Carroll award for outstanding achievement in creative writing in 2014, and he was a featured reader at the Poetry Foundation’s Open Door Reading Series in 2015. Eric holds a BA in English from the University of Illinois at Chicago, and an MEd in secondary education from DePaul University.
There are 11 references cited in this article, which can be found at the bottom of the page.
This article has been viewed 17,883 times.
Learn more...
For those of us who don’t have a giant workspace filled with fancy jigsaws, table saws, and plunge routers, cutting clean circles can be kind of a pain. The Dremel may not seem like an obvious solution since most people use it to polish, sand, or cut details, but with a single $15-20 attachment, the Dremel can be turned into a circle-cutting machine! To get clean circles, all you need is the circle cutter guide kit—a cheap attachment for your tool that basically turns it into a jigsaw on a circle-cutting jig. Keep in mind, while there are dozens of different tools produced by the company named Dremel, these steps only apply to the popular rotary tool that most people are thinking of when they reference a “Dremel.”[1]
Steps
Assembling the Circle Cutter
-
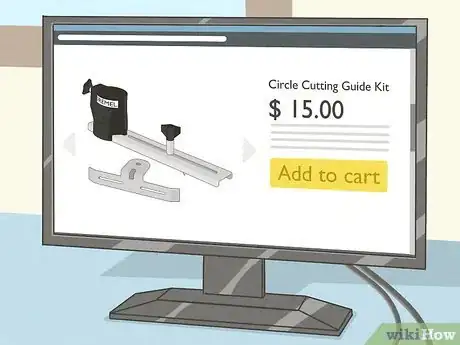
1Purchase a circle cutter guide kit to make cutting circles a breeze. The Dremel is a great freehand router, but it is not designed to cut perfect circles. However, you can cut beautiful circles out of most materials if you purchase a Dremel circle cutter guide. This kit is inexpensive, which is good since this is basically the only way to cut out clean circles with a Dremel.[2]
- You should be able to buy a circle cutter kit online for $15-20. Larger construction supply stores may carry them, but you probably won’t find them at your local mom-and-pop shop.
- The circle cutter kit will allow you to cut circles that are 3⁄4–12 inches (1.9–30.5 cm) in diameter. For anything smaller than that, you can just bore a hole with a router tip. For anything bigger than that, you’ll need to break out a jigsaw, table saw, or circle-cutting jig for your jigsaw.
-
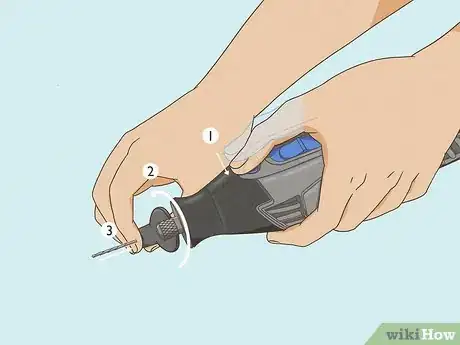
2Insert a round cutting bit in the Dremel based on the material you’re cutting. Unplug the Dremel and hold down the shaft lock button on the side of the tool to unlock it. Use a wrench to twist the shaft that’s holding the current bit in place counterclockwise. When the bit is loose, slide it out and insert a round cutting bit built for the material you’re cutting. Retighten the shaft and release the lock button.[3]
- The bit you use depends on the material you’re cutting. If you’re cutting wood, the multipurpose cutting bit is a great choice. If you’re cutting tile, you need a cutting bit designed for ceramic.[4] If you’re cutting metal, you’ll need a bit designed for the type of metal you’re cutting.
- If you have the housing cap on, which is that plastic cover that goes over the shaft, take it off and set it aside after you install the right bit. You don’t need this cap to use the circle cutter.
Advertisement -
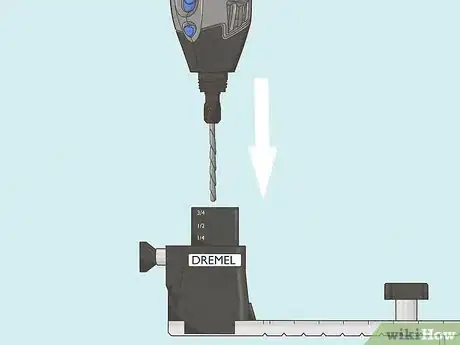
3Screw the cutting guide’s housing into the end of the rotary tool. The round, black case sticking up from one side of the cutting guide is your cutting guide’s housing. Slide the Dremel’s cutting bit through the middle of the plastic housing with the guide line, which is the flat length of metal with the hash marks, at the bottom. Twist the housing clockwise until the threading catches on the end of the Dremel tool. Turn it as tight as it will go.[5]
- Don’t worry if the housing slides back and forth after you tighten it. It’s designed to do that! That sliding piece sets the depth of the cut. You’ll tighten it in a second, but don’t worry about it for now.
- Keep your fingers away from the cutting bit while you’re tightening the housing. It probably won’t cut you, but it’s better to be safe than sorry!
-
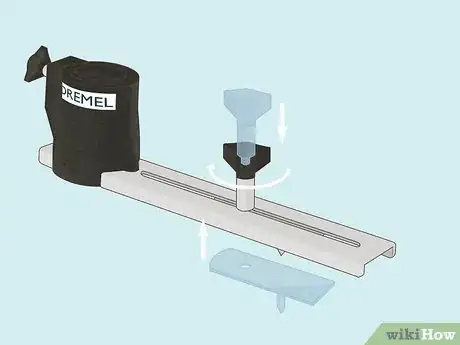
4Install the circle-cutting pivot knob by screwing it into the guide. The pivot knob is the small half-circle with two points sticking out of either side. Flip the semi-circular pivot knob around until the threaded pin (not the pointy pin) is pointing up. Then, place the threaded pin underneath the guide line and push it up through the opening in the middle so that the pointy pin is sticking out underneath. Screw the cap that came with your circle cutter kit into the threaded pin but don’t tighten it all the way.[6]
- If you’re cutting a circle bigger than 4 inches (10 cm), insert the pivot knob with the semi-circular side pointing away from the Dremel. If you’re cutting a circle smaller than 4 inches (10 cm), point the semi-circular side towards the Dremel.
-
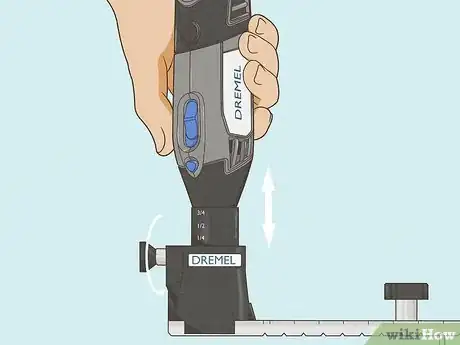
5Use the thumb screw on the housing to set the depth of the cut. Look on the side of the plastic housing for a small knob. Turn this knob counterclockwise 2-3 times and lift the Dremel up a little. On the side of the piece that pops out of the housing, there are hash marks with measurements. Find your desired cutting depth and line it up with the base of the housing. Tighten the knob on the side of the housing clockwise to lock this cutting depth in place.[7]
- You can set the depth to be longer than the thickness of your material if you’re punching a circle clean through, or you can set the depth to be ¼-¾ the thickness of the material to carve a groove into the surface.
- If you’re cutting all the way through a material, set the cutting depth to be at least 1⁄4 inch (0.64 cm) longer than the width of your material.
- If you aren’t cutting all the way through a material, measure the thickness and subtract 25-75% of the height to avoid cutting too deep into the wood, tile, foam, or other cutting surface.
Making Your Circle Cut
-
1Draw the circle on the surface that you’re going to cut. If you already have your measurements or outline, great! Otherwise, use a measuring tape to calculate the diameter of the circle you want to cut. Hold the measuring tape up to the surface and draw a dot at the center point. Then, use a compass or stencil to outline the surrounding circle.[8]
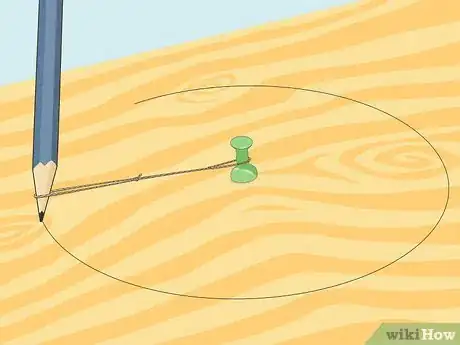
- You can also cut a length of string to match the radius of your circle and tie one end to a pencil and the other end to a tack. Set the tack on top of your center point and hold it in place. Then, drag the pencil around the center point.[9]
- The tool you use to draw on the material depends on the material and your personal preference. You could use a regular pencil, carpentry pencil, or grease marker for wood. If you’re cutting tile, you’re better off with an erasable marker.
-
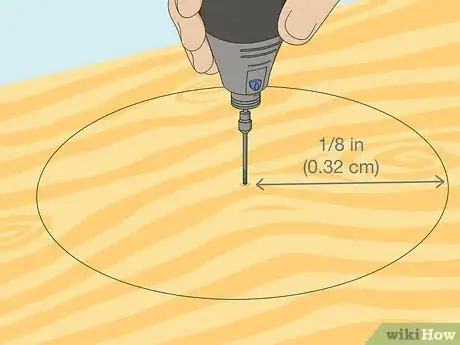
2Drill a pilot hole through the center of the circle you drew. Attach a 1⁄8 in (0.32 cm) pilot bit to a drill. Hold the bit over the center point of your circle and slowly drive the pilot bit into the material at a perpendicular angle. This will create a small divot for that pin that’s sticking out of the base of the pivot knob and anchor it in the material you’re cutting.[10]
- The depth of this hole isn’t super important so long as that sharp pin sticking out of the pivot knob fits entirely inside of it.
- Unfortunately, there is no way to use the circle cutter tool without drilling this center point. So if you only plan on cutting part-way through a material, you’ll have to fill this center hole in or disguise it somehow when you’re done.
-
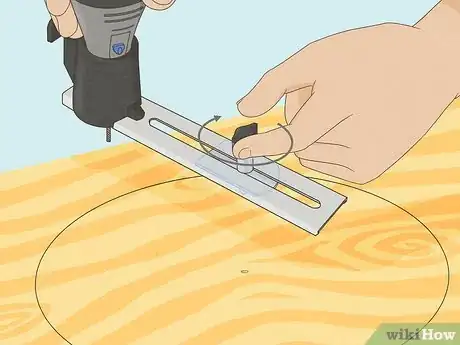
3Lock the pivot knob in the guide line so it matches the radius of the circle. Find the hash mark on your guide line that matches the radius on the circle. Grab the cap that sits on top of the pivot knob and drag it along the guide line. Line up that pin underneath the pivot foot with the hash mark on your guide line. Tighten the cap by twisting it clockwise to lock your cutting radius in place.[11]
- This cap doesn’t need to be super tight, but it shouldn’t budge or move freely either.
-
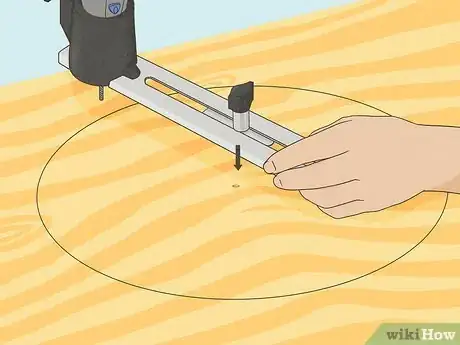
4Slide the pointy pin on the foot knob inside the pilot hole you drilled. Hold the cap you just tightened over the pilot hole you drilled and slowly lower it into the hole. Check the base of the guide line to make sure it’s resting flat on surface you’re cutting and double-check the cutting bit on the Dremel to make sure it lines up with the circle you drew before moving forward.[12]
- If the guide line doesn’t sit flush on the surface you’re cutting because the Dremel bit is too long, drill a pilot hole on your outline to give the cutting bit some room to stick out at the bottom while you insert the pivot foot in the center point.
-
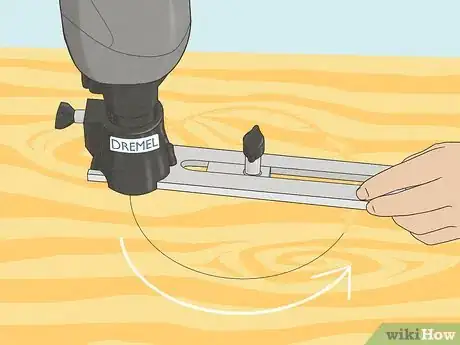
5Turn the Dremel on and push it around the circle you drew. Place one hand on the front half of the Dremel and your other hand on the trigger. Turn the Dremel on and slowly push it around the circle you drew. Apply a light downward pressure to keep the pivot foot firmly planted in the pilot hole and the guide line flat against the surface you’re cutting. Lead the cutting bit around the circle to make your cut.[13]
- Keep your hands away from the guide line and the pivot foot. So long as you aren’t actively lifting the tool up, the circle cutter attachment should stay where it is.
- The Dremel is cutting in a fixed position as you move it in a circle. It shouldn’t deviate from the circle you drew, even if you aren’t pushing it in a perfect circle.
- The actual cutting part of this process should be extremely easy and straightforward if you set everything up correctly.
-
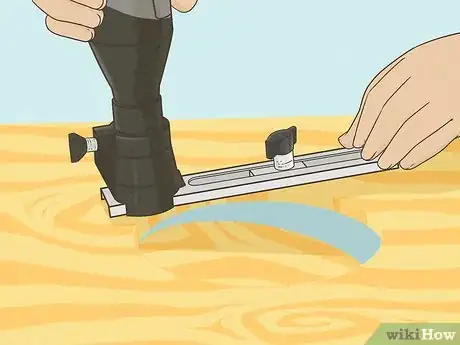
6Release the trigger and lift the tool up when you’re done. Hold the tool firmly as you get close to finishing your cut. As soon as you complete your cut, release the trigger and hold the tool firmly in both hands. Lift it up and set it on its side to disassemble the circle cutter kit or measure out your next cut.[14]
- Keep a firm grip on the Dremel, especially if you’re cutting a circle out of the material entirely. If you let go of the tool once the material falls out, you’re going to have an expensive and dangerous piece of equipment falling to the floor and potentially cutting your feet.
- You can clean up any rough edges left by the Dremel by wiping the cut with sandpaper or a clean cloth depending on what you were cutting.
Warnings
- Always keep both hands on the Dremel while the cutting bit is running. You do not need to put a hand on anything other than the Dremel itself.⧼thumbs_response⧽
Things You’ll Need
- Circle cutter guide
- Measuring tape
- Marker, grease pen, or pencil
- Wrench
- 1⁄8 in (0.32 cm) drill bit
- Drill
- Compass or stencil (optional)
- String and pencil (optional)
References
- ↑ https://youtu.be/sjnPI2basZ0?t=16
- ↑ https://www.dremel.com/en_US/products/-/show-product/tools/678-01-circle-cutter-straight-edge-guide
- ↑ https://www.dremel.com/documents/20812/137350/New+1600A012FM_01-17_4000.pdf
- ↑ https://youtu.be/zXQpWqsmQaA?t=101
- ↑ https://www.dremel.com.au/au/en/ocsmedia/678_manual.pdf
- ↑ https://www.dremel.com.au/au/en/ocsmedia/678_manual.pdf
- ↑ https://youtu.be/MJXx-7jfqjk?t=46
- ↑ https://youtu.be/UUL24IdUrkU?t=277
- ↑ https://youtu.be/_yqmqESN_Oo?t=41
- ↑ https://www.dremel.com.au/au/en/ocsmedia/678_manual.pdf
- ↑ https://www.dremel.com.au/au/en/ocsmedia/678_manual.pdf
- ↑ https://youtu.be/MJXx-7jfqjk?t=120
- ↑ https://youtu.be/MJXx-7jfqjk?t=138
- ↑ https://www.dremel.com.au/au/en/ocsmedia/678_manual.pdf
- ↑ https://www.dremel.com/documents/20812/597949/bit-guide-poster.pdf/27f6fb76-d3ef-44ef-9f33-e33243d5b17e
