wikiHow is a “wiki,” similar to Wikipedia, which means that many of our articles are co-written by multiple authors. To create this article, 10 people, some anonymous, worked to edit and improve it over time.
There are 9 references cited in this article, which can be found at the bottom of the page.
This article has been viewed 507,566 times.
Learn more...
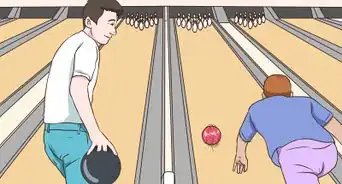
You have the straight shot down and now it's time to look like the pros. Learning to throw a curve bowling ball takes a lot of time and practice, but the effort pays off with the newfound confidence you will have after mastering this skill and improving your bowling score.
Steps
Mastering the Technique
-
1Start with the right stance and grip. You want to be several inches from the foul line and preferably at least four steps away from your release. Some people take longer and that's fine -- but at least four steps is ideal. Line your feet up with the arrow on the lane you are aiming for (which will depend on how hefty your curve is).
- If you have your own ball, you probably know how to grip it. However, if you're working with a house ball, you may need to adjust your style. House balls generally have knuckle grips -- you want your fingers (and especially thumb) to come out swiftly, so don't jam them in there. Hold the ball so it aligns straight with your wrist. Hand positions are covered later on in this article; it's more important during your swing than before.
-
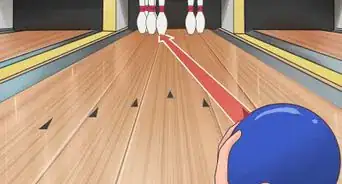
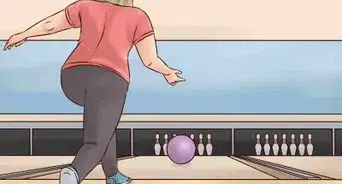
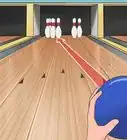
2Always focus on the arrow on the lane that you want to hit. Never focus on the pin you are aiming for. It is a lot easier to hit a mark that is ten feet in front of you than one that fifty. The arrow you want to hit will vary on lane conditions (wet vs. dry). To change the aim it is easier to change where you stand at the start than to change the arrow. If you are missing to the left, move your starting point to the left and vice versa. It sounds counter intuitive, but if you move to the left and hit the same arrow the ball will go farther right at the beginning before swinging to left. There are dots on the floor to help you adjust. Moving your feet over just one board can be the difference between a strike and the dreaded 7-10 split.Advertisement
-
3Start your approach like you would a straight shot. Your approach is the same as any standard shot -- the change is in your follow-through, and mostly in your hand. Bring the ball back into the swing position while keeping your palm behind the ball, just as you normally do.
- Be sure to keep your wrist strong. If you carry too much of the weight on your wrist or twist it back and forth, you could hurt yourself -- or at the very least wear yourself down before your frames are up.
-
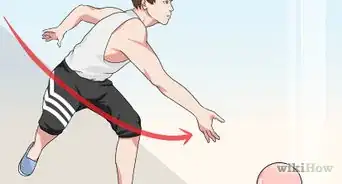
4Release the ball at the bottom of your swing, pulling your thumb out before your fingers. The idea behind the hook is at the very end, your fingers are the only thing containing the ball, and they spin it as it releases -- hence why your thumb needs to get out of the way. Here are a few hand position options:[1]
- The standard way to hook the ball is to place your two fingers and thumb in the three holes as normal. In other words, change nothing.
- Some people choose to not put their thumb in the ball at all, and instead sort of cup the ball on their palm and/or wrist as they swing the ball back and release it in the follow-through. And yet a few choose to only place one finger (the index finger) in the slot and palm the ball, spinning in the same motion on the release. However, you risk the ball turning in your grip, and that can lead to sprained wrists and fingers.
-
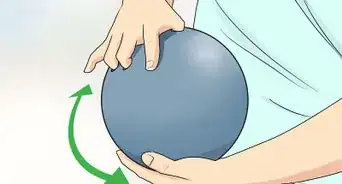
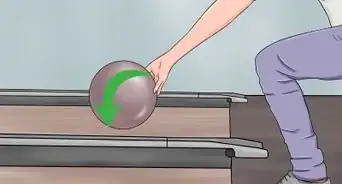
5Rotate your fingers up along the outside of the ball as you release, directing the ball's spin with your fingers. Continue moving your hand up on your swing to direct the ball down the lane, finishing in a handshake position. Ideally, you want to go from a 4 o'clock position to a 7 o'clock position.
- The ball should be totally out of your hands by the seven o'clock position, and your arm should follow through to the 12 o'clock position with your hand up by your ear all while your eyes are lock on the arrow you are trying to hit.
- Try hard not to subconsciously decelerate your swing in an effort to concentrate on and nail your hook; the same power is still needed. Or if you do, account for the differential; when you resume your normal throw, the hook could be very different.
-
6Learn to control the degree of your curve by varying the ball's position and timing your release. To increase the degree of the curve, release your fingers from the ball more rapidly. Your counterclockwise motion could also be more (or less) drastic.[2]
- With a little practice you will know if you've thrown a good ball or not by how close the arrow you are.
- If you're not getting it, isolate the variables and experiment with each one alone. Try starting from a different start spot. Try switching up your footwork. Heck, experiment with different balls. It's possible that your wrist and hand positioning is just fine and there's another element that's mixing it up.
Practicing Your Hook
-
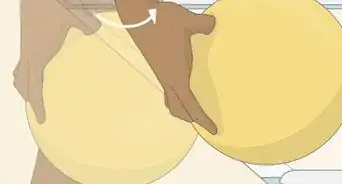
1Use a tennis ball to practice. A great way to practice your hook shot without having to make an embarrassing trip to the bowling alley is to practice with a tennis ball. It'll go straight when you throw it, but when it hits the bounce, it'll veer off to the side -- if you're doing it right, of course![3]
- Another option is a pool ball, but the damage potential of nearby objects is a bit more substantial!
-
2Use a bowling ball that is a few pounds lighter than the ball you would normally use as you're learning. A lighter ball allows you to focus on learning the new throwing technique. While you definitely want to get up to your normal ball sooner rather than later, the lighter ball can help you concentrate on what your hands should be doing. Just don't get too used to it!
-
3Think of it like spiraling a football, only upside down. If you have experience spiraling a football, it's the same general principle. Just under-handed! Your fingers move along the side of the ball in much the same way. Just think of throwing a football underhanded, trying to maintain the same spin. It starts cupped in your hand, and the last point of contact is with the tips of your fingers as it spins off.
Choosing the Right Ball
-
1If you're using a house ball, know that it could be very difficult. Those balls at the bowling alley are meant for straight shots; hooking them could require different, more outrageous methodology to get the same, natural hook effect. So if you don't have your own, don't stress! It could be your equipment.
- The general rule of thumb is that you choose a ball that's 10% of your body weight. If you're 160 pounds, choose a 16-pound ball.[4] That is, if you're of normal health and have no reason why a lighter ball would be more down your (bowling) alley.
-
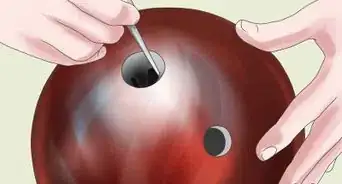
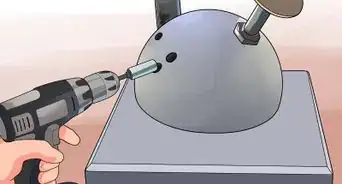
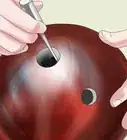
2Get a ball with a fingertip grip. Certain balls (most house balls) come with knuckle grip, where the holes go down to your second knuckle. But a fingertip grip is much more conducive to throwing a hooked ball -- since your thumb and fingers have to come out, the actions are a lot swifter and smoother.[5]
-
3Get your own ball with a urethane or resin coating. A urethane coverstock on your bowling ball will make your hook shot so much easier; they don't absorb oil from the lane and they provide way more friction than your standard plastic ball (the house ball). Those two things combined set that hook up for success.[6]
- A resin coating can actually dig into the oil in the lane, upping the chance that you hit exactly where you're aiming for. But they're quite an investment and only for the most serious of bowlers.
-
4If you're considering getting your own ball, ask about RG ratings and coverstock. A ball with a high differential of RG rating will create a really sharp hook.[7] However, you could have a ball with a low differential, so long as it has a matte-finish coverstock to combat lane oil. If you're dealing with a dry lane (at your home alley, that is), consider a stiff or pearl coverstock.
- So many options! When in doubt, explain your situation to the assistant. As long as you give them all your variables and what you'd like to do, they can find the perfect ball for you.
- Don't choose a ball drilled to your fingers and with your axis point until you have your hook down. As you get better at it, your hook changes. So wait it out! You want a ball that's all your own when you're at your peak.
Community Q&A
-
QuestionWhy is the ball spun that way under #4? The animation between 4 and 5 is incorrect. The arrow shows an incorrect axis of rotation. The guy in the video below explains it correctly, but the arrow in the animation between 4 to 5 is going in the wrong direction. The ball should rotate clockwise as it goes down the lane, from the bowlers perspective, so the arrow should be pointing up. If the ball spun the way the animation shows, then it would be rotating on an axis perpendicular to the ground, which is not how it should be.
 Community AnswerThe images shown are flipping the image (from right side of the body to left side of the body) so you can see the hand placement and release. You're right, it's incorrect, but the other ones are consistent.
 -
QuestionWhat equipment should I use to develop a ball hook?
 Anthony HarlanCommunity AnswerIt's really about going out and throwing, but an awesome starter ball is a Brunswick T-Zone (my first) or a DV8 Misfit (2 of my friend's first). They will give you some reaction, but only if you put some revs on them on light oil to medium oil lanes.
Warnings
- Do not try to turn or curve the ball using your wrist -- it should stay straight and solid through the swing and release.⧼thumbs_response⧽
Things You'll Need
- Bowling ball
- Bowling lane
- Tennis ball (optional, for practice)
- Wrist support (optional)
References
- ↑ https://www.liveabout.com/how-to-hook-a-bowling-ball-420793
- ↑ https://www.youtube.com/watch?v=T6dubEXRhRo
- ↑ https://www.myactivesg.com/Sports/Bowling/Training-Method/Bowling-for-Beginners/How-to-make-a-bowling-ball-curl
- ↑ http://www.dummies.com/how-to/content/bowling-for-dummies-cheat-sheet.html
- ↑ https://www.bowl.com/Welcome/Welcome_Home/Throw_a_Great_Hook/
- ↑ https://www.liveabout.com/how-to-choose-the-right-bowling-ball-4686684
- ↑ https://www.liveabout.com/rg-ratings-explained-420734
- http://www.bowlingball.com/BowlVersity/increase-your-bowling-ball-hook#idc-cover
- http://www.bowlingball.com/BowlVersity/how-to-curve-a-bowling-ball#idc-cover
About This Article
To curve a bowling ball, stand a few inches from the foul line and at least 4 feet back from your release. Start your approach the same as a straight shot, but focus on the arrow that you'd like to hit. Release the ball at the bottom of your swing, pulling your thumb out before your fingers. As you release, rotate your fingers along the outside of the ball, from a 4 o'clock position to a 7 o'clock position, to make it curve. This is easiest if you have a quality bowling ball, one with fingertip grips and a urethane or resin coating. To learn how to practice your hook, read on!
