This article was co-authored by wikiHow Staff. Our trained team of editors and researchers validate articles for accuracy and comprehensiveness. wikiHow's Content Management Team carefully monitors the work from our editorial staff to ensure that each article is backed by trusted research and meets our high quality standards.
There are 7 references cited in this article, which can be found at the bottom of the page.
The wikiHow Video Team also followed the article's instructions and verified that they work.
This article has been viewed 52,398 times.
Learn more...
Crocheting with chunky yarn is similar to crocheting with any standard yarn. However, you will need slightly different materials. It is also a good idea to check the gauge of your yarn and test your stitches before crocheting with chunky yarn because it can yield very different results than a standard weight yarn.
Steps
Choosing Materials to Crochet With Chunky Yarn
-
1Select a chunky yarn. You can usually tell that a yarn is chunky just by looking at it. Chunky yarn is only one term used to identify yarn types within the broader "bulky yarn" category. Many yarn brands will label the yarn as "chunky yarn," but there are a few other terms that brands may use to describe the yarn. These terms include "craft" and "rug" yarn. Check the label to be sure that a yarn is chunky.
- Another way to identify chunky yarn is by its yarn weight symbol. The symbol for chunky yarn and all other forms of bulky yarn is "5."[1]
- A thicker yarn category is category 6, which is "super bulky." Some yarns in this category might be called "super chunky." Super chunky yarn and chunky yarn are not quite the same, so you should keep that in mind when making your yarn selection.
-
2Consider different types of material. Yarns can be made from different fibers, even yarns of a single thickness. Each fiber will have a different texture and appearance. Experiment with different fibers until you find one that you like.
- As a general tip, consider the intended use of the project when picking out a fiber material. A blanket or scarf will need a softer yarn fiber than a rug or handbag would probably need.
- Acrylic wool is a mix of natural and synthetic fibers.[2] It tends to be inexpensive and durable, making it ideal for projects like rugs and purses. It can also be used for sweaters and scarves but may not be soft enough for those with sensitive skin.
- Cotton wool is soft, durable, and natural. It is generally preferred for sweaters and scarves but may still be too rough for those with very sensitive skin, like infants and toddlers.
- The softest wools are cashmere, silk, mohair, lambs, and alpaca. Cashmere and silk wools are typically used for scarves, shawls, and wraps, but they are more delicate and require more care. Mohair, lambswool, and alpaca wool tend to be used for blankets and sweaters, but they also require special care.
Advertisement -
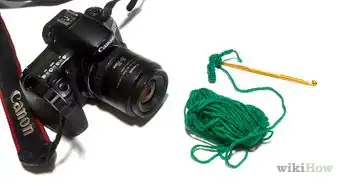
3Find the right color. This step applies to any yarn you shop for, and chunky yarn is no exception. You'll need to figure out which color or colors you want to use for your project. Use any color that you like or that will meet the needs of your project.
- Once you figure it out, buy the number of skeins you will need. It's better to have too many than too few. The dye can be slightly different from batch to batch, so buying the same hue by name at two different times can result in having two slightly different shades. You can avoid this problem if you buy the yarn all at once.
- To be on the safe side, you should also check the "lot" or "dye lot" number on the back label of each skein. Make sure that the dye lot number on each skein is the same before you buy them. Otherwise, you may still end up with different shades.
-
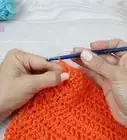
4Choose the best hook size for your yarn. The right crochet hook to use can vary by project and yarn type. If you are using a pattern, then the hook size might be indicated in the pattern. If you are not using a pattern, then check the yarn label for a recommendation. If you are not sure what hook size to use, choose a hook size that falls within the standard recommended range.
- Larger hooks tend to be best for chunky yarn. In U.S. sizes, look for a hook between K-10-1/2 and M-13. In metric sizes, look for a hook between 6.5 and 9 mm.
- If you end up picking a super chunky yarn, the recommended hook size is M-13 and up in U.S. sizes or 9 mm and up in metric sizes.[3]


Planning a Project With Chunky Yarn
-
1Choose a pattern. Figure out what it is that you want to make with chunky yarn. If you're still a novice, it would be best to find an actual pattern to work from. If you are a more advanced crocheter, then you may be able to create something without a pattern.
- Choose patterns that are meant for chunky yarn. You will not get the same results if you try to use chunky yarn with a pattern that is meant for non-chunky yarn. Also, make sure that you use a hook size that is appropriate for the type of yarn you are using.
-
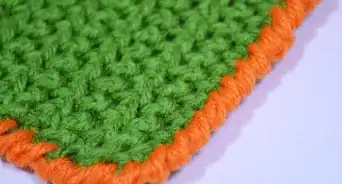
2Identify the gauge range of your yarn. Gauge refers to the number of stitches you will need to form a 4-inch by 4-inch (10-cm by 10-cm) square using a certain type of yarn. To determine the exact gauge of your yarn, crochet a 4-inch by 4-inch (10-cm by 10-cm) square.
- When working with single crochet, a 4-inch (10-cm) square made with chunky yarn will typically consist of 8 to 11 stitches. For super chunky yarns, a 4-inch (10 cm) square of single crochet would consist of 5 to 9 stitches.[4]
- For simple projects, like scarves and blankets, precise gauge measurements are not as important to note. For more advanced projects, like sweaters and socks, you will need to know the gauge of your yarn to prevent the final piece from being too small or too large to fit properly.
-
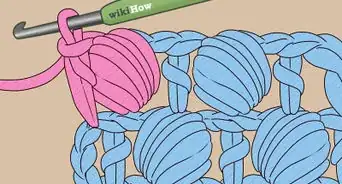
3Test your stitches. Not all stitches work well with chunky yarn, so it is a good idea to test your stitches before you get too far into a project. Crochet a 4-inch by 4-inch (10-cm by 10-cm) square to test the stitch. Some stitches that work well with chunky yarn include:[5]
- Basic stitches like single, double, and half-double crochet
- V-stitch
- Herringbone half-double crochet
- Back loop only crochet stitches
- Post stitches
- Puff stitch
- Bobble stitch
- Broomstick lace


Crocheting a Chunky Infinity Scarf
-
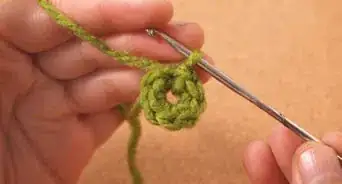
1Chain 45. Start by making a chain of 45 stitches. This will be the foundation for your infinity scarf.[6]
-
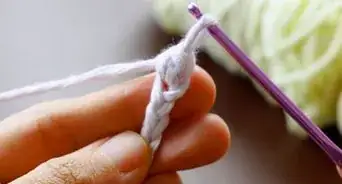
2Slipstitch to connect the first and last chains. After you have completed your chain, you will need to connect the ends to form a circle. To do this, insert your hook into the first stitch in your chain with the loop from the last stitch you created still on the hook. Then, yarn over the hook and pull through both loops.[7]
- Make sure that the chain is straight and not twisted when you connect the ends.
-
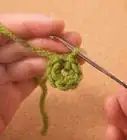
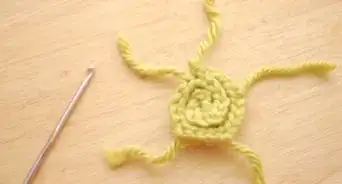
3Chain 3 and double crochet into fifth stitch from the hook. Next, chain three stitches to begin your row and then double crochet into the fifth stitch from the hook. To do a double crochet, yarn over and insert the hook into the fifth chain. Then, yarn over again and pull through the first stitch on the hook. Yarn over again and pull through the next two stitches. Then, yarn over one more time and pull through the last two stitches on your hook.[8]
-
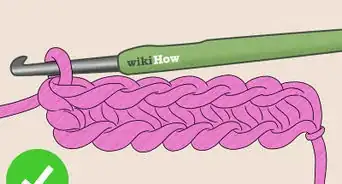
4Double crochet all stitches to the end of the round. To complete the first round, continue to double crochet all the way to the end. Double crochet one time into every stitch in the chain.
- If you prefer to use a different stitch to make your infinity scarf, then you can. Double crochet stitch is just a suggestion.
-
5Slipstitch to connect first and last stitches in the round. When you get to the end of the round, use a slipstitch to connect the first and last stitches in the round. Insert the hook into the top of the first double crochet stitch, yarn over, and then pull through both stitches on the hook to secure the stitch.[9]
-
6Chain 3 again. To start your next round, and every round thereafter, you will need to chain 3. This chain will provide the slack needed to do the first double crochet stitch.[10]
-
7Double crochet all stitches. Double crochet all of the stitches in this round like the one before and finish with a slipstitch. Continue to work the round in this manner until the scarf is the width you want it to be.[11]
-
8Finish the scarf. When you finish your final round, connect the first and last stitch with a slipstitch, then pull the loop out to make it several inches long. Cut the loop in the center and pull away the excess yarn. Then, tug on the tail to tighten the last stitch. You can then knot the tail through the last stitch a couple of times to secure it and then cut the excess, or you can use a darning needle to weave the tail through the edge of the scarf.
Community Q&A
-
QuestionWhat is the width of this scarf?
 crochet 4 beginnersCommunity AnswerThe width depends on thickness of yarn and crochet hook size. Check the gauge of yarn, like number of stitches per inch. Also, check how many rows make an inch.
 -
QuestionI'm making a beanie for my husband. I have a super bulky yarn. What size crochet needle do I need?
 Community AnswerUse a size 7 or 8 so it keeps the stitches together, without space between.
 -
QuestionI have never crocheted with a super bulky yarn. Is it difficult, especially when adding on the next skein?
 Community AnswerI have crocheted with somewhat bulky yarn, and it's still really fun. When adding on the next skein, just use a magic knot. Works like a charm!
Things You'll Need
- Chunky yarn (one skein to make an infinity scarf)
- Hook appropriate for the yarn size
- Crochet pattern (optional)
- Scissors
- Darning needle (optional)
References
- ↑ http://www.craftyarncouncil.com/weight.html
- ↑ http://www.ebay.co.uk/gds/Chunky-Wool-Buying-Guide-/10000000177318510/g.html
- ↑ http://www.crochetspot.com/types-of-yarn-and-recommended-crochet-hooks-and-gauges/
- ↑ https://www.crochetspot.com/types-of-yarn-and-recommended-crochet-hooks-and-gauges/
- ↑ https://www.craftsy.com/blog/2017/03/best-crochet-stitches-for-chunky-yarn/
- ↑ http://www.makeandtakes.com/chunky-crochet-cowl
- ↑ http://www.makeandtakes.com/chunky-crochet-cowl
- ↑ http://www.craftyarncouncil.com/mar06_dc.html
- ↑ http://www.makeandtakes.com/chunky-crochet-cowl
About This Article