This article was co-authored by wikiHow Staff. Our trained team of editors and researchers validate articles for accuracy and comprehensiveness. wikiHow's Content Management Team carefully monitors the work from our editorial staff to ensure that each article is backed by trusted research and meets our high quality standards.
There are 7 references cited in this article, which can be found at the bottom of the page.
The wikiHow Video Team also followed the article's instructions and verified that they work.
This article has been viewed 19,559 times.
Learn more...
Crocheting an oval is an important crochet skill for some projects. You may need to crochet an oval to create slipper bottoms, a rug, or a placemat. Learning to crochet an oval is easy as long as you have some basic crochet skills. You will need to crochet a foundation round and then work increases around the foundation to create your oval.
Steps
Crocheting the Foundation Round
-
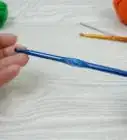
1Make a slipknot. Loop the yarn around your finger twice and then pull the first loop over the second loop. Pull on the free end of the yarn to tighten the knot. Then, slide the loop onto the crochet hook and tug the tail to tighten the loop some more.[1]
-
2Crochet a chain. Loop the yarn over the hook in front of the slipknot. Then, pull this loop through the slipknot. This is your first chain. Repeat this as many times as needed to get the desired chain length.[2]
- Make the chain as long or as short as you want it to be, or use the length indicated by your pattern.[3]
- A longer chain will produce a narrow oval, while a shorter chain will produce a wider oval.
- To create a practice oval, chain 6 and then follow the rest of the instructions to complete the oval.
Advertisement -
3Do a single or double crochet stitch into the third stitch from the hook. You can work the oval in single or double crochet. If you use single crochet, the stitches will be a bit denser and smaller than double crochet stitches. Crochet into the third stitch from the crochet hook, not counting the loop on the hook.[4]
- To single crochet, insert the crochet hook into the third chain stitch from the hook. Then, loop the yarn over the hook and pull the yarn through the chain stitch. Then, yarn over again and pull through both stitches on the hook.[5]
- To double crochet, yarn over the hook and insert the hook into the third chain stitch from the hook. Loop the yarn over the hook again and pull through the first stitch. Yarn over the hook again and pull through the first 2 loops. Then, yarn over the hook 1 more time and pull the loop through the remaining 2 loops on the hook.[6]
-
4Crochet to the end of the chain. Continue to work in the same stitch all the way to the end of the chain. Work 1 stitch into every chain stitch to complete the first half of the round.[7]
-
5Work 3 crochet stitches into the end of the chain. When you reach the end of the chain, crochet into the same chain 3 times. This will create a fan-like shape and make it easier to begin crocheting on the other side of the chain.[8]
- Single crochet if you worked the chain in single crochet. Double crochet if you worked the chain in double crochet.
-
6Crochet 1 stitch into each stitch on the other side of the chain. Continue working in the same stitch as you used for the first side of the chain. Work 1 crochet stitch into each of the chains just as you did in the first half of the round.[9]
-
7Finish with 3 stitches in the end of the chain. When you get to the end of the new side of the chain, work 3 stitches into the last chain. Single crochet if you have been working in single crochet. Double crochet if you have been working in double crochet. This will form a fan-like shape and allow you to curve around to the other side of the oval again without puckering or gathering the stitches.
- If you are using a pattern, follow its instructions for working increases. You may need to work more or fewer stitches into the ends depending on the project.
-
8Slipstitch to connect the first and last stitches. To connect the beginning and end of this round, slipstitch into the top of the first stitch you created.[10] To slipstitch, insert the hook into the top of the first stitch in the round. Then, loop the yarn over the hook and pull through both loops on the hook.[11]
- This completes the first round of the oval.
- You may want to place a stitch marker through the slipstitch to mark the end of the round.


Increasing the Oval
-
1Chain 1 or 2 depending on the stitch you are using. Begin the new round with a chain of 1 for a single crochet stitch round or a chain of 2 for a double crochet stitch round.
-
2Crochet 1 time into each of the stitches. Work 1 stitch into each of the stitches on the first half of the round. You may single or double crochet the stitches regardless of the stitch you used in the first round. Just be consistent with the stitch you decide to use for this round.[12]
-
3Work 3 stitches into the end stitch. Single or double crochet 3 times into the end stitch, which is the middle of the 3 increase stitches that you created in the first round. This will be the stitch that is centered on the end of the foundation chain.[13]
- If you are using a pattern, follow the pattern’s instructions for increases.
-
4Continue to crochet on the other side of the foundation. After you finish the increase stitches, work around to the other side of the round. Crochet 1 time into each of the stitches in the other half of the round.[14]
-
5Crochet 3 times into the slipstitch stitch. When you get to the end of the round, locate the slipstitch you made in the first round and crochet 3 times into it. This will be the final increase for this round.[15]
- Remember that if your pattern says to increase by more or fewer stitches, go with what the pattern says.
-
6Slipstitch to connect the first and last stitches in the round. Insert the hook into the top of the first stitch in the round. Then, yarn over and pull through the stitch and the loop on the hook.
-
7Repeat this process until the oval is the size you want it to be. To continue expanding the oval, keep repeating the same increase process until the oval is the size you want it to be. Use 1 stitch type for each round.


Things You’ll Need
- Yarn
- Crochet hook
References
- ↑ https://www.craftyarncouncil.com/mar06_crochet.html
- ↑ https://www.craftyarncouncil.com/mar06_crochet.html
- ↑ https://crochetncrafts.com/crocheting-the-first-round-of-an-oval/
- ↑ https://www.youtube.com/watch?v=IBaV5YrG8nc&feature=youtu.be&t=21s
- ↑ https://www.craftyarncouncil.com/instructions_cr.php3
- ↑ https://www.craftyarncouncil.com/mar06_dc.html
- ↑ https://crochetncrafts.com/crocheting-the-first-round-of-an-oval/
- ↑ https://crochetncrafts.com/crocheting-the-first-round-of-an-oval/
- ↑ https://crochetncrafts.com/crocheting-the-first-round-of-an-oval/
About This Article

If you want to crochet an oval, start by tying a slipknot in your yarn before looping the yarn over your hook. Next, pull the loop through the slipknot to make your first chain, and repeat the process until you get the chain length you want. If you’re using single stitches, crochet into the third stitch from the hook. When you reach the end of the chain, crochet into the chain 3 times to make a fan-like shape. On the other side, crochet 1 stitch into each stitch and finish the chain with 3 stitches. Finally, to connect the beginning and end of the round, put in a slipstitch. If you want to learn more, like how to increase the size of your oval once you make the foundation, keep reading!