wikiHow is a “wiki,” similar to Wikipedia, which means that many of our articles are co-written by multiple authors. To create this article, 13 people, some anonymous, worked to edit and improve it over time.
This article has been viewed 107,040 times.
Learn more...
Reusable aluminum water bottles are better for the environment than purchasing bottled water or other drinks in plastic containers, but if you have one, you may have noticed how well aluminum conducts heat. With a bit of insulation, you can keep your beverage and your fingers at their own temperatures longer. This is a small project, so you could easily complete it using remnants of yarn from other projects.
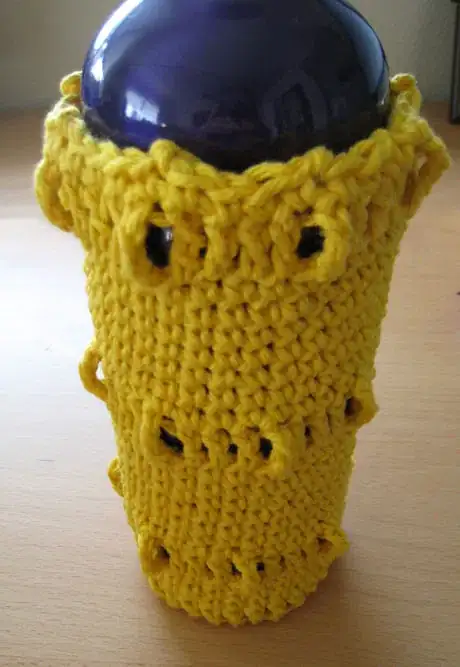
This article gives information on making the cozy to a custom size alongside numbers of stitches used to obtain the specific result pictured. Use whichever seems to work best for you. Working through parts about the custom size will teach you a lot about crocheting without a pattern; in fact, you could crochet any cylindrical object with confidence this way. The materials shown are listed under Things You'll Need below.
Steps
-
1Measure the circumference (the distance around) of your water bottle. The key to sizing this cozy is to get the right number of stitches to go that distance.
- Because this is a crocheted fabric, it will be a little stretchy, so aim to crochet something that is a bit snug.
-
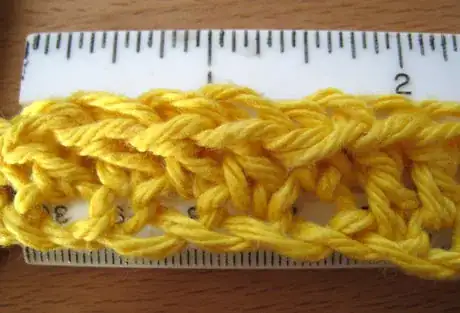
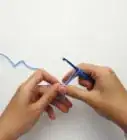
2Measure your stitches. Chain until you have about three inches. Chain two more and double crochet into the third chain from the hook. Double crochet one stitch per stitch back across the row you created.Advertisement
-
3Count the number of stitches in the test piece and measure their length. Try to count in the middle to avoid figuring in any unevenness at the ends. Here, there are seven stitches (gauge stitches) in two inches (5cm) (gauge length). Measure the stitch length in the same units you used to measure the bottle circumference.
-
4Do a simple proportion.
- gauge stitches / gauge length = total stitches / bottle circumference
- total stitches = (gauge stitches x bottle diameter) / gauge length
- here, total stitches = (7 stitches x 9 inches) / two inches = 31 stitches.
- For this example, round down to an even 30 stitches for easier math and a slightly tighter fit. Jot this number down.
- Unravel the gauge piece if you wish to recover the yarn.
-
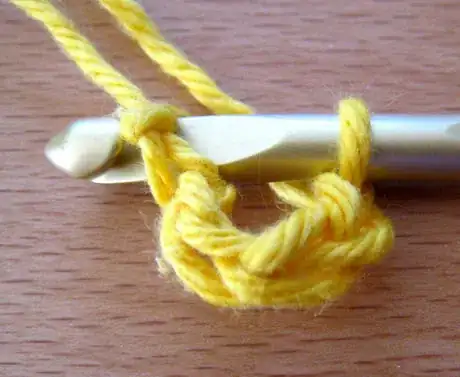
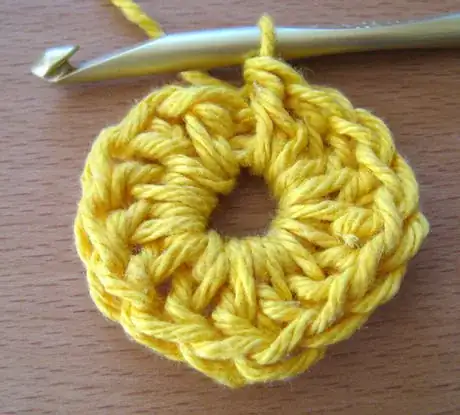
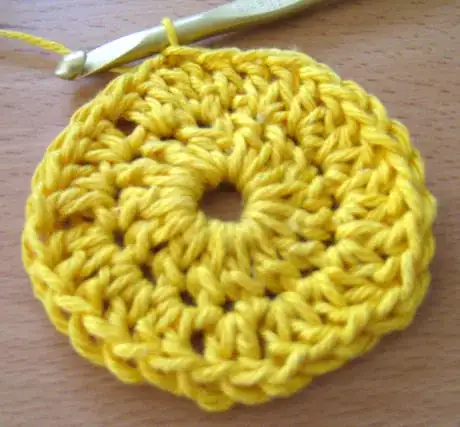
5Create the circular bottom of the bottle cozy (see tips for more information on customizing this). The idea is to come out with a flat disk, about the same diameter as the water bottle or a bit smaller, and with as many stitches as the "total stitches" number above in the final row.
-
6
-
7
-
8Slip stitch to join.
-
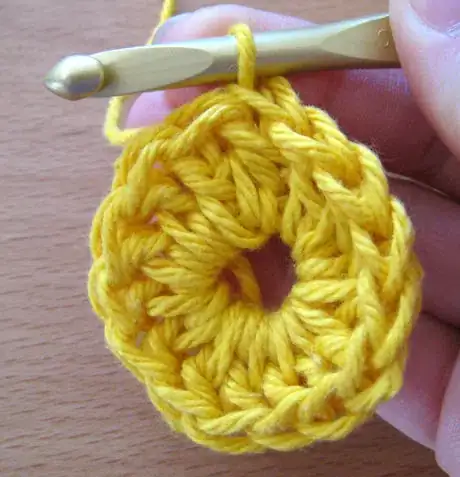
9Chain two to start the second round (counts as first double crochet). Then double crochet into each stitch from the first round. The example uses 2 stitches per inch to arrive at 30 stitches, the "total stitches" number from above. Add additional rounds if needed to produce the diameter required. See the tips below on how to do this.
-
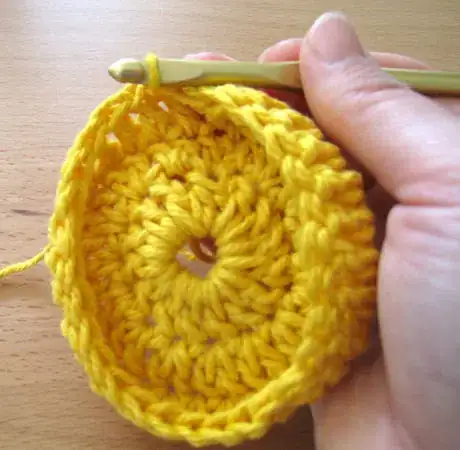
10Form the sides. Chain two and double crochet one stitch into each stitch of the previous round.
- You could chain one and single crochet this round instead, but the double crochet produces a sharper-looking "corner" at the bottom of the bottle cozy.
- To avoid a spiral effect (optional): Place a stitch marker at the beginning of the round. Each time you reach it, join with a slip stitch and chain one. Otherwise, just stitch into the next available stitch. This is a bit more important (but still not required) if you want to make the ribbon loops.
- At one stitch per stitch on a round piece such as this, two things should happen. First, the edges should curl up (or down) and start to form a cylinder. Second, you should have the same number of stitches in each subsequent round.
-
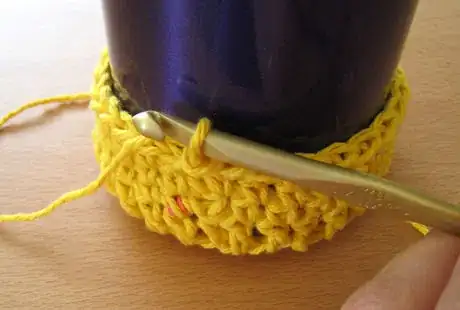
11Try the base on the water bottle in the first couple of rows. If it's too loose, you'll need fewer stitches in the last row of the round base. If it's too tight, add a few stitches, either to the round base or to one of the bottom rows of single crochet right near the base. Either way, it's best to find this out now.
-
12Decide where you'd like the ribbon loops, and how many you'd like. With a good tie at the top, they are mostly decorative, but if you'd like, you can make them line up with a feature on the bottle, such as a narrower section.
- If you don't want the optional ribbon loops, continue the entire bottle cozy in a single crochet until you reach the desired height.
- Place the loops a bit lower than you think you will need them, remembering that the piece will stretch somewhat when in use.
-
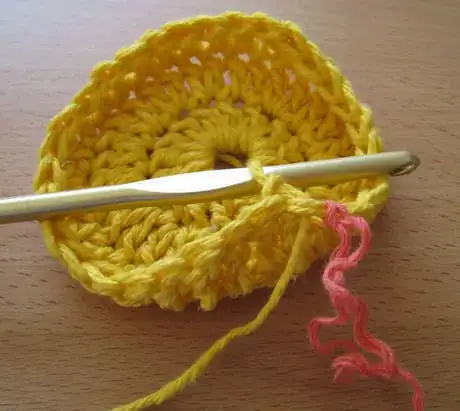
13Create the ribbon loops. Finish the round at the bottom of where you want the loop.
- Chain three.
- Double crochet into the next two stitches from the previous round (total of three double crochet including the chain).
- Triple crochet into the next stitch. The triple crochet is a little too tall for the row of double crochets around it, so it forms a sort of belt loop that will stick out if you tug on it a bit.
- Continue the pattern of three double crochet followed by a triple crochet for the rest of the round. Make a one or two loops with only two double crochet between if you need to to come out even on number of stitches and loops.
- Join with a slip stitch, chain 1, and proceed with additional rounds of single crochet as before.
-
14Continue alternating several rounds of single crochet with a round of loops until you reach the height you desire.
- Finish with at least one round of single crochet.
- Stop short of the neck of the bottle.
-
15Create the loops for tying the cozy closed. Chain six (or some other number that produces a desired length). Skip three stitches (or some other number that produces the desired spacing), and slip stitch into the next stitch. Repeat all the way around.
-
16Tie off and stitch in the ends.
-
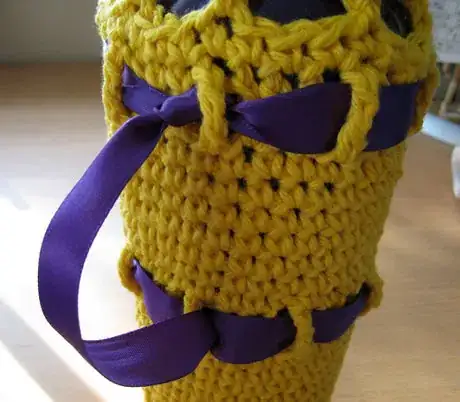
17Add ties and laces as desired. Any ribbon, cord or yarn will do. This cozy uses six strands of leftover yarn, braided tightly and tied in a simple knot at both ends to tie the bottle in.
- Use a cord that doesn't stretch too much for the top closure.
- Thread the ribbons through the loops formed by the triple crochet as you would a belt through belt loops. Tug on the loops gently to open them up, if needed. You can tie the ends in knots or bows, tuck them in, stitch them together, or leave them hanging loose to create the effect you prefer.
- Lace a cord or braided yarn through the loops around the top and tie the bottle into the cozy. Tie it so that you'll be able to get the bottle out again for cleaning.
-
18Fashion any handles or straps you want and stitch them to the cozy or use the loops already built in to attach them. You could crochet or braid them from any yarn that's left over, use more of whatever ribbon you're using, or recycle some fabric (perhaps an old necktie?), whatever you prefer.
Community Q&A
-
QuestionCould I use crochet thread for this project?
 Community AnswerYes. You can use any type of thread for this. Whatever type of yarn you are using, check its label for thickness and which crochet hook number to use. Thickness is written as ply of yarn.
Things You'll Need
- Sizes given here are as shown, for reference. Use whatever yarn, hook, and bottle you have and adjust the size as needed.
- Bottle: three inch (7.5cm) diameter, 8 1/4 inches (21cm) tall, to the neck.
- Hook: Size 10 or J (U.S.)
- Yarn: recycled cotton, a bit thinner than standard worsted weight acrylic. Two fist-sized balls for the cozy, a third if desired for straps.
- Coordinating/contrasting ribbon, yarn, cord, etc., optional.
- Scissors
- Tape measure and/or ruler
- Yarn needle for sewing in ends


