X
wikiHow is a “wiki,” similar to Wikipedia, which means that many of our articles are co-written by multiple authors. To create this article, volunteer authors worked to edit and improve it over time.
This article has been viewed 25,877 times.
Learn more...
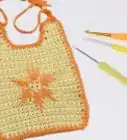
Crocheting a simple vest can be done with only beginner to intermediate level skills, but the project itself can be somewhat time-consuming. You'll also need to adjust the pattern based on the bust size of the intended wearer.
Steps
Before You Begin: Taking Measurements
-
1Measure your bust. If you don't already know the bust size of the intended wearer, you should measure it now.
- To measure bust size, wrap a cloth measuring tape around the widest part of the bust. Keep the tape taut but not tight, and make sure that it remains parallel to the floor.
-
2Determine your size. Compare your bust measurement to the sizing measurements of the pattern.
- If your bust size is:
- 32 inches (81 cm), make a small.
- 36 inches (91 cm), make a medium.
- 40 inches (102 cm), make a large.
- 44 inches (112 cm), make an extra-large.
- Note that the default instructions are for a small vest, but necessary size-based alterations are noted in the substeps.
- You'll need five balls of yarn for a small, six for a medium or large, and seven for an extra-large.
- If you want to add edging to the vest, you'll need an additional one to three balls of yarn in a second, coordinating color.
Advertisement - If your bust size is:
-
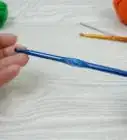
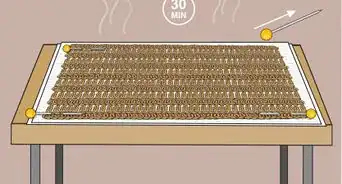
3Check the gauge of your yarn. Work two single crochets and two shell stitches with your chosen yarn. The length of this pattern should be about 4 inches (10 cm).
- Also note that six rows of this pattern should produce material that is 4 inches (10 cm) long.
- Use fine to super-fine yarn for best results.
- Start with a G-6 (4 mm) crochet hook. If the gauge is too small with this hook, increase the hook size and try again. If the gauge is too large, decrease the hook size and try again.
-
4Familiarize yourself with the stitches. You'll need to know a few basic stitches and three special stitches to complete this vest.
- The basic stitches you need to know include: chain stitch, single crochet, double crochet, slip stitch and whip stitch. You'll also need to know how to make a slip knot.
- The specialty stitches you need to know include: shell, half-shell, and beginning half-shell.
- For each shell stitch:
- Double crochet one.
- Chain one and double crochet one. Repeat a total of six times.
- For each half-shell:
- Double crochet one.
- Chain one and double crochet one. Repeat a total of three times.
- For each beginning half-shell:
- Chain four.
- Double crochet one.
- Chain one and double crochet one. Repeat a total of two times.


Advertisement
Part 1
Part 1 of 6:
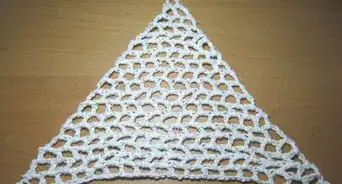
Part One: Main Body Piece
-
1Work a foundation chain. Attach the yarn to your hook using a slip knot, then work a foundation of 179 chain stitches.
- For medium vests, work 195 chains. For large vests, work 211 chains. For extra-large vests, work 227 chains.
-
2Double crochet across the first row. Work one double crochet into the fourth chain from the hook. Then, work one double crochet into each chain across the rest of the row.
- Note that the three chains you skip will act as your first double crochet.
- Turn the work to the other side once you reach the end of the row.
-
3Chain and double crochet across the second row. Chain four. Skip the first two double crochet, then double crochet once into the double crochet that follows.
- After that, chain one, skip the next double crochet, and double crochet once into the stitch after that. Repeat across the row.
- Turn at the end of the row.
-
4Work another row of double crochet. Chain three, then double crochet once into each chain-one space of your previous row.
- Do not stitch into the double crochets of your previous row.
- Repeat this pattern across the row and turn once you reach the end.
-
5Single crochet, double crochet, and shell stitch the fourth row. Chain one, then single crochet into the first double crochet of the previous row.
- After that, skip the next three double crochet, then work one shell stitch into the double crochet after that. Skip the next three double crochet, then single crochet into the next double crochet. Repeat this substep pattern across the row.
- Turn at the end of the row.
-
6Single crochet across the fifth row. Chain four, then skip over the next chain-one space before starting the row pattern.
- Single crochet once into the next chain one space, then chain one. Repeat four times.
- Skip the next two chain-one spaces. Single crochet into the next chain one space and chain one; repeat four times. Repeat the entire substep across the rest of the row.
- Double crochet in the last double crochet of the row.
- Turn the pattern.
-
7Repeat the third row. Your sixth row should be identical to the third row.
- Chain three.
- Double crochet into each chain-one space of the previous row.
- Turn at the end.
-
8Work chains and double crochets across the seventh row. Chain four, then skip the first three double crochet. Double crochet once into the next double crochet after that.
- Afterward, chain one, skip the next double crochet, and double crochet once into the double crochet after that. Repeat this pattern until you reach the last three stitches.
- Chain one.
- Skip the next two stitches.
- Double crochet once into the final stitch.
- Turn the work.
-
9Repeat rows three through seven. Work three more sets of rows that are identical to rows three through seven.
- This should take care of rows 8 through 22.
-
10Repeat rows three through six. Work one set of rows that are identical to rows three through six.
- This should give you rows 23 through 26.
- Row 26 is the final row of the back piece. Do not fasten off the yarn at the end of this last row, however.


Advertisement
Part 2
Part 2 of 6:
Part Two: Front Panel A
-
1Double crochet the first row. Chain four. Skip the first three double crochet, then double crochet once into the next double crochet.
- After that, chain one, skip the next double crochet, and double crochet once into the double crochet after that. Repeat this pattern 27 times.
- For medium and large vests, repeat 31 times. For extra-large vests, repeat 35 times.
- Turn the work over.
- Do not work stitches into the remainder of the previous row. You will need to create a gap between the front panels and the back panel for armholes.
- After that, chain one, skip the next double crochet, and double crochet once into the double crochet after that. Repeat this pattern 27 times.
-
2Repeat the body rows. Follow the steps used to create body rows three through seven. Do this a total of two times.
- This will create rows two through eleven of front panel A.
- Only work stitches into front panel A. Do not work rows two through eleven into the body of the vest.
-
3Work a partial set of body rows. Follow the steps used to create body rows three through six.
- Work one set of rows like this into front panel A, creating rows 12 through 15 of the panel.
-
4Fasten off the yarn. Cut the yarn, leaving a tail 3 inches (7.6 cm) long. Pull this tail through the loop on your hook to fasten off the yarn.
- Weave the excess tail into the inner stitches of the vest to hide and secure it.


Advertisement
Part 3
Part 3 of 6:
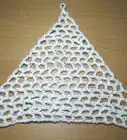
Part Three: Back Panel
-
1Join the yarn. Join the primary vest yarn to main body piece of the vest using a slip stitch.
- Find the end of front panel A, then skip three unworked double crochet in the main body piece. Join the yarn onto the main body stitch after that.
-
2Double crochet across the first back panel row. Chain four. Skip the next double crochet in the main body piece, then double crochet once into the double crochet after that.
- Chain one, skip the next double crochet, and double crochet once into double crochet after that. Repeat 27 times.
- For medium vests, repeat 27 times. For large and extra-large vests, repeat 35 times.
- Turn the work and leave the remainder of the main body stitches unworked. Do not work any of the back panel rows into this untouched section of the main body.
- Chain one, skip the next double crochet, and double crochet once into double crochet after that. Repeat 27 times.
-
3Repeat the third body row. For the second row of the back panel, follow the same steps used to create the third row of the main body piece.
-
4Shell and half-shell in the third row. Work one beginning half-shell into the first double crochet of the row. Skip the next three double crochet, single crochet once into the double crochet after that, and skip the following three double crochet after that.
- Shell stitch once into the next double crochet. Skip the following three double crochet, single crochet once into the double crochet after that, and skip the next three double crochet after that. Repeat this substep pattern across the rest of the row.
- Work one half-shell into the last double crochet of the row, then turn the work.
-
5Single crochet across the fourth row. Chain one, then single crochet once into the first double crochet.
- Chain one and single crochet once into the next chain-one space; repeat once more.
- Chain one and skip the next two chain-one spaces.
- Single crochet into the next chain-one space and chain one; repeat three more times. Skip the next two chain-one spaces. Repeat this entire substep sequence until you reach the last half-shell of the previous row.
- Single crochet in the next chain-one space and chain one; repeat once more. Single crochet once into the last double crochet, then turn the work.
-
6Work a series of repeat rows down the rest of the back panel. For rows 5 through 15 of the back panel, you'll need to repeat steps used while working previous rows.
- For row five of the back panel, repeat row three of the body.
- For row six of the back panel, repeat row seven of the body.
- For rows seven through eleven of the back panel, repeat rows two through six of the back panel.
- For rows 12 through 15 of the back panel, repeat rows two through five of the back panel.
-
7Fasten off the yarn. Cut the yarn, leaving 3 inches (7.6 cm) of excess. Pull this tail through the loop on your hook to fasten off the yarn.
- Weave the excess tail into the inner stitches of the vest to hide it.


Advertisement
Part 4
Part 4 of 6:
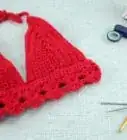
Part Four: Front Panel B
-
1Join the yarn. Join the vest yarn to the main body piece using a slip stitch.
- Find the end of the back panel, then skip over three unworked double crochet in the main body piece. Join the yarn onto the main body stitch after that.
-
2Double crochet across the first row. Chain four, then skip the next double crochet. Double crochet once into the double crochet after that.
- Chain one, skip the next double crochet, and double crochet once into the double crochet after that. Repeat across the main body row until you reach the last three stitches.
- Chain one, then skip the next two stitches. Double crochet once into the last stitch and turn the work over.
-
3Repeat row patterns for the remainder of front panel B. For rows 2 through 15, you'll need to repeat row patterns you worked with earlier in the project.
- For rows two through eleven, repeat rows three through seven of the body. You'll need to work this set of rows twice.
- For rows 12 through 15, repeat rows three through six of the body once.
-
4Fasten off the yarn. Cut a tail measuring roughly 3 inches (7.6 cm). Pull this tail through the loop on your hook to tie off the yarn.
- Weave the remaining tail into the inner stitches of the vest to hide it.


Advertisement
Part 5
Part 5 of 6:
Part Five: Joining
-
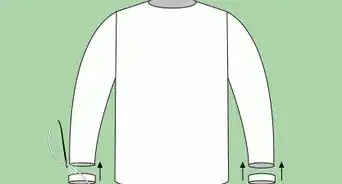
1Sew together the back panel and front panel A. Thread a yarn needle with the same yarn used to crochet the vest, then whip stitch the bottom half of the back panel to the bottom half of front panel A.
- Fold the panels so that the outer sides face each other.[1] Match the stitches at the armhole edges of both panels.
- Cut a piece of yarn three to four times longer than the armhole edge of either panel.
- Whip stitch 16 stitches together from bottom to top. Trim the yarn and weave it into the inner stitches of the vest.
- This will create a shoulder seam and complete one armhole.
-
2Stitch together the back panel and front panel B. Fold the back panel and front panel B together. Follow the same procedure used on the previous shoulder seam to complete the second.
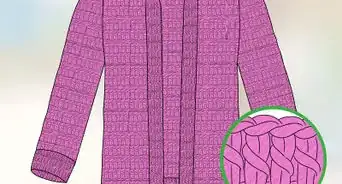
- After completing the second shoulder seam, the vest is technically complete and ready to wear. If desired, however, you can decorate the vest with optional edging.


Advertisement
Part 6
Part 6 of 6:
Part Six: Optional Edging
-
1Crab stitch around both armholes. Tie your second color yarn to the crochet hook using a slip knot. Work one row of crab stitches around the perimeter of one armhole, then work one row of crab stitches around the perimeter of the second armhole. To work the crab stitch:[2]
- Join the yarn with a slip stitch.
- Work one single crochet into each stitch around the perimeter of the armhole. Do not turn the work at the end of the row.
- Chain one.
- Working in reverse (from left to right), skip one stitch, then single crochet once into each stitch of the previous row.
- Slip stitch the last crab stitch (reverse single crochet) into the turning chain of the previous row.
- Fasten off the yarn as usual.
-
2Work shell edging around the entire perimeter. Tie your second color yarn to the crochet hook using a slip knot. Work shell edge stitches directly into the stitches around the outer perimeter of the vest. To work the shell edge stitches:
- Join the yarn with a slip stitch.
- Chain one.
- Single crochet once into the first stitch.
- Skip one stitch, then work five double crochet into the next stitch. Skip another stitch, then work one single crochet into the stitch after that. Repeat this pattern all the way around the perimeter of the vest.
- Single crochet once into your last stitch.
- Slip stitch the last stitch into the chain-one.
- Fasten off as usual.


Advertisement
Things You'll Need
- 5 to 7 balls of fine to super-fine yarn, for vest
- 1 to 3 balls of fine to super-fine yarn, second color, for edging (optional)
- G-6 (4 mm) crochet hook
- Yarn needle
- Scissors
- Measuring tape (optional)
References
About This Article
Advertisement