This article was co-authored by wikiHow staff writer, Jessica Gibson. Jessica Gibson is a Writer and Editor who's been with wikiHow since 2014. After completing a year of art studies at the Emily Carr University in Vancouver, she graduated from Columbia College with a BA in History. Jessica also completed an MA in History from The University of Oregon in 2013.
This article has been viewed 22,818 times.
Learn more...
Adding a brim to a crocheted hat is an easy way to add style to a simple hat. You can use any color of soft yarn you like and crochet the hat in the round until it's as large as you want. Then, crochet a few rows to make a brim that sticks out from the hat like a cap. For more embellishment, sew on buttons, attach crocheted flowers, or thread ribbon around the base. Your stylish hat will be the perfect accessory to dress up any outfit.
Steps
Starting the Top of the Hat
-
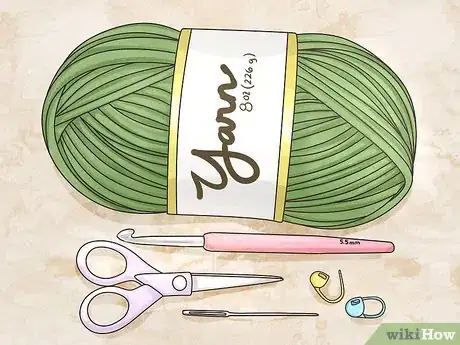
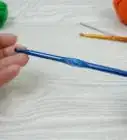
1Find a size I (5.5 mm) crochet hook and 8-oz (226 g) of worsted yarn. Use a skein of yarn in any color you like that's 244 yards (223 m) long.
- Since yarn labels may differ, look for #4 yarn weight.
- You'll also need a large-eye tapestry needle so you can weave in the yarn tails.
Tip: If you'd like to make a slouchier hat, use super bulky, soft yarn instead of worsted weight yarn.
-
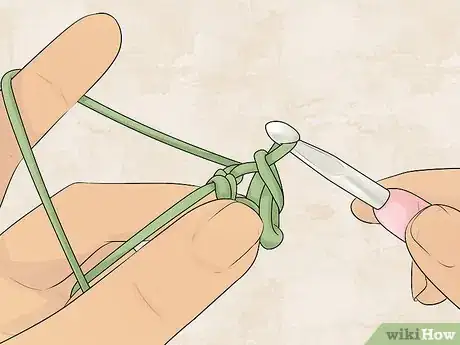
2Make 3 chain stitches. Tie a slip knot and place it onto your hook. Hold the yarn tail and wrap the working yarn around your hook 1 time so it catches. Slowly pull the hook back through the slip knot. You'll now see 1 chain on your hook. Repeat this 2 more times so you have a total of 3 chains on the hook.
- These chain stitches make up your foundation chain, which is the start of your hat.
Advertisement -
3Join the yarn ends to make a circle. Insert the hook into the center of the first chain that you made. Wrap the yarn around the hook and pull it through both of the loops on the hook. Once you pull the yarn through, you'll have 1 loop left on the hook.
- Joining the yarn will secure your foundation row.
-
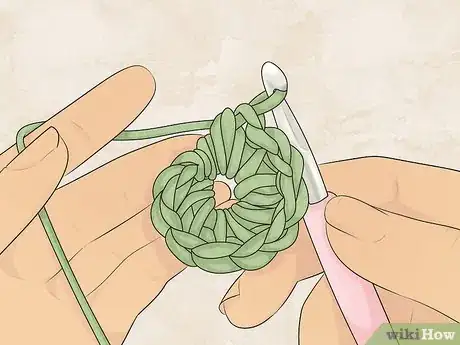
4Chain 1 and make 10 half-double crochet (hdc) stitches for round 1. Wrap the working yarn over your hook so it catches. Pull it through the loop to chain 1 stitch. To hdc, wrap the yarn over your hook and insert it into the next chain stitch. Pull it through and yarn over again. Then pull it through all 3 loops on the hook to make 1 hdc stitch.
- To make it easier to keep track of the rounds, consider placing a yarn marker once you've made 10 hdc stitches.
-
5Make 2 hdc into each stitch for round 2. Instead of joining the rounds, keep working them so you crochet a flat circle. Insert your hook into the next stitch and a hdc stitch. Then insert your hook into the same stitch and make another hdc stitch. Continue to hdc into each stitch for this round.
- To keep track of where you are in the round, look for the yarn marker that you placed at the start of the round.
- You'll now have 20 stitches after you've made this increase round.
-
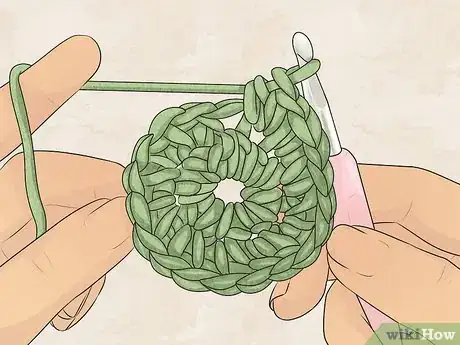
6Alternate hdc stitches in round 3 to increase the row by 10 stitches. Hdc into the first stitch and then make 2 hdc stitches into the next stitch. Keep alternating between making 1 hdc and 2 hdc stitches as you work your way across round 3.
- Once you've crocheted round 3, you'll have 30 hdc stitches.
Tip: From this point on, you'll make 10 extra stitches for each round until you get a total of 60 stitches.
Crocheting the Body
-
1Switch between 2 individual hdc and 2 hdc into a stitch across round 4. To increase your round evenly, make a hdc stitch into the first 2 stitches. Then make 2 hdc into the following stitch. Keep alternating between individual hdc and hdc stitches into the following stitches.
- You should now have 40 hdc stitches after finishing round 4.
-
2Increase round 5 by hdc into 3 stitches and then hdc twice into a stitch. Make a hdc stitch into the next 3 stitches. To increase the round, work 2 hdc stitches into the following stitch. Repeat this across round 5.
- Once you crochet round 5, you'll have 50 hdc stitches.
-
3Hdc into the next 4 stitches and make 2 hdc into the following stitch. To work round 6, make 4 individual hdc stitches. Then make 2 hdc stitches into the next stitch. Switch back to making individual stitches before making the increasing stitches.
- Do this for the rest of round 6 so you end up with 60 hdc stitches.
-
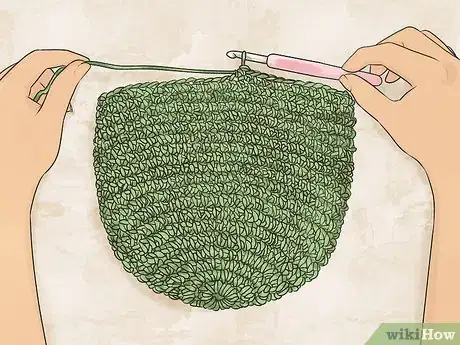
4Make 1 hdc into every stitch for rounds 7 through 20. Once you reach 60 stitches, you don't need to increase the rounds. Instead, work 1 hdc into every stitch for each round until the hat is at least 20 rounds in size.
- For a larger hat, continue to crochet until it's as big as you like. Try fitting it on your head to test the size.
-
5Skip 1 stitch and slip stitch the following stitch to finish off the round. After you've made at least 20 rows, skip 1 stitch and insert your hook into the next stitch. Wrap the yarn over the hook so it catches and pull the hook through both of the loops to make a slip stitch.
Did You Know? Skipping a stitch and then slipping a stitch will even out the final row so it's level.
Making the Brim
-
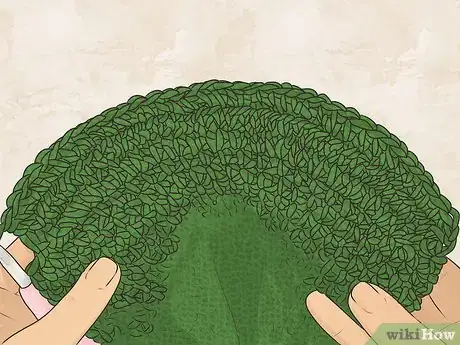
1Chain 1 stitch, skip 1, and make 2 hdc into each of the next 19 stitches. To start the brim, make 1 chain stitch and then skip the stitch that's after it. Then make 2 hdc stitches into each of the next 19 stitches.
- You should now have a total of 38 stitches that will form the base of the brim.
-
2Slip 1 stitch and make 2 slip stitches to make the end of the brim's first row. Once you've worked across the brim, skip 1 stitch and insert your hook into the following stitch. Wrap the yarn over the hook so it catches and pull it through both of your loops to slip the stitch. Make 1 more slip stitch finish the row.
-
3Turn the work and make 1 hdc into every stitch across the brim. To make the brim's second row, flip the work around and begin making a hdc into each stitch. You'll end up making 38 hdc stitches for the second row.
-
4Slip 1 stitch and turn the work before you hdc the last row of the brim. Insert your hook into the next stitch on the hat and slip the stitch onto your hook. Flip the work over and hdc into every stitch to create the third row.
- If you'd like to make a wider brim, make additional rows until the brim is as large as you like.
Tip: Keep in mind that if you make more than 3 rows for the brim, it will become floppy.
-
5Make a slip stitch and tie off the end of the yarn. To finish the hat, insert the hook into the next stitch on the hat and slip the stitch. Cut the yarn to leave a 6 in (15 cm) tail and tie it through the remaining loop on the hook. Then thread the yarn onto a large-eyed tapestry needle and weave in the tail.
-
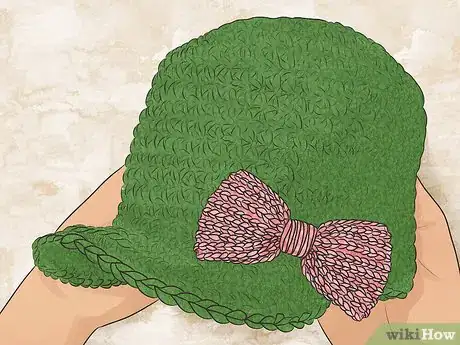
6Add embellishments to personalize your crocheted hat. To make your hat even more stylish, crochet a few flowers that you can sew onto the finished hat. If you prefer, attach a few large buttons to the side of the hat or weave ribbon around the base of the hat.
- Try crocheting a bow that you can stitch onto the side of the hat.
Things You'll Need
- Size US I (5.5 mm) crochet hook
- 1 8-ounce (226 g) skein of worsted weight yarn measuring 244 yards (223 m) long
- Large-eye tapestry needle
- Scissors
