This article was co-authored by Sarah Stearns. Sarah Stearns is a DIY Specialist, Artist, Maker, Blogger, and the Founder of SarahMaker.com. With over ten years of experience, she specializes in fun, approachable crafts like crocheting, making polymer clay jewelry, quilting, and creating Cricut projects. Her work has been featured in several publications, such as Scientific American, Good Housekeeping, Vox, and Apartment Therapy. Sarah holds a BA in Psychology from Vanderbilt University.
wikiHow marks an article as reader-approved once it receives enough positive feedback. This article received 11 testimonials and 80% of readers who voted found it helpful, earning it our reader-approved status.
This article has been viewed 149,366 times.
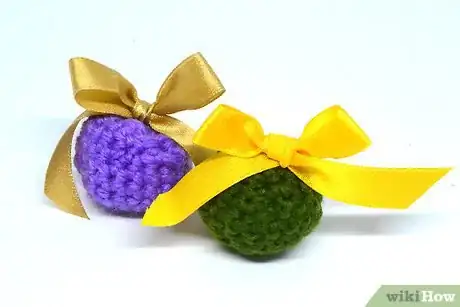
Crocheting a plush ball is fairly easy if you have some basic knowledge of how to crochet. You can crochet a basic ball or customize it to make it unique. After your ball is finished, you can use it as décor or play with it. All you need to get started is a ball of yarn, a crochet hook, and some stuffing material.
Steps
Making a Simple Ball
-
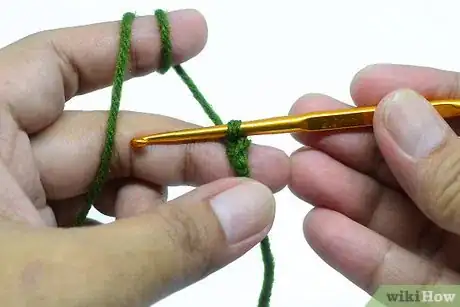
1Make a slip knot and chain two stitches. Start by making a slipknot. To make a slipknot, loop the yarn around your index finger two times. Then, pull the first loop over the second loop to make a slipknot and slide the knot onto your crochet hook. Then, chain two stitches.[1]
-
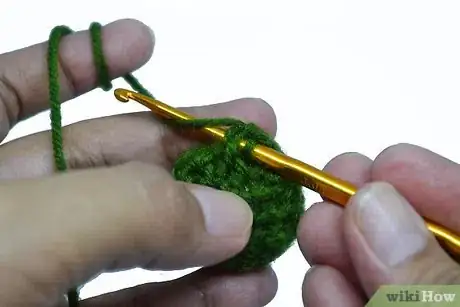
2Work in six single crochets. Make six single crochet stitches in the second stitch from the hook, which should also be the first chain stitch you created.[2] To single crochet, insert the hook through the stitch and loop the yarn over the hook. Then, pull the yarn through the first loop on the hook and yarn over again. Then, pull through the remaining two loops on the hook.[3]
- When done, you should have your first round. This round has six stitches in it.
Advertisement -
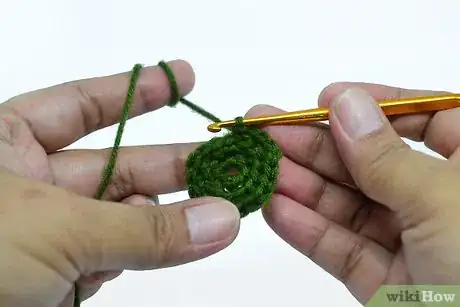
3Make two single crochets in each previous stitch. Complete your second round by working two single crochets into each single crochet stitch from the previous round.[4]
- Your second full round should have a total of 12 stitches.
-
4Alternate between two and one single crochets. For your third round, make two single crochets into the first stitch of your previous round, then one single crochet in the second stitch of the previous round. Alternate between one and two single crochets into each stitch all the way around, using every stitch from the previous round.[5]
- You should make a total of 18 stitches in this round.
- This will be your last round of increases.
-
5Complete three rounds of single crochets. For rounds four through six, single crochet once into each stitch of the corresponding previous round.[6]
- For round four, stitch into round three; for round five, stitch into round four; for round six, stitch into round five.
- Each round should have 18 stitches in it.
-
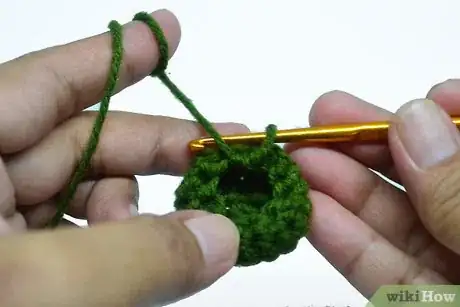
6Single crochet decrease during the next round. Make a single crochet decrease across the first two stitches of your previous round. Afterward, work one single stitch into the stitch that follows. Repeat this all the way around.[7]
- To do a single crochet decrease, start by inserting the hook through the next stitch in your round and yarn over. Then, pull the yarn through the first loop on your hook and insert the yarn into the next stitch in your round and yarn over again. Pull the yarn through the first stitch again and then yarn over one more time. Pull the yarn through the remaining three stitches on the hook to complete your first single crochet decrease.[8]
- You should make a total of 12 stitches for this seventh round.
- You have reached the halfway point of your ball and are beginning to narrow it back down with this step. Essentially, you will be creating the same rows you had for the first half of the ball, but in reverse.
-
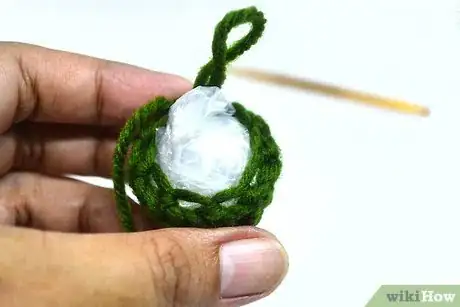
7Stuff the ball. It is a good idea to start stuffing the ball before it is too close to being finished or you may have a hard time adding the filling with only a small opening.[9] The ball needs to be stuffed or it will look deflated. You can fill the ball with fiberfill stuffing, dried beans, or plastic bags.
- If using something small like dried beans, you may wish to wait until after you complete another round before filling it. If you wait any longer than that, however, the ball might become too difficult to fill at all.
-
8Decrease again. For the eighth round, make a single crochet decrease over the next two stitches from the previous row. Repeat all the way around.[10]
- You should complete a total of six stitches.
-
9Do another decrease for the ninth and final round. Make a single crochet decrease over two stitches of the previous round. Repeat all the way around.
- You should only need to make three stitches.
-
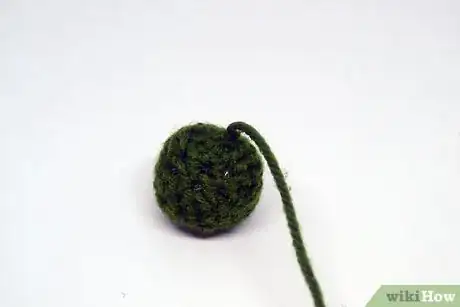
10Fasten off the end. Cut the yarn, leaving a long tail. Wrap the tail around your hook and pull it through the loop currently on the hook. Then, tie a knot to secure the ball.[11]
- Weave the loose end into the stitches of the ball to hide it.
Customizing and Using Your Ball
-
1Change the size. You can make a ball small or large depending on your intentions for using it. To make the ball larger, add a few more rounds of increases by alternating between single crocheting two stitches into one and then one stitch into one.
- At the end of each increase round, you should have 1.5 times the number of stitches you had at the beginning of the round. For example, if you start a round with 30 stitches, you should finish it with 45 stitches.
- Keep increasing until the ball circumference is the size you want it to be.
-
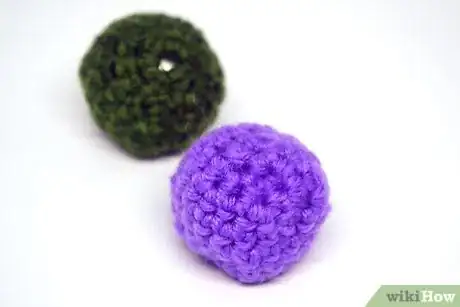
2Choose your yarn. The color and type of yarn you choose can also affect the look and feel of your ball. You can go with a solid color, alternate between two or three colors, or go for a multi-color yarn. You can also choose a smooth yarn like an acrylic, or go with a fluffy yarn to give your ball a furry appearance.
- For a striped ball, switch yarn colors after every round for a small ball or after every two rounds for a larger ball.
- Be sure the check the gauge of the yarn you are using and make sure that you are using the recommended hook for the yarn type. This information is usually listed on the yarn label.
-
3Try a different stitch. You can also experiment with different stitches when making your ball. Trying a different stitch can give your ball some texture and add an interesting design. For example, you could try the popcorn stitch or the crunch stitch for a textured ball.
- Keep in mind that tight stitches work best for crocheting a ball because you want to make sure that the stuffing won't come out. Avoid stitches that have wide gaps in them, unless you plan on lining the ball with fabric.
-
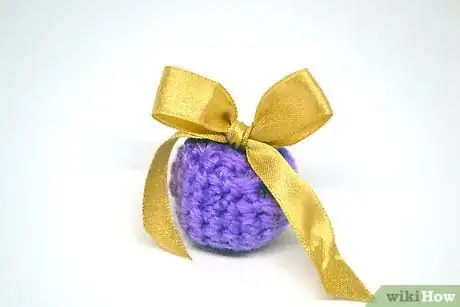
4Embellish the ball. After your ball is finished, you can always add embellishments to make it even more unique. Try sewing on a button, tying a ribbon around the middle of the ball, or adding some glittery puffy paint.
- For example, you could tie a black satin ribbon around a white ball to add some contrast, or use some glue to add a bit of glitter to the ball and make sparkle.
-
5Display or use your ball. Depending on what you had in mind for this project, you have some options when it comes to displaying and using your ball. You can use your ball to play with or you can display it as part of your home décor. Some ways you can use and display a crocheted ball include:
- As an ornament. You can loop a piece of yarn or ribbon through the ball to hang it up like an ornament.
- In a bowl. Place several balls into a bowl on a table or shelf for a cute DIY décor piece.
- Play hacky sack with a bean stuffed ball. If you used beans to stuff your ball, then take it outside and play a game of hacky sack with friends.
References
- ↑ http://www.eatdrinkchic.com/post.cfm/diy-colourful-crochet-balls
- ↑ http://www.eatdrinkchic.com/post.cfm/diy-colourful-crochet-balls
- ↑ http://newstitchaday.com/crochet-101-how-to-crochet-the-single-crochet-for-beginners/
- ↑ http://www.eatdrinkchic.com/post.cfm/diy-colourful-crochet-balls
- ↑ http://www.eatdrinkchic.com/post.cfm/diy-colourful-crochet-balls
- ↑ http://www.eatdrinkchic.com/post.cfm/diy-colourful-crochet-balls
- ↑ http://www.eatdrinkchic.com/post.cfm/diy-colourful-crochet-balls
- ↑ http://newstitchaday.com/sc2tog-single-crochet-two-together/
- ↑ http://www.eatdrinkchic.com/post.cfm/diy-colourful-crochet-balls
Community Q&A
-
QuestionCould I make a solar system model using this method?
 Community AnswerYes, although it would be difficult and quite time-consuming. Many people prefer to use painted Styrofoam balls instead.
 -
QuestionHow do I turn a crochet ball into a grape?Make the balls as described in article, leaving an extra long tail on each ball. Once you have enough balls to form a cluster, begin crocheting the tails together two at a time. Start at the base where the yarn is still attached to the balls. Make a slop-knit as close to this base as you can, but relax; a bit of "looseness" in a grape-cluster is good. Alternate pulling a loop of yarn through the loop on your hook from one ball-tail to another until a cluster forms.
-
QuestionI’m a beginner and this seems hard. Anything easier to recommend?
 MicheleTop AnswererFor most beginners, making dishcloths, scarfs and afghans are the best and easiest way to learn. Try finding a pattern for a simple dishcloth or other flat piece of work before trying dimensional.
Things You'll Need
- Yarn
- Crochet hook, size D3 (3.25 mm)
- Polyester fiberfill, plastic bags, dried beans, or other stuffing
About This Article
If you want to crochet a ball, chain 2 stitches before working 6 single crochet stitches into the second chain from the hook to form your first round. For the second round, work 2 single crochet stitches into each of the 6 stitches. In the Third round, alternate between inserting 2 single crochet stitches and 1 single crochet stitch into each stitch, then use only 1 single crochet stitch for rounds 4 through 6. In round 7, alternate between a single crochet decrease and 1 single crochet stitch, then stuff the ball and decrease in rounds 8 and 9. For tips on how to change the size of the ball, read on!
