wikiHow is a “wiki,” similar to Wikipedia, which means that many of our articles are co-written by multiple authors. To create this article, 24 people, some anonymous, worked to edit and improve it over time.
wikiHow marks an article as reader-approved once it receives enough positive feedback. In this case, several readers have written to tell us that this article was helpful to them, earning it our reader-approved status.
This article has been viewed 311,741 times.
Learn more...
Making a family tree is a fantastic way to illustrate your family's history. Start by researching your ancestry to find out who should be included, then diagram each generation to create your family tree. You can embellish your diagram to turn it into a display-worthy work of art, or simply save your research so you'll always have your family history on hand. See Step 1 to get started.
Steps
Researching Your History
-
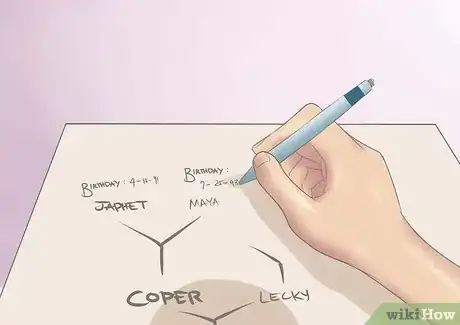
1Write down the people you want to include in the diagram. A family tree begins with you, and branches out from there. Start by writing down the names of people in your immediate family, then move to your parents' generation. Make sure you don't leave anyone out! Your family tree will be an important piece of family history, so take time to create an accurate diagram.
- Write down your name, your siblings' names, and your parents' names.
- Write down your grandparents' names, your aunts' and uncles' names and your cousins' names.
- Write down your great grandparents' names and your great aunts' and uncles' names.
- Many people stop there, but you can include as many generations as you want.
-
2Fill in the holes by doing some research. It might start getting difficult to fill in names once you go back a few generations. In an effort to make sure everyone gets included and all the names are accurate, conduct some research to double check yourself. This is a great opportunity to learn more about your family history.[1]
- Talk to older members of your family to find out more information. Find out the names of your grandparents' siblings, their spouses, their children. Ask around to find out as much as you can. If you're lucky, you'll get the opportunity to hear some surprising family stories and secrets, too.
- Do online research using a genealogy tool. There are many online tools that let you simply enter your name and your parents' name, then do all the research for you. These sites usually give you a limited amount of information free, then require payment for more in-depth research. If you're serious about mapping your ancestry, this is a great way to collect information.
Advertisement -
3Decide what other information you want to highlight. In addition to including the first and last names of your family, you might want to list their birth dates, death dates (if applicable), marriage dates, and so on. Having these dates on the family tree will make it even more informative as a historical document for your family. In addition to dates, you could consider including your relatives' birthplaces or hometowns.[2]
-
4Decide whether to include photos. If you have access to photographs of your ancestors, you could include a small portrait of each person. This option is best for family trees that are relatively contained, since the pictures could take up a lot of room on your finished diagram.[3]
- If you only have a few photos, you could just include pictures of your immediate family members.
- Track down photos of as many family members as possible. If you want to make them all the same size, scan them into your computer and use Photoshop or another photo editing program to change the scale.
Creating the Diagram
-
1Start with your generation. This is the base of the tree, and includes you, your parents, and your siblings. The shape your diagram will take is your choice. If you want it to branch out vertically and get bushier at the top, like a tree, start at the bottom of a large sheet of paper. You may also start on the left side of a sheet of paper so that your diagram will be easy to read from left to right. No matter what shape you want your diagram to take, fill in the following information to get started:[4]
- Write down your name.
- Draw a line from your name to the name of your mother. Draw another line from your name to the name of your father. Draw a horizontal line connecting your mother and father.
- If you have siblings, draw lines from your mother and father to their names.
- If your siblings have spouses, write them in and connect them with lines.
- If your siblings have children, write them in and connect them with lines.
-
2Fill in your parents' generation. Now it's time to fill in the second generation - your parents' generation. Connect each married couple with a horizontal line, and draw lines from parents to children.[5]
- Write your maternal grandparents' names above your mother's name. Write your paternal grandparents' names above your father's name.
- Connect your maternal grandparents' names to your mother's siblings. Connect your paternal grandparents' names to your father's siblings.
- Add the names of your aunts' and uncles' spouses.
- Add the names of your aunts' and uncles' children, your cousins.
-
3Diagram your grandparents' generation. If you have a big family, your diagram may already be threatening to go over the edge of the page. Some people stop here, with both sets of grandparents serving as the crown of their family tree diagram. If you want to keep going, it's time to include your grandparents' generation. Remember to connect married couples with horizontal lines, and to draw lines from parents to their children.[6]
- Add the names of your maternal grandmother's mother and father and your maternal grandfather's mother and father. These are your great grandparents.
- Add the names of your paternal grandmother's mother and father and your paternal grandfather's mother and father. These are your great grandparents.
- Add the names of your maternal grandparents' siblings - your great aunts and uncles.
- Add the names of your paternal grandparents' siblings - your great aunts and uncles.
- Fill in the names of your great aunts' and uncles' spouses and children.
-
4Decide how far back you want to go. If you're enjoying the experience of researching your family history, keep tracing it back as far as you can. There's no limit to the potential size of your diagram, especially if it's digital!
Making it Unique
-
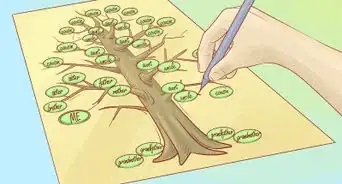
1Embellish the diagram yourself. Now that your diagram is complete, consider putting an artistic spin on it so you can share it proudly with the rest of your family. Copy the diagram in pencil on a large sheet of drawing paper, then use nice ink or paint to render the names and add colorful embellishments. You could choose to use the classic tree shape or try something new and creative to illustrate your ancestry. Here are a few ideas:[7]
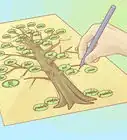
- Turn the connecting lines into branches, and write each person's name on a different leaf. Children's names can be written on apples or berries.
- Make a family galaxy, with people's names written on planets and stars. If you want, make your name the "sun."
- Create a family neighborhood, with each name written on a little house, all connected by streets.
-
2Use software to create a computer-generated tree. If you want your diagram to look visually appealing but you'd prefer not to illustrate it yourself, there are hundreds of options to choose from online. Do a search for "free family tree" to come up with templates or auto-generated diagrams you can print out and hang on your wall.
-
3Consider having an artist do an original rendition. Find an artist to render your family tree as a beautiful work of original art. You can choose to have the names written in calligraphy and have them set against a gorgeous background. If you do an online search for "family tree artist" you'll find lists of artists whose work you can commission. Take a close look at different portfolios to find an artist whose work matches your family's style.
Community Q&A
-
QuestionWhen listing a married family member, does the maiden name go first or second, and do you use parentheses?
 Community AnswerThe maiden name goes second. You put "née" in front of the maiden name, and you can use either parentheses or a comma. If Mary Brown marries John Green and changes her name, she can be listed as "Mary Green (née Brown)" or "Mary Green, née Brown."
 -
QuestionCan a widow without children be added to the family tree?
 Community AnswerYes. If the widow's late husband's parents were Mary and John Smith, you put the widow's name connecting to Mary's and John's names, as if the widow was their child.
 -
QuestionHow do I add step and half-siblings and parents to a family tree?
 Ashton CarterCommunity AnswerConnect them with lines. For example, if your parents are John and Mary Smith, but your half-sibling's mother is Mary Smith, connect your half-sibling to your mother, and their dad with lines. For step-siblings, first write your parents, then connect your step-parents (your parent's spouse) to the parents they married with lines. Next, write the step-parent(s)' former spouse(s) and their children (your step-siblings), then connect the lines.
References
- ↑ https://www.findmypast.com/content/10-tips-to-start-your-family-history-journey
- ↑ https://www.familytreemagazine.com/premium/creating-a-photo-book-the-5-elements-to-include/
- ↑ https://www.familytreemagazine.com/premium/creating-a-photo-book-the-5-elements-to-include/
- ↑ https://www.theguardian.com/news/2007/apr/14/guardianspecial4.guardianspecial225
- ↑ https://www.theguardian.com/news/2007/apr/14/guardianspecial4.guardianspecial225
- ↑ https://familyhistorydaily.com/genealogy-help-and-how-to/who-counts-as-family-in-a-family-tree/
- ↑ https://www.theguardian.com/news/2007/apr/14/guardianspecial4.guardianspecial225
About This Article
Creating a family tree diagram can be a fun way to show your family history. Start by writing your name at the bottom of the page. Draw your parents above you with a line between them. Horizontal lines represent marriage and vertical lines represent parentage. Then, draw any siblings you have beside you and connect them to your parents. Once you’ve finished your immediate family, fill in your parents’ generation, including your grandparents, your aunts and uncles, their spouses, and your cousins. After that, fill in your grandparents’ generation and keep going up the page as far as you can. For more tips, including how to make your family tree diagram unique, read on!


