This article was co-authored by Joshua & Jeremy George. Joshua and Jeremy George are BBQ Specialists and the Co-Owners of Smokin J’s BBQ in San Diego, California. With over six years of experience, they specialize in slow-smoked meats and making in-house rubs and sauces. Smokin J’s BBQ has been featured in many publications, including The BBQ Magazine.
This article has been viewed 336,035 times.
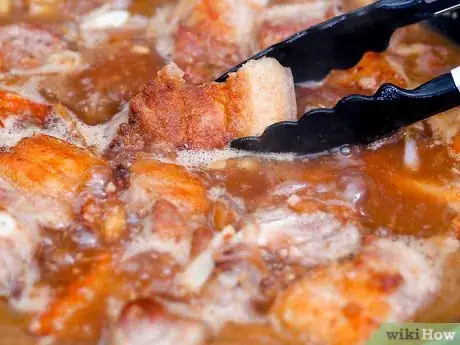
Pork is the culinary name for meat from the pig. Although the word pork can also refer to cured, smoked, or processed meat, this article will focus on fresh meat. Pork can be eaten and prepared in various forms: cured, smoked, roasted, broiled, grilled, steamed, sauteed, stir fried, braised, fried, and stewed. In this guide you'll find different methods on how to handle, cook, and store "the other white meat."
Steps
Preparing and Storing Pork
-
1Know your cuts. Generally, there are four basic parts of the pig that the most common cuts of meat come from (though many countries cut the meat differently and/or have their own names for particular cuts): the shoulder/hand, the loin, the belly/side and the leg/ham. The muscles surrounding the backbone are tender and lean (and usually more expensive!) because they aren't used as much by the pig as the muscles closer to the ground, which are tougher but more flavorful.[1]
- Shoulder - Usually divided into the lower picnic shoulder and the upper Boston shoulder (also known as the Boston butt). These cuts need to be cooked with low heat and in gently simmering liquid (e.g. a slow cooker) in order to melt away the fat and connective tissue, but the result is tender and moist. Available as: boneless Boston shoulder roast, Boston shoulder roast, cubed pork for kebabs and stews, ground pork (the picnic).
- Loin - This is where rib roasts, baby back ribs, tenderloin and the chops come from. Since these cuts are naturally tender, dry heat cooking methods (roasting, grilling, broiling, pan-frying and stir-frying) are best. Available as: blade roast, rib chop, loin chop, sirloin chop, sirloin roast, tenderloin.
- Belly/side/spareribs - The spareribs can be grilled and then roasted, but the rest of this section is usually reserved for bacon. Available as: bacon, pancetta, spareribs.
- Leg/ham - This cut is usually sold cured, cooked or smoked, but if you buy it fresh, you can glaze and score the rind and roast it (a popular option for holidays and special occasions). Available as: leg cutlet, smoked ham, top leg roast.
- Other - If you're adventurous, there's a use for almost every part of the pig's body. You can boil the head for brawn (head cheese), stocks and soups, and fry or bake the ears for crunchy munching. Throw the hocks/trotters into long-cooked soups, stews and sauces to add body. The tail can also be eaten, as can the organs: pâté, small intestine sausages (chitterlings) and black pudding (blood filled digestive tract).
-
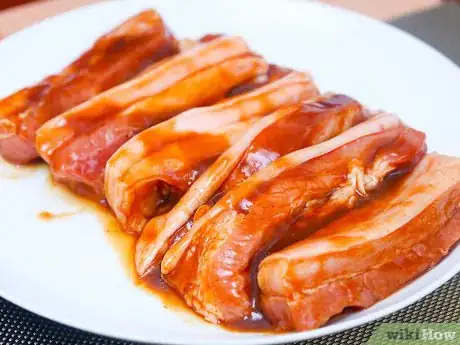
2Make time to brine or marinate. Since modern pigs are bred to be lean, the meat has less fat to keep it moist during cooking.[2] Brining is a good solution for this, but it requires planning ahead. The meat sits in a mixture of salt and water and absorbs the water slowly through osmosis. You can also make a mouth-watering marinade for your pork by combining your favorite flavors and spices in an oil base, then letting the pork sit submerged in this mixture for several hours or overnight.
- A general rule for marinades is to use about 1/4 cup of marinade per pound of pork or enough to cover the entire outside surface of the meat in a plastic refrigerator bag.
- The bigger the cut, the more time it'll need to brine or marinate. Generally, cuts from the loin or belly region will need to marinate for several hours (up to 6 for large cuts). Shoulder roasts can take up to 24 hours or longer to fully marinate. Feel free to marinate your pork as long as want, however, make sure that you don't allow the pork to go bad by marinating for more than a day or two.
Advertisement -
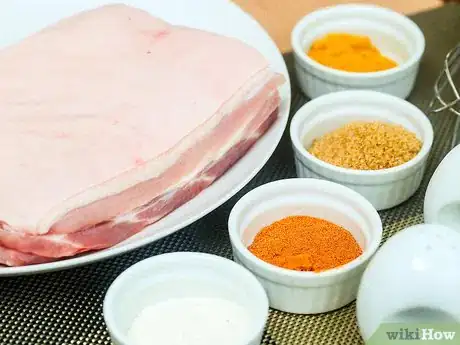
3Prepare a dry rub. Another popular way to flavor many types of meat is with a dry rub - a dry combination of salt, pepper, herbs, spices, and other (usually powdered or granulated) dry ingredients. The meat is coated with the dry rub either immediately before cooking or anywhere from a few hours to a day beforehand. Dry rubs don't help a piece of pork retain its moisture, but they do give it an intensely flavorful exterior, and, when expertly cooked, form a delicious "crust."
- Common ingredients in dry rubs include salt, pepper (both red and black), powdered garlic and onion, ginger, rosemary, and, for a sweet, caramelized crust, white and/or brown sugar. Experiment with your favorite ingredients.
- Generally, about 1/4 cup of dry rub is needed for each standard-sized cut of pork. If you're unsure, just make enough dry rub to completely cover the surface of each piece of meat.
-
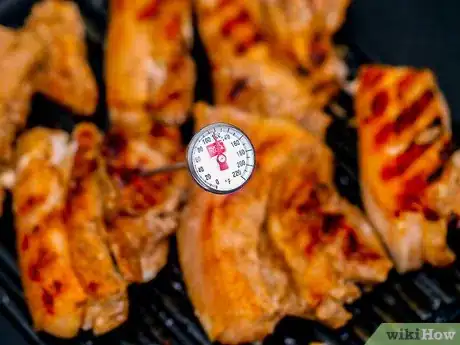
4Know beforehand when to stop cooking. As with any meat, you want to cook long enough to kill any harmful micro-organisms, but not so long that you dry the meat out. The USDA recommends cooking pork to an internal temperature of 160 F (70 C) (use an instant-read meat thermometer in the center of the thickest part of the meat) but some cooks prefer to stop between 140 and 150 F to preserve juiciness, since the Trichinella parasite dies at 137 F.[3]
- Remember to account for the fact that the internal temperature of bigger pieces keeps rising even after you take the meat off the heat. Don't let a good piece of meat "overcook" after you've finished cooking.
- Pork cooked to 160 F (70 C) can sometimes remain pink in the center, depending on the cooking method or added ingredients. So don't assume that because it's pink, it's not safe to eat!
-
5Store pork safely. When you buy raw pork, refrigerate it as quickly as possible to 40°F. If you don't cook it within 5 days, you must freeze it (0°F) or throw it away. Once you do cook it, eat it within two hours (or if the surrounding temperature is 90°F, within one hour), or store it in the fridge in shallow, covered containers for up to 4 days, or freeze it. For best quality, eat frozen pork within 3 months, and never refreeze partially defrosted pork. In general, though, thawing can dry out pork, so keep that in mind!
- To defrost raw pork, put it in a sealed bag and run it under cold water.
- Using cold water is the safest way to thaw raw pork. Don't use warm water for this purpose.
Grilling Pork
-
1Heat your grill. Grilling is a cooking method that uses direct, dry heat to heat meat on an array of closely-spaced metal bars called a grill. Grilling is a great choice for giving a mouthwatering crisp, seared crust to naturally-moist cuts of pork like chops or tenderloin. The most common types of grill are charcoal and gas grills. If you're using a charcoal grill (which takes time to reach cooking temperature), ignite your charcoal, then, as you're waiting for the charcoal to get an ash-covered, glowing appearance, portion out your pork cuts on a tray or platter so you'll be ready to immediately add them to the grill.
- Gas grills reach "ready" temperature much more quickly than charcoal grills. However, they can give a slightly different flavor to the meat. Some people prefer the taste of charcoal grills, while others prefer the ease of gas grills.
- Consider using natural hardwood or mesquite charcoal as opposed to the more-commonly used briquette form. Hardwood charcoal generally burns hotter and faster,[4] which is handy for searing meat. Natural charcoal can also transfer some of its smoky, aromatic flavor to your meat as it cooks.
- Particularly thick cuts of pork requires a longer, lower-temperature grilling process. In this case, conventional briquettes can be a better choice than hotter, quicker-burning hardwood charcoal.
-
2Add your pork cuts to the grill when ready. To prevent your meat from sticking to the grill, coat the bars of the grill with an oil that has a high smoke point (olive or grapeseed oil works well.) Do this by using a grill brush dipped in oil or by soaking a paper towel in oil, then pushing it across the grill with a pair of tongs or another long-handled tool. Then, place your pork cuts on the grill with tongs, arranging them so that they don't touch.
- Avoid cross-contamination. Don't use any of the tools you use to place your pork on the grill to handle any other foods without washing them. Clean the container that held your uncooked pork cuts before using it for any other food. Don't allow uncooked pork to touch cooked pork.
-
3Cook your pork on a colder region of the grill. Contrary to popular belief, immediately searing a piece of meat does not "seal in the moisture (or flavor.)" In fact, rapidly seared pieces of meat are now believed to retain less moisture than pieces of meat that have been cooked more gradually.[5] For charcoal grills, begin by arranging your pork around the edge of the grill, which is usually cooler than in the center. Gas grills should use a medium level of heat.
- We will eventually sear the pork at the end of the grilling process. By waiting until the meat is already cooked to sear, we retain much of the meat's moisture.
- Flip your pork cuts about once every minute or so. This ensures the meat is evenly-cooked. It will also help the meat to begin to develop an even crust.
-
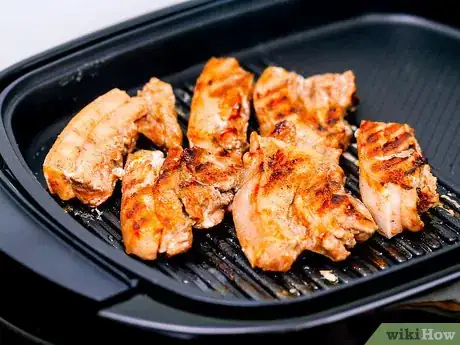
4Grill until the meat is done. Keep the barbecue's lid closed while cooking to speed the cooking process. Thin cuts of pork will only need 4-5 minutes of cooking on hot grills, while larger pieces of meat will require longer, cooler cooking periods. "Done" pork should be uniformly firm to the touch with a browned outside, a whitish (not pink) interior, and juice that runs clear to brown (never red or pink.)
- If you're unsure, use a meat thermometer. The USDA recommends an internal temperature of 160-170 degrees F (about 70 degrees C) for pork products. However, many prefer temperatures as low as 140 degrees C for juicier, rarer cuts of pork (see Method 1 for more information.)
-
5Quickly sear the pork. Before you remove your pork from the grill, give it a crispy, delicious crust. On charcoal grills, transfer the pork to the hottest part of the grill (usually the center). On gas grills, simply turn the heat to "high." Cook the pork this way for less than a minute on each side - you don't want to burn the meat or dry it out.
- The chemical process that creates the flavorful seared crust is called the Maillard Reaction. Partially burning the outside of a piece of meat causes the meat's amino acids to react with sugars to form flavor compounds. In practice, this process simply means that a meat's seared crust tastes great!
-
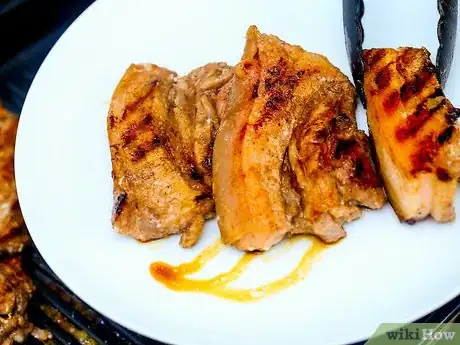
6Allow the meat to rest. Remove done pieces of pork from the grill, placing them on a clean platter. Cover the meat with aluminum foil to keep it from cooling, then allow the meat to sit for about five to ten minutes. Use this rest time to put the finishing touches on any companion dishes (or to set your table.)
- Allowing the meat to rest serves two purposes. First, most cuts of meat continue to cook even after they've been removed from the grill - your pork is no exception. If you're on the fence about whether your pork is done or not, giving it time to sit can often provide the extra "push" it needs to be definitively done. Second, it allows the pork to re-absorb some of the moisture lost during the cooking process. As a piece of meat cooks, it shrinks and "tightens" on a molecular level, squeezing moisture out of the meat.[6] A few minutes of rest allows the meat to partially "relax" and retain more moisture.
-
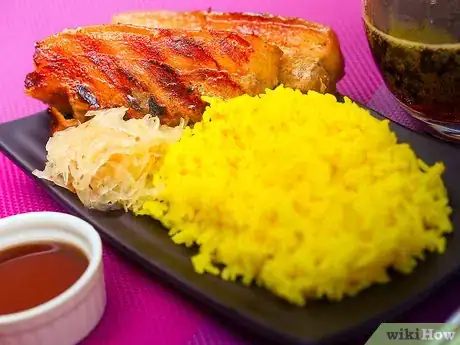
7Season and serve. After the meat has rested and re-absorbed some of its moisture, it's ready to eat! Season gently with salt, pepper, or any other of your favorite spices. Serve with the bone in or with it removed.
- Grilled pork goes great with starches like sweet potatoes or typical barbecue sides like coleslaw.
Pan-frying Pork Chops
-
1Bread your pork chops. Fried pork chops are a rich, delicious treat. Their golden-brown crust, a result of their being coated with a flavorful breading before frying, is as eye-catching as it is flavorful. To begin cooking this scrumptious dish, bread your pork chops (note - thin cut pork chops are preferable for their quick cooking time.) Completely coat each pork chop with flour, dust it off so that its coating is thin and even, then dip it in beaten eggs. Allow the egg to briefly drain off of your chop. Finally, toss your pork in a store-bought or prepared breading of your choice.
- There are a variety of options when choosing your breading. Many supermarkets sell pre-packaged bread crumbs (Panko, etc.). You can use these by themselves or, for a custom flavor, season with your favorite spices, salt, and/or pepper. You can even make your own breading out of normal breadcrumbs.
- The breading doesn't have to be the only source of flavor - dry seasonings like cayenne pepper and paprika can be also be added to the flour.
-
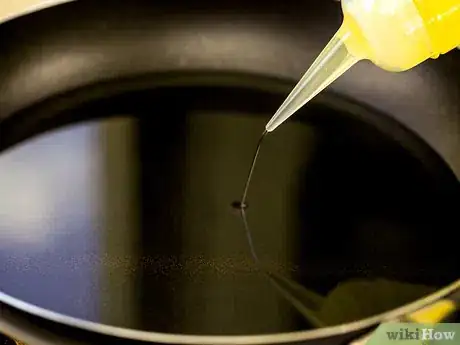
2Heat oil in a pan. For frying, it's best to add meat directly to a hot pan, not to add meat to a cold pan, then heat. Add one half cup of an oil with a high smoke point (like olive or grapeseed oil) to a frying pan or skillet. Swirl the pan to evenly coat the inside of the pan with oil. Turn the stove's burner to "high" and allow the oil to heat for a minute or two. Carefully add a tablespoon or two of butter to the hot oil - it will help give the pork chops a crispy brown crust.
- The oil is hot enough when meat audibly sizzles when it touches it.
-
3Add your breaded pork chops to the pan. Be careful - a hot oily pan can erupt with sizzling and crackling when meat is added. The sizzle sounds tremendously satisfying, but it's often accompanied by small splashes of hot oil. Use a pair of tongs to safely adjust your pork chops.
-
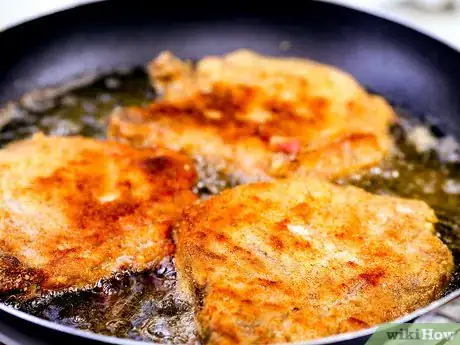
4Cook the chops over medium-high heat until they're golden-brown. The exact cooking time will differ based on the size and thickness of your pork chops. Thin-cut chops will only need a few minutes per side, while thick slices can require 5 minutes or more. Allow each side to develop a rich, deep golden brown color. Well-fried chops should be crispy on the outside while tender on the inside.
- Normal rules for judging pork's doneness apply: use a fork and knife to check for meat that's white all the way through with clear to brown juices.
-
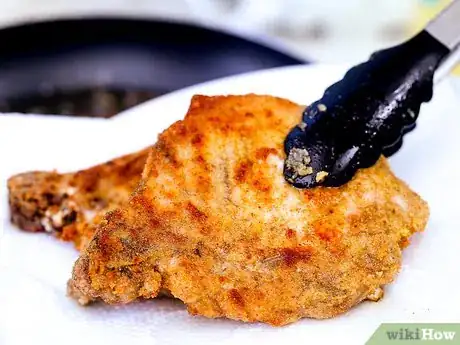
5Remove the pork from the heat. As with other methods of cooking, pork will continue to cook after it's removed from the skillet. Move done pork chops to a plate lined with a paper towel (which will absorb excess oil, helping to prevent the pork chops from getting soggy.) Allow the pork to rest for several minutes, then serve and enjoy!
- A cool, lightly-dressed salad compliments the hot crispiness of the pork chops perfectly.
-
6Carefully dispose of excess oil. Don't pour fry oil down the drain - this can clog your sink. Instead, let your oil cool, then transfer it to a jar or plastic container. Keep your oil in the fridge, where it will solidify. Use your oil for future recipes or for a variety of other purposes that require grease.
- If you're interested in alternative fuels, you can even make biodiesel from leftover oil with a few household tools and ingredients!
Braising Pork Spareribs
-
1Preheat your oven to 375 degrees F (190 degrees C). Braising is a long, slow cooking method that leaves meat so moist and tender that it's practically falling apart. Because of this, it's ideal for tougher cuts. In this recipe, we'll use a braising process to give some pork spareribs a juicy meat-falls-off-the-bone texture. As with all oven-based cooking methods, begin by pre-warming your oven.
-
2Season your spareribs. Pour one cup of flour into a dish and season with salt and pepper to taste. Turn the spareribs in the flour mixture, dusting them off to ensure no excess flour remains. The flour mixture will add a nice savory flavor to your meat and help it develop a brown crust in the next step.
-
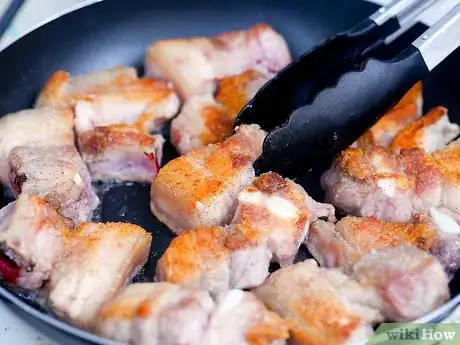
3Briefly brown your spareribs in a pan. Heat a few tablespoons of oil in a skillet, then add your spareribs and sear over high heat for a few minutes. Don't cook your spareribs all the way through - just give them a crisp brown exterior. The interior of the meat will slowly cook in the oven over several hours while braising. When the spareribs are brown, set aside.
- Your meat doesn't even have to appear visibly done when you take it out of the pan - as long as it has a crisp, brown exterior, it's ready to go into the oven.
-
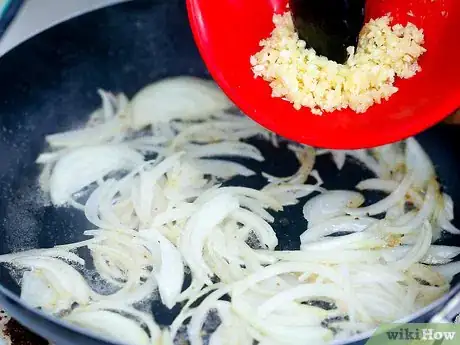
4In the same pan, sauté onions and garlic. Adding vegetables to this dish will give the final product a complex, delicious flavor. Chop one medium sized onion and a few cloves of garlic into medium-sized bits, then sauté them until they're just translucent.
-
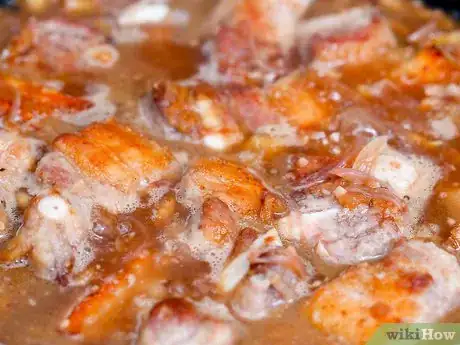
5Add a braising liquid to the pan. Braising is a cooking process that partially resembles stewing. When we braise the meat, we'll cook it slowly in a soupy mixture - like a stew. Beef stock will be our base liquid - begin by adding two cups of beef stock to the pan. Modify this base with a few ounces of other liquid flavors - red wine vinegar, for instance is a good choice - and simmer in the pan to reduce the mixture, concentrating the flavor.
- When it comes to flavoring your braising liquid, there's countless choices. Stout beer, red wine, and tomato puree all taste great. Powdered ingredients like paprika and garlic salt also work well. Don't be afraid to test your broth by tasting it. Generally, if it tastes good, so will your meat!
-
6Place the spareribs in a cooking pan. Pour your beef stock mixture over the top of your spareribs, evenly coating them. Cover the pan with foil and transfer to a rack in the center of your oven.
-
7Braise for about 2-3 hours. Every hour, turn your spareribs. Exact cooking times will vary. Luckily, braised meat will only dry out if it's left in the oven well past its done point. After an hour and a half, periodically test your ribs for doneness with a fork. The meat should be quite soft and easy to pull apart. The inside may appear slightly stringy.
-
8Remove and serve. Immediately transfer your moist, juicy spareribs to a plate and serve. If you desire, use leftover liquid from the cooking pan as a gravy, generously basting your spareribs.
- This dish is a fantastic compliment to fluffy mashed potatoes, as the potatoes will absorb the liquid (and thus the flavor) that leaks from the spareribs.
Expert Q&A
-
QuestionHow do I keep pork shoulder tender when I cook it?
 Joshua & Jeremy GeorgeJoshua and Jeremy George are BBQ Specialists and the Co-Owners of Smokin J’s BBQ in San Diego, California. With over six years of experience, they specialize in slow-smoked meats and making in-house rubs and sauces. Smokin J’s BBQ has been featured in many publications, including The BBQ Magazine.
BBQ Specialists Cook your pork shoulder over low heat to help the inside come to temperature without overcooking the outside.
 -
QuestionHow long after cooking grilled pork should it be served?
 Community AnswerFairly soon. Doesn't really matter but you don't exactly want to eat cold pork.
 -
QuestionCan I add garlic and ginger to pork?
 Community AnswerYes, you can as a way to flavor the meat, and in step 3 it says they are common to use.
References
- ↑ http://www.sfgate.com/food/article/Pork-Know-your-cuts-and-how-to-cook-them-2664037.php
- ↑ http://www.sfgate.com/food/article/Pork-Know-your-cuts-and-how-to-cook-them-2664037.php
- ↑ http://www.sfgate.com/food/article/Pork-Know-your-cuts-and-how-to-cook-them-2664037.php
- ↑ http://www.npr.org/blogs/thesalt/2013/05/24/186434261/the-great-charcoal-debate-briquettes-vs-lumps
- ↑ https://www.thekitchn.com/is-searing-meat-before-cooking-worth-the-extra-effort-47332
- ↑ http://www.virtualweberbullet.com/meatrest.html
- ↑ http://www.recipetips.com/kitchen-tips/t--463/pork-cooking-tips.asp
About This Article
To cook pork chops, begin by dusting pork chops with flour, then dipping them in beaten eggs. Next, dip them in bread crumbs. Then, heat oil in a pan and add the pork. Cook the chops for 5 minutes on each side, or until they are a deep brown color. When they are cooked through, remove the chops from the pan and let them drain on a plate lined with paper towel before serving. For tips on cooking pork chops on the grill, read on!

