This article was co-authored by wikiHow staff writer, Jack Lloyd. Jack Lloyd is a Technology Writer and Editor for wikiHow. He has over two years of experience writing and editing technology-related articles. He is technology enthusiast and an English teacher.
The wikiHow Tech Team also followed the article's instructions and verified that they work.
This article has been viewed 333,923 times.
Learn more...
This wikiHow teaches you how to turn a CD's files into MP3 files on a computer. CDA files are CD-only song files that cannot be played on a computer without the CD, while MP3 files are audio files which can be played on almost any platform. You can use iTunes on both Windows and Mac computers to convert CDA files, or you can use Windows Media Player on your Windows computer if it was included in your installation.
Steps
Using iTunes
-
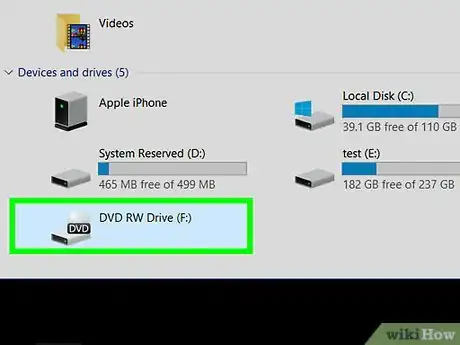
1Insert the audio CD that you want to convert into your computer. The CD must go logo-up into the CD tray.
- If you're on a Mac, you'll need to plug a USB CD drive into your computer.
-
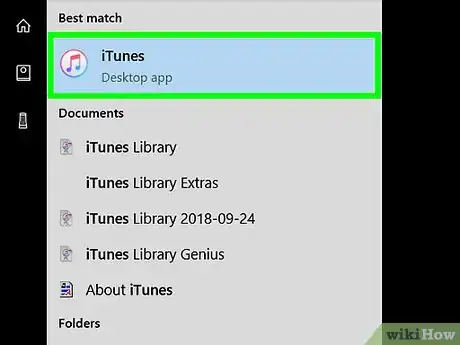
2Open iTunes. It's the multicolored musical note on a white background.
- If iTunes opens automatically, skip this step.
Advertisement -
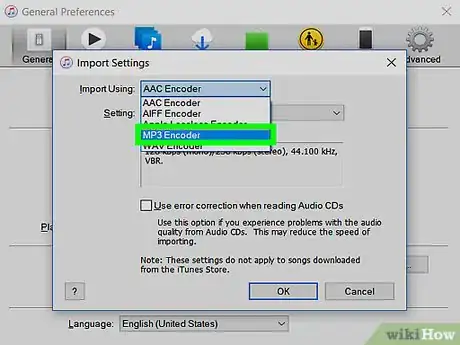
3Enable MP3 conversions. iTunes can turn your CD's songs into MP3 files, but you'll first need to enable the MP3 encoder for it to do so:
- Click Edit (Windows) or iTunes (Mac)
- Click Preferences...
- Click Import Settings...
- Click the Import Using drop-down box
- Click MP3 Encoder
- Click OK
- Click OK to return to the page.
-
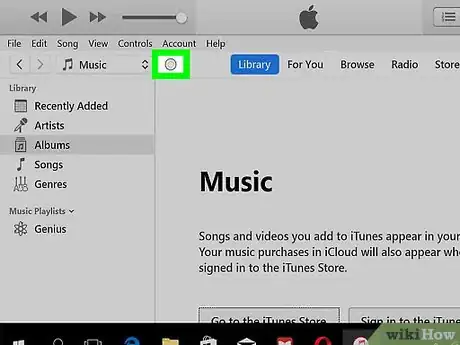
4Click the CD icon. This round, disc-shaped icon is in the upper-left side of the window. Doing so opens the CD's page in iTunes.
- If you haven't yet imported the CD into iTunes, the CD will begin importing automatically.
-
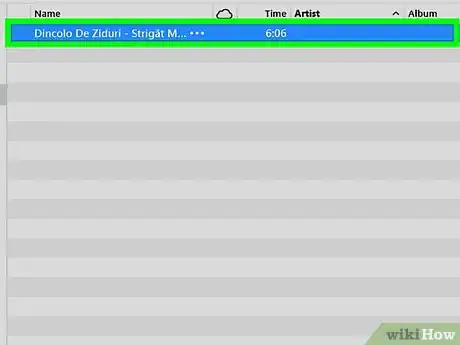
5Select the CD's songs. Click any song in the CD list, then press either Ctrl+A (Windows) or ⌘ Command+A (Mac). This will select every single song on the CD.
-
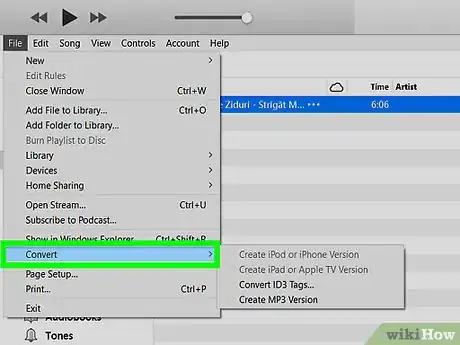
6Click File. It's either in the top-left corner of the window (Windows) or on the far-left side of the menu bar (Mac). A drop-down menu will open.
-
7Select Convert. This option is near the bottom of the File drop-down menu. Selecting it prompts a pop-out window to appear.
-
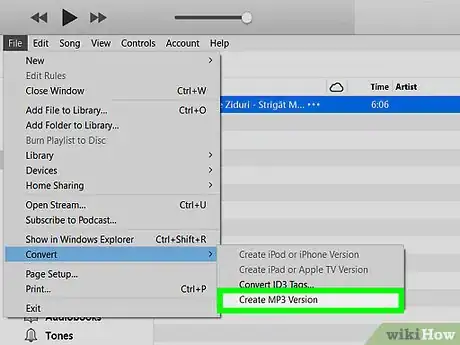
8Click Create MP3 Version. It's at the bottom of the pop-out window. Your CD's files will begin converting into MP3 files.
-
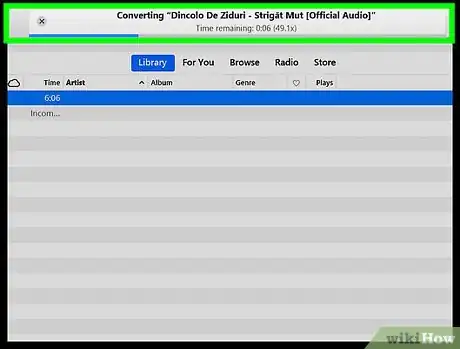
9Allow the CD to convert. This can take up to a minute per song.
-
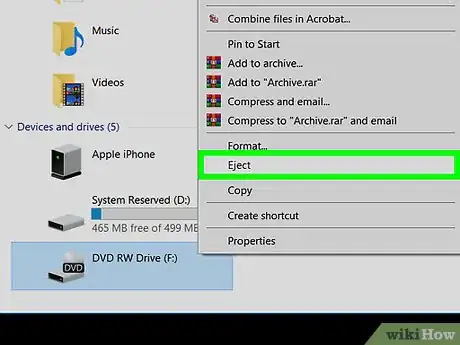
10Eject the CD. Once your CD finishes converting, you can eject it. At this point, you'll be able to view the MP3 files by clicking the Recently Added tab in the upper-left corner of the page and then clicking the CD's album.
-
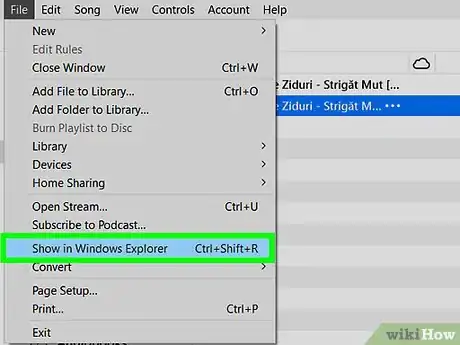
11View the files on your computer. All of the CD's MP3 files will be stored in a folder on your computer. You can open this folder by doing the following:
- Click one of the song titles to select the song.
- Click File in the upper-left side of iTunes.
- Click Show in Windows Explorer (Windows) or Show in Finder (Mac) to open the songs' folder.
Using Windows Media Player
-
1Insert the audio CD that you want to convert into your computer. The CD must go logo-up into the CD tray.
- If you're on a Mac, you'll need to plug a USB CD drive into your computer.
-
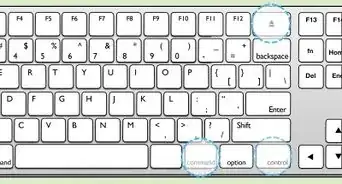
2
-
3Open Windows Media Player. Type windows media player into Start, then click Windows Media Player at the top of the Start window when it appears.
- If your computer doesn't have Windows Media Player, it won't show up in Start. You can instead download and use iTunes.
-
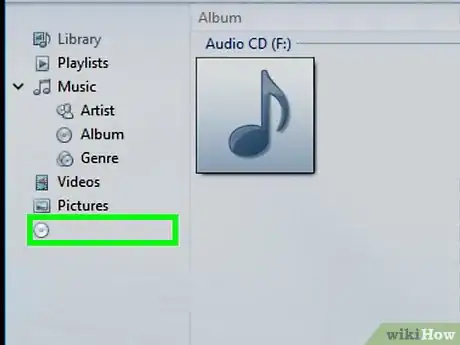
4Select your CD. Click your CD's name on the left side of the Windows Media Player window.
- If your CD's information isn't retrievable by Windows Media Player, you'll click Untitled album or similar here.
-
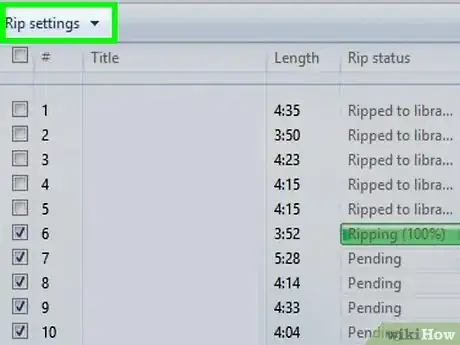
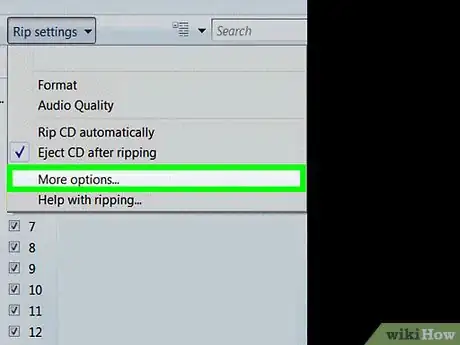
5Click Rip settings. It's a tab at the top of the Windows Media Player window. Doing so prompts a drop-down menu.
-
6Click More options…. You'll find this in the drop-down menu. A pop-up window will appear.
-
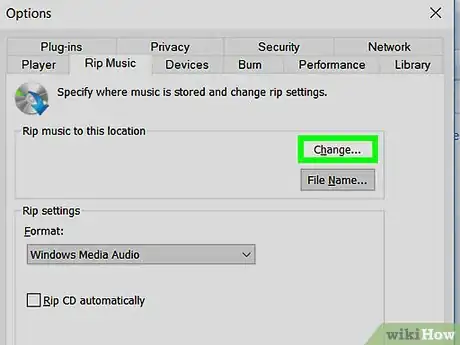
7Change the save location. To change the location in which your CD's MP3 files are saved, do the following:
- Click Change… on the right side of the window.
- Select a folder.
- Click OK
- Click Apply, then click OK.
-
8Click Rip CD. It's a tab at the top of the Windows Media Player page. Windows Media Player will begin ripping your CD's files.
-
9Allow the CD to convert. This can take up to a minute per song.
-
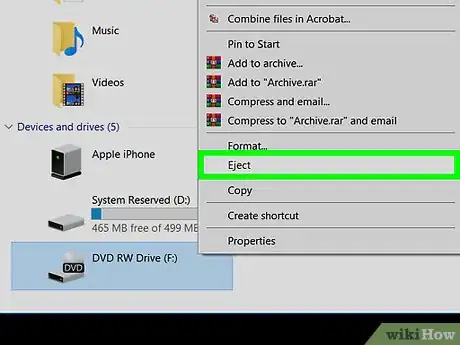
10Eject the CD. Once your CD is done ripping, you can eject it and close Windows Media Player.
-
11View your CD's MP3 files. Your CD's MP3 files will be in your specified location inside of a folder with the CD's album, which will be inside a folder with the CD's artist's name.
- For example, if you ripped Poems, Prayers & Promises by John Denver to your desktop, you would open the MP3 files' folder by going to the desktop, double-clicking the "John Denver" folder, and double-clicking the "Poems, Prayers & Promises" folder.
Community Q&A
-
QuestionIs there a way to convert CDA to MP3 on my computer without a CD?
 Benjamin HerneCommunity AnswerNo. CDA files are index files that tell a computer (or other device) where on the CD the information for a particular track is stored. Trying to convert a CDA file without the disk is like trying to make a copy of a book out of the library index card - the card isn't the book, it just tells you where to look for it.
 -
QuestionI have mp3s on my thumb drive, but my Nissan SUV says "looking for Apple music". What should I do?
 Community AnswerMaybe Nissan's player supports M4a format. That is the format in which songs are converted in iTunes for iPhones. You can try converting one mp3 file to M4a format using Imtoo audio converter.
 -
QuestionIs there a way to convert CDA to MP3 on my computer without a CD?
 Community AnswerNo. CDA stands for compact disc audio. This means that it is only audio disk format. If by chance you are talking about any other formats that you save on PC successfully, you can encode (convert) them with Imtoo converter.
Warnings
- If you're using Windows 10, Windows Media Player may not be available.⧼thumbs_response⧽
About This Article
1. Insert the CD and launch iTunes.
2. Open iTunes.
3. Open your preferences.
4. Click Import Settings.
5. Select MP3 Encoder and click OK.
6. Click the CD icon and select your songs.
7. Navigate to File > Convert.
8. Click Create MP3 Version.
