This article was co-authored by wikiHow staff writer, Travis Boylls. Travis Boylls is a Technology Writer and Editor for wikiHow. Travis has experience writing technology-related articles, providing software customer service, and in graphic design. He specializes in Windows, macOS, Android, iOS, and Linux platforms. He studied graphic design at Pikes Peak Community College.
The wikiHow Tech Team also followed the article's instructions and verified that they work.
This article has been viewed 575,796 times.
Learn more...
Do you have a headset that you want to connect to your Windows PC? Depending on the type of headset, you may be able to pair it wirelessly using Bluetooth or a dongle, or plug it in to your computer's headphone jack, USB port, or HDMI port. Once you connect your headset to your PC, you can use its built-in microphone to chat while gaming, make phone calls, join video conferences, and more. This wikiHow guide will show you the easiest way to connect a wireless or wired headset to your Windows 10 or 11 PC and make it your default audio device.
Things You Should Know
- To connect a Bluetooth headset, turn on Bluetooth in Windows Settings, place the headset into pairing mode, select your headset, and click Pair.
- If your wireless headset comes with a dongle, insert it into a USB port, then turn on your headset to connect instantly.
- Wired headsets may connect to your PC using a 3.5mm headphone jack, USB 3.0 port, or HDMI cable.
- Some wired headsets have a two-ended 3.5mm connector, which you'll plug in to both the headphone and microphone jacks.
Steps
Connect a Wireless Headset
-
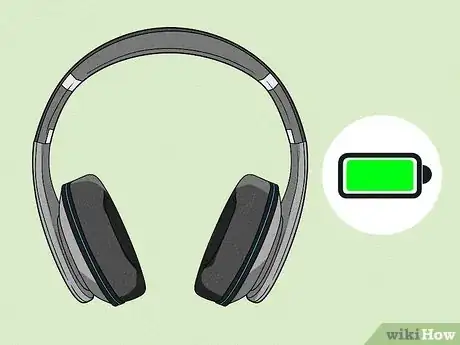
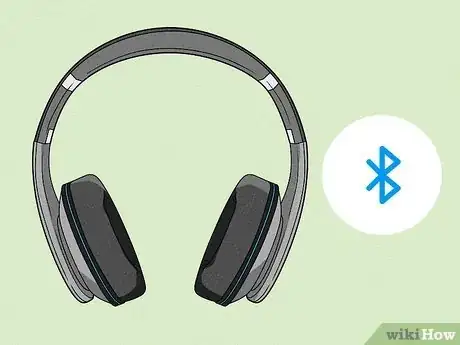
1Make sure the headset is charged or has batteries. Newer wireless headsets can be charged using a USB cable. If you've just taken your headset out of the packaging, connect it to a power source to charge it fully before pairing. If your headset requires AAA or AA batteries, insert them now.
-
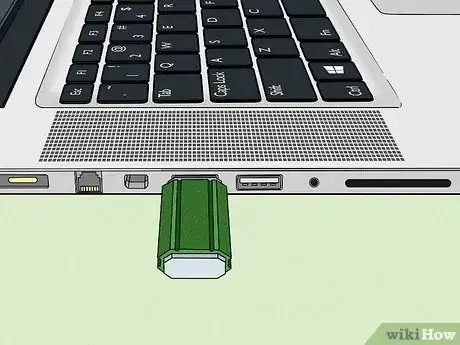
2Connect the wireless dongle, if present. Many wireless headsets connect to your computer using a wireless USB dongle, which you'll find in the original packaging. If your headset came with a wireless dongle, plug it into any free USB port on your PC.
- If your headset connects with Bluetooth, we'll cover pairing it with your PC in a moment.
Advertisement -
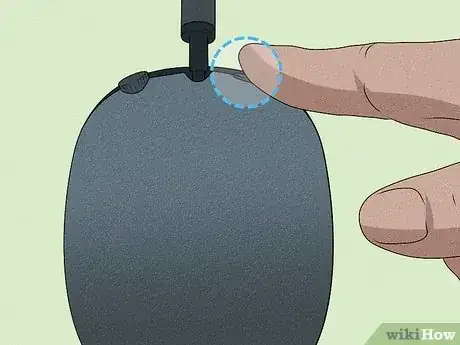
3Turn on your headset. Press the headset's power button to turn it on. If the headset isn't fully charged, you might also want to connect it to its charger to ensure that it stays on during the connection process.
- If you are using a wireless dongle, your PC should connect to the headset automatically. You can now skip to Configure Your Headset to learn how to make your headset the default listening (speaker) and microphone when it's connected to your PC.
-
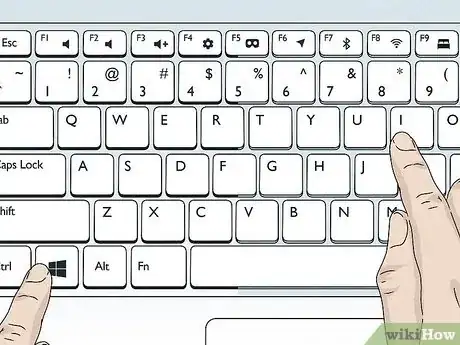
4Open your Windows Settings. You'll find this gear icon in the Windows Start menu on both Windows 10 and Windows 11.
- You can also use the keyboard shortcut Windows key + i to open your settings.
-
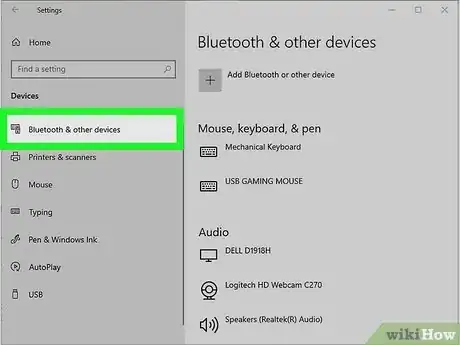
5Open your Bluetooth settings. The process is a little different depending on your version of Windows:[1]
- Windows 10: Click Devices on the Settings panel, then click Bluetooth & other devices.
- Windows 11: Click Bluetooth & devices in the left panel.
-
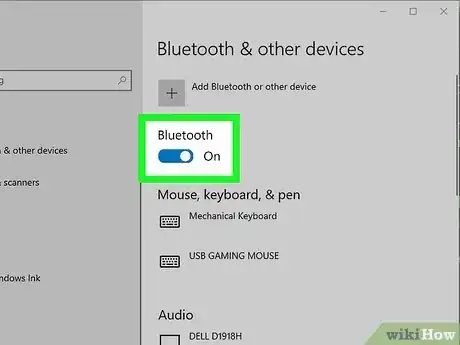
6Turn Bluetooth on (if it isn't already on). If the Bluetooth switch is off, click it to turn it on now.
-
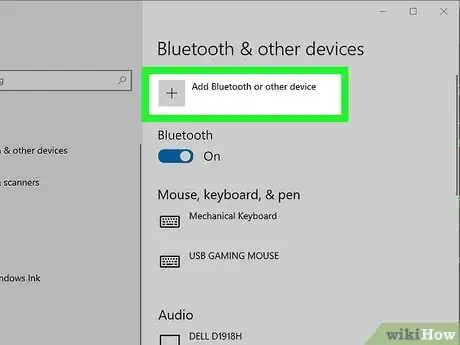
7Click Add Device or Add Bluetooth or other device. You'll see one of these two options near the top of the window.
-
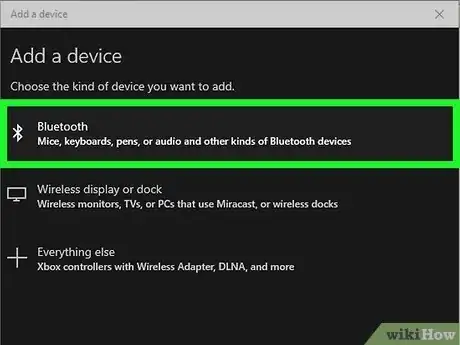
8Select Bluetooth. You'll find this at the top of the Bluetooth menu.
-
9Put your Bluetooth headphones in pairing mode. The way you do this is going to be different from one Bluetooth headset model to the next.
- Some headsets have a dedicated Pairing button that you press and hold. If yours doesn't, you may need to press and hold the power button.
- You will hear a tone or see a flashing light to indicate the headset is in pairing mode.
- Consult your headset's manual if you can't find the pairing button.
-
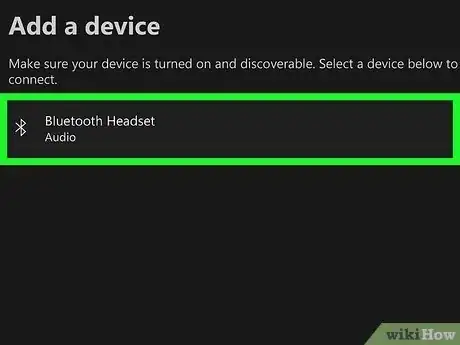
10Select your headset. It should appear in the Bluetooth menu within a few seconds. The headset's name will likely be a combination of the manufacturer's name and the headset's model number.
- If the headset doesn't appear in the Bluetooth menu, turn Bluetooth off, press the pairing button on your headset, and then turn Bluetooth back on.
-
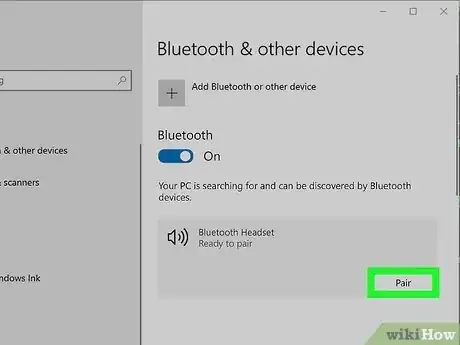
11Click Pair. It's below the headset's name. Clicking this should prompt your headset to connect to your computer at this point. Your headset is now connected to your PC and ready to configure.
- See Configure Your Headset to learn how to make your headset the default listening (speaker) and microphone when it's connected to your PC.
Connect a Wired Headset
-
1Check your headset's connections. Depending on the type of headset you have, you will see one or more of the following connection types:
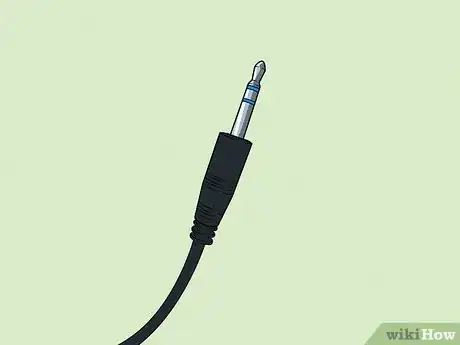
- 3.5-mm audio-out — This is the standard audio-out plug-in (also known as an aux plug) that you see on headphones and speaker systems. 3.5mm connectors plug into headphone ports, and are sometimes green in color and may have a headset icon on it.
- 3.5-mm microphone — Most newer headsets have a single 3.5mm jack for both audio-out and the microphone, but some older headsets may have two separate 3.5mm jacks for audio out and the microphone. The mic jack will sometimes be pink and/or have a microphone icon.
- USB — USB 2.0 and 3.0 connectors are flat and rectangular, while newer USB Type-C ports are small and oval-shaped. These plug into USB ports on your PC.
- HDMI — HDMI inputs transmit both video and audio signals. They are rectangular and flat and look kind of look like an USB port, except they are longer and have notched corners.
-
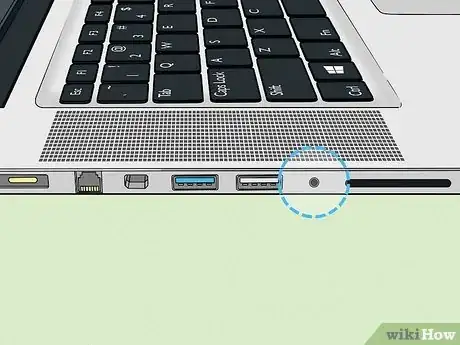
2Find your PC's audio inputs. Laptop PCs typically have the 3.5mm audio-out port on the left, right, or front side of the keyboard, while desktop PCs may have these ports on the front or back of the tower. Microphone ports are usually pink, while headphone ports are usually green.
- On laptops that don't have color-coded ports, the audio-in port will have an image of headphones next to it and the microphone input will have an image of a microphone next to it.
- If you have a headset that has a separate 3.5 mm jack for the audio and the microphone, but your computer only has one 3.5-mm port, you can use an adapter to connect both jacks to a single port.
- USB port locations, but you'll normally find them near the audio ports. USB 3.0 ports will either have a blue band on the inside or will have an icon that resembles a fork and says "SS" for super speed.
- HDMI ports are usually on the side or front of laptops, and on the back of desktop towers. If you have an all-in-one computer monitor, you can find the HDMI port on the side or back of the monitor.
-
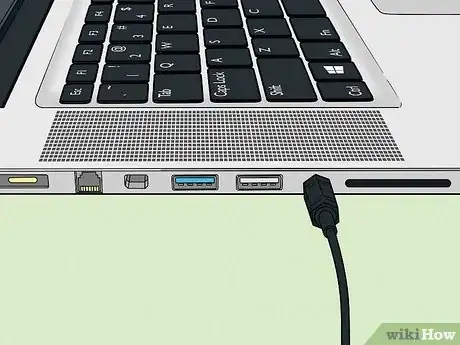
3Plug your headset into your computer. After you identify what type of connection your headset uses, match it with the correct port on your PC and plug it in.
-
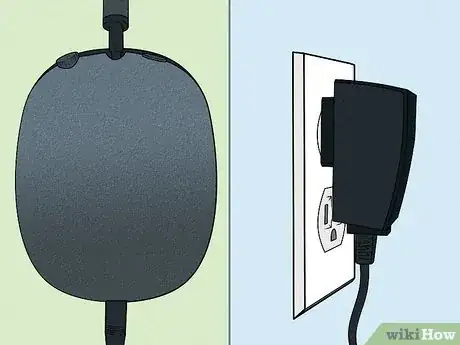
4Plug your headset into a power source if necessary. Some headsets require external power sources, though most will be powered via USB if this is the case. If you need to attach your headset to an external power source (e.g., a wall socket), do so. Once this is done, your headset is ready to be set up in Windows settings.
- Now that your headset is connected to your PC, see Configure Your Headset to learn how to make it your default audio device and microphone.
Configure Your Headset
-
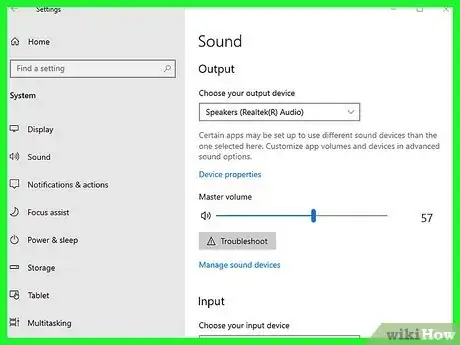
1Open your Windows Sound settings. The steps to locate your sound settings will be a little different depending on your version of Windows:
- Windows 10:
- Press the Windows key on your keyboard, type sound, and then click Sound.
- Windows 11:
- Press the Windows key on your keyboard.
- Type Sound.
- Click Sound Settings.
- Scroll down and click More sound settings in the "Advanced" section.
-
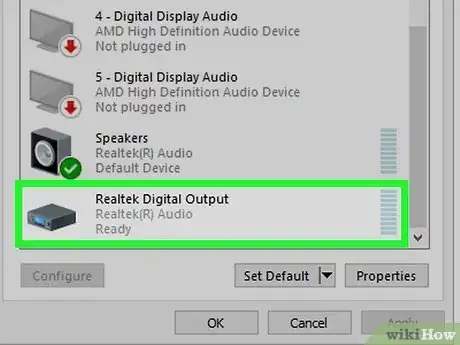
2Click your headset on the Playback tab. This tab opens by default and displays all of the devices you can use to listen to audio on your PC. Click your headset to select it now.
-
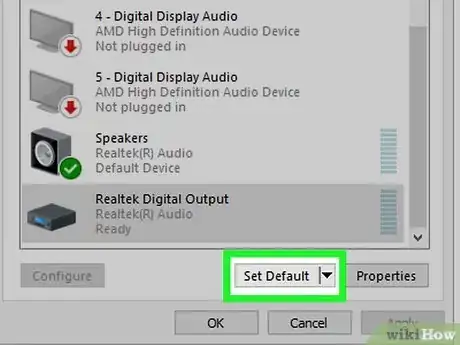
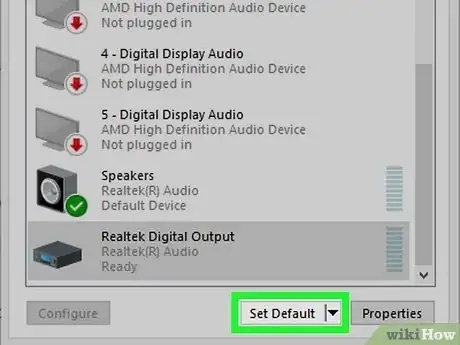
3Click the Set Default. It's at the bottom of the window. Your headset will now be the default output device whenever it is connected to your PC.
- If the option is grayed out, that means your headset is already set up as the default playback device.
-
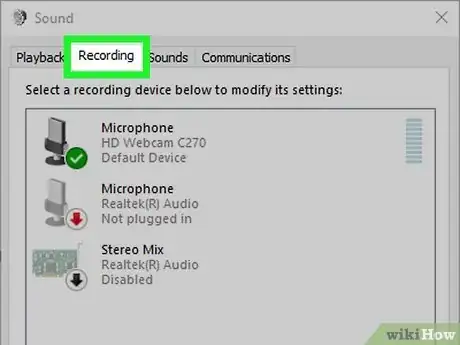
4Click the Recording tab. It's at the top of the Sound window.
-
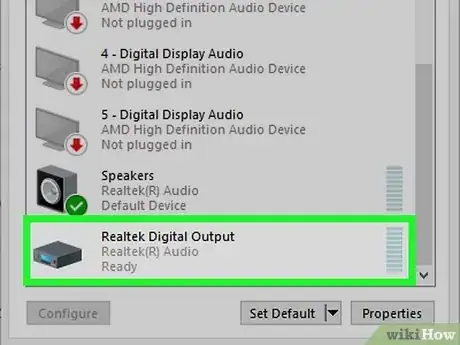
5Click your headset to select it. This highlights your headset.
-
6Click the Set Default button. Now your headset's microphone will be the default audio input whenever it's connected to your PC.
-
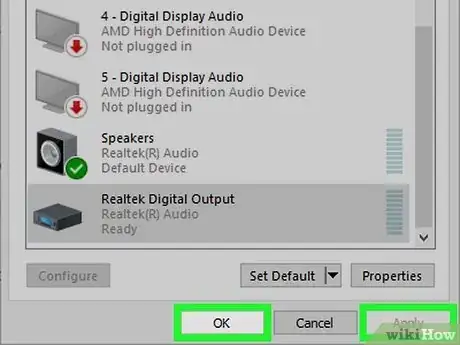
7Click Apply, then click OK (Windows 10 only). Doing so saves your settings. You're now ready to begin using your headset with your computer.
Community Q&A
-
QuestionWhat if I don't have a microphone jack on my laptop/desktop?
 Community AnswerBuy a USB headphone adapter. You can get one on Amazon and they're inexpensive.
 -
QuestionWhat do you mean by TRRS?
 Community AnswerTRS is the jack with the three connections, "Tip, Ring and Sleeve", typical for stereo headphone connectors. TRRS has four connections, "Tip, Ring, Ring and Sleeve".
 -
QuestionHow do I set up my headset with a microphone attached to my Windows 10?
 Community AnswerThere are multiple ways of doing this, depending on the type of headphones you have. If you have USB headphones, simply plug them into an open USB port on your computer. You may need to install driver software from your manufacturer, which can be found on their website or included in the box on a USB drive or a CD. If you have headphones with a 3.5mm jack, plug them into the headphone port on your computer. If your computer's jack doesn't have TRRS (which allows a separate microphone connection, which is what you need for a headset), you may need to buy external hardware.
References
About This Article
1. Identify if your headset uses a wired or wireless connection.
2. Connect your headset to the proper port if it's a wired headset.
3. Put your headset in Bluetooth pairing mode if it's a Bluetooth headset or plug in the wireless dongle.
4. Click the Windows Start menu and type "Bluetooth."
5. Click Bluetooth and other device settings.
6. Ensure Bluetooth is turned on.
7. Click Add Device or Add Bluetooth or other device.
8. Click Bluetooth.
9. Put your headset in Pairing mode.
10. Click your Bluetooth device.
