This article was co-authored by wikiHow Staff. Our trained team of editors and researchers validate articles for accuracy and comprehensiveness. wikiHow's Content Management Team carefully monitors the work from our editorial staff to ensure that each article is backed by trusted research and meets our high quality standards.
The wikiHow Tech Team also followed the article's instructions and verified that they work.
This article has been viewed 403,278 times.
Learn more...
This wikiHow teaches you how to connect your iPhone to your desktop computer so that you can sync or back up with iTunes, or transfer photos and other data.
Steps
Using a USB Cable
-
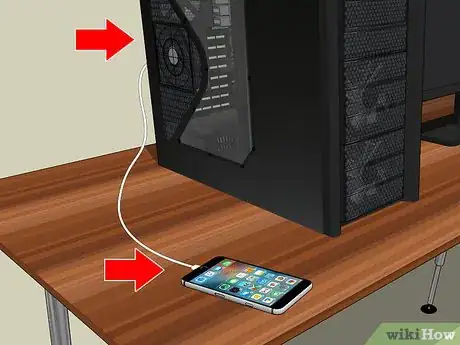
1Connect your iPhone to a desktop computer. Use the USB cable that came with your device.
-
2Open iTunes. It's an app with a musical note icon.
- iTunes may launch automatically when you connect your iPhone.
Advertisement -
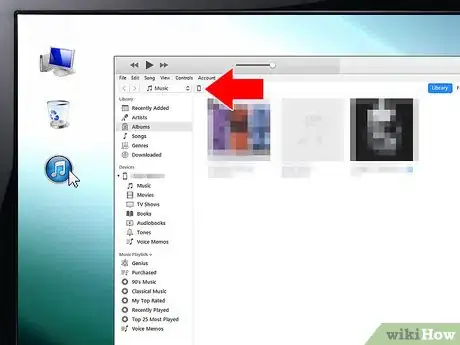
3Click on the iPhone icon. It will appear in the upper left corner of the iTunes window.
-
4Click on Back Up Now. Do so if you wish to create a local iPhone backup on your desktop.
-
5Select content to sync. Do so by clicking on a content category in the left pane of the window, then checking or unchecking Sync [content] at the top of the right pane.
-
6Click on Apply. It's in the lower-right corner of the window. Doing so saves the sync options you've selected.
-
7Click on Sync. It's in the lower-right corner of the window. The syncing process will begin.
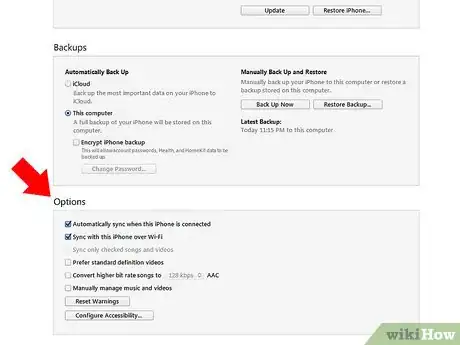
- Check "Automatically sync when this iPhone is connected" in the "Options" section of the window to sync whenever you connect your iPhone to your desktop.[1]
Connecting with Wi-Fi
-
1Connect your iPhone to a desktop computer. Use the USB cable that came with your device.
-
2Open iTunes. It's an app with a musical note icon.
- iTunes may launch automatically when you connect your iPhone.
-
3Click on the iPhone icon. It will appear in the upper left corner of the iTunes window.
-
4Scroll to "Options". It's the last section in the right pane of the iTunes window.
-
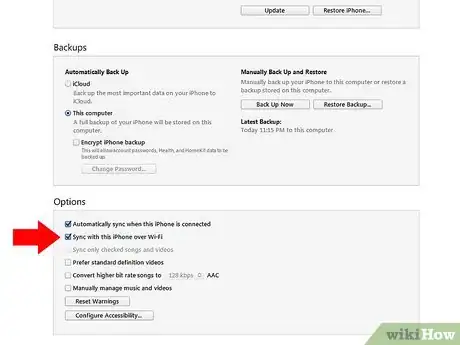
5Check "Sync with this iPhone over Wi-Fi". The box is on the left side of the right pane.
-
6Click on Apply. It's in the lower right corner of the iTunes window.
- Wait for your iPhone to finish syncing for changes to be applied.
-
7Disconnect your iPhone from your desktop.
-
8Open your iPhone's Settings. It's a gray app that contains gears (⚙️) and is typically located on your home screen.
-
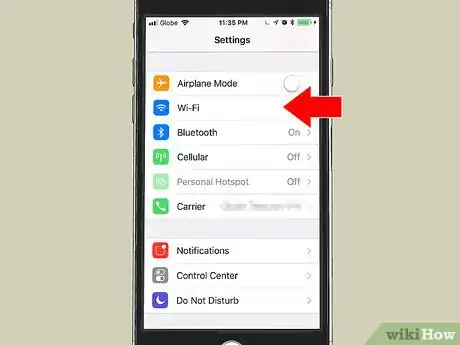
9Tap Wi-Fi. It's near the top of the menu.
-
10Tap a Wi-Fi network. Your iPhone and your desktop must be connected to the same Wi-Fi network.
-
11Tap Settings. It's in the upper-left corner of the screen.
-
12Scroll down and tap General. It's next to a gray gear (⚙️) icon containing near the top of the menu.
-
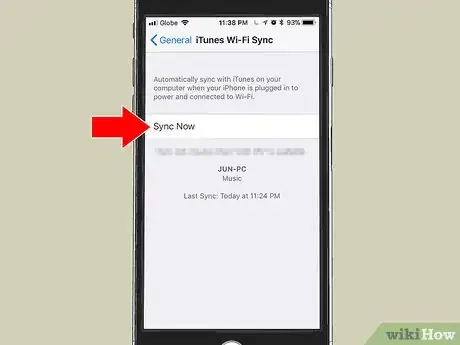
13Tap iTunes Wi-Fi Sync. It's near the bottom of the menu.
- If more than one desktop is listed, tap the desktop with which you want to sync.
- Make sure iTunes is open on your desktop.
-
14Tap Sync Now. Your iPhone will wirelessly sync with your desktop over Wi-Fi.
Using AirDrop with a Mac
-
1Click on Finder on your Mac. It's a blue and light blue icon that contains a smiley face and is usually located in your Dock. This opens a Finder window on your desktop.
- Bluetooth must be enabled on both devices to connect via AirDrop.
-
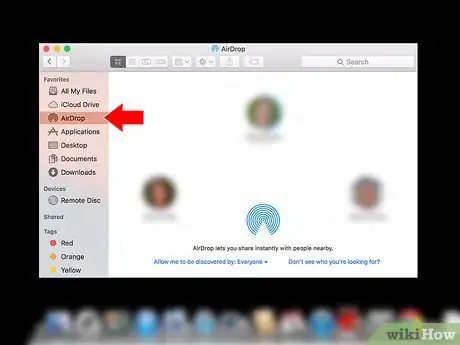
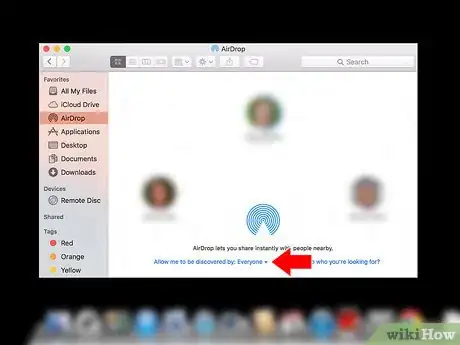
2Click on AirDrop. It's under "Favorites" in the toolbar on the left side of the finder Window.
- AirDrop is an efficient way to create a connection over which you can transfer photos, documents, and other files when the devices are in close proximity (within several feet).
-
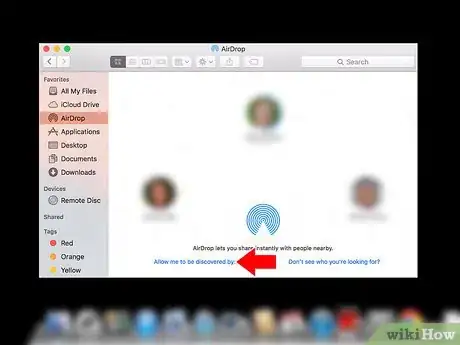
3Click on "Allow me to be discovered by." It's at the bottom of the Finder window. A drop-down menu will open.
-
4Click on Everyone.
-
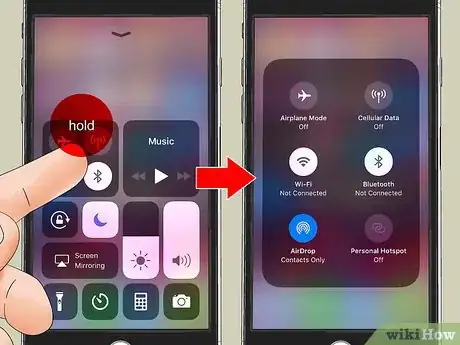
5Swipe up on your iPhone's home screen. This launches the Control Center.
-
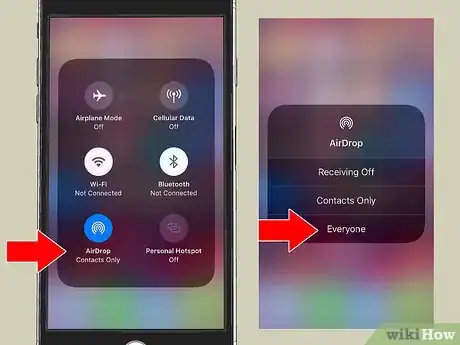
6Tap AirDrop:. It's on the right side of the Control Center and will be followed by a receiving status, such as "Everyone," "Contacts Only," or "Receiving Off."
-
7Tap Everyone. Now you can send and receive data between your iPhone and desktop.
-
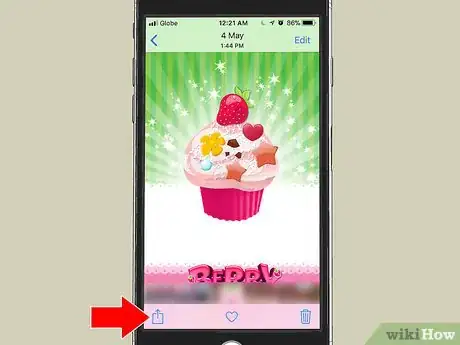
8Select a file to share. Do so on either device.
- Files or pages created or stored in Apple apps like Photos, Notes, Contacts, Calendar, and Safari are almost always shareable over AirDrop. Many third-party apps also have AirDrop functionality.
-
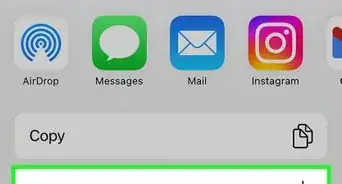
9Tap or click on the "Share" icon. Look for a square that contains an upward pointing arrow.
-
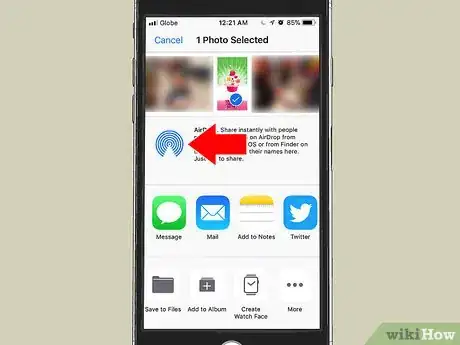
10Tap or click on AirDrop. It's near the top of the "Share" dialog box.
-
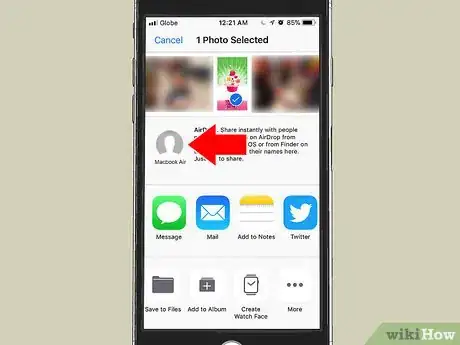
11Tap or click on the name of the receiving device. Do so from the sending device.
- If you don't see the Mac or iPhone, ensure that the device is close enough (within a few feet) and that AirDrop is enabled.
- If prompted to turn on Bluetooth and Wi-Fi, do so.
-
12Tap or click on Save on the receiving device. This saves a copy of the file on the device.
- Tap or click on Open and Save to view the file(s) you saved.
Community Q&A
-
QuestionWhat if iTunes isn't recognizing my iPhone?
 Community AnswerTry reinstalling iTunes. If that doesn't work, then contact Apple support. Also, make sure that the iPhone is turned on and you are on the home screen when you are connecting your iPhone.
 -
QuestionHow do I make my iPhone a hotspot and connect my computer to it?
 Community AnswerGo into Settings > Personal Hotspot and enable. Then connect your computer to it like any Wi-Fi network.
References
About This Article
1. Connect a USB cable to the iPhone.
2. Connect the other end to a computer.
3. Open iTunes on the computer.
4. Click the iPhone icon.
5. Click Back Up Now.
6. Choose content to sync.
7. Click Apply.
8. Click Sync.

