This article was co-authored by wikiHow Staff. Our trained team of editors and researchers validate articles for accuracy and comprehensiveness. wikiHow's Content Management Team carefully monitors the work from our editorial staff to ensure that each article is backed by trusted research and meets our high quality standards.
The wikiHow Culinary Team also followed the article's instructions and verified that they work.
This article has been viewed 38,571 times.
Learn more...
Looking to make a colorful chocolate bunny for Easter or a Christmas scene out of chocolate? Perhaps you're attempting bright cake pops for a birthday party. To get the details of your edible treat just right, you may need to color your chocolate.
Ingredients
- Dark chocolate, milk chocolate, or white chocolate chips
- Coloring oil or coloring powder
- Vegetable shortening
- Access to a microwave or a stove
- A glass bowl
Steps
Gathering Your Ingredients
-
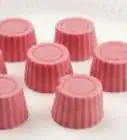
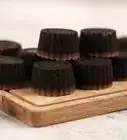
1Decide if you are going to use dark chocolate or white chocolate. Use dark or milk chocolate if you are trying to get a nice jet black color. Otherwise, you will need to use white chocolate to make any other colored chocolate.
- Choose a white chocolate with a low viscosity, or that appears very thin when you melt it.
- Tollhouse's White Chocolate Chips are one of the better brands for coloring.
- Go for chips instead of bars, as the smaller the pieces of chocolate are, the faster they will melt. Candy melts are also a good option.
-
2Buy oil based coloring that is made especially to color chocolate. Never add a water based food coloring to chocolate. It causes the chocolate to seize, or turn lumpy and solid. You want to create colored chocolate that is smooth and easy to work with. So skip the cheap water based colors and go for oil or powder colors.
- You can buy oil based coloring and powder coloring online.
- One good brand is Americolor, which creates strong colors without having to add a lot of oil to the chocolate.[1]
- If you are trying to create a pale color like light blue or yellow, go for oil based colors as you only have to add very little coloring to the white chocolate to get the color you want.[2]
- If you are trying to create a more vibrant color, like a bright yellow or a bold red, buy a powder coloring or paste coloring. The more oil you add to the chocolate, the less smooth it will be. So using a small amount of powder coloring or paste coloring should create a vibrant color without adding too much oil to the chocolate.
Advertisement -
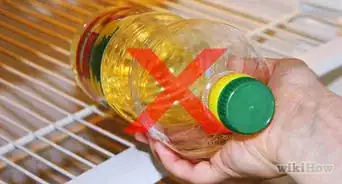
3Get vegetable shortening, not vegetable oil. Vegetable shortening usually comes in a round plastic tub and is hard in appearance, almost like butter. The shortening will help the chocolate to set properly on your candy or on a cake pop. It will also speed up the melting time of the chocolate.
- Vegetable oil will only make the chocolate more loose and limp, meaning you will end up with messy chocolate covered candies or limp cake pops.
-
4Melt the chocolate in a double boiler, if possible. If you have access to a stovetop, a large metal bowl, and a pot with a handle, you can boil the chocolate on the stove instead of in the microwave.[3]
- The double boiler method works a bit faster and you have more control over the chocolate as it melts.
-
5Melt the chocolate in a glass bowl if you use the microwave. Glass conducts heat evenly and quickly, so its the vessel of choice for melting chocolate in the microwave.


Melting the Chocolate in the Microwave
-
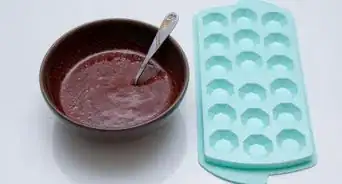
1Work in small batches. When melting the chocolate, its best to melt a small amount at a time. So only use 1-2 cups of chocolate chips to start.[4]
-
2Place the white chocolate chips in a glass bowl. Microwave the chocolate for no more than 30 seconds at a time on medium high heat.
- You may be tempted to microwave the chocolate for longer than 30 seconds to speed up the process, but don't do this. Any longer than 30 seconds at a time will heat the chocolate up too fast and cause it to become lumpy.
-
3Stir the chocolate as you microwave it for intervals of 30 seconds. Right before the chocolate is completely melted, take it out of the microwave and stir it to completely melt it.
- It's fine if a few of the chips on the sides of the bowl have not completely melted.
-
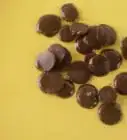
4Check the consistency of the melted chocolate. Make sure most of the chocolate is smooth and easy to stir. The chocolate should fall easily off the spoon.


Melting the Chocolate in a Double Broiler
-
1Place a deep pot with a handle on the stove. Fill the pot about ⅓ of the way with water. Turn the burner to high heat so the water boils.[5]
-
2Take a metal bowl and set it on the pot with water. The water should hover about half an inch below the metal bowl.
- Once the water boils in the pot, turn off the heat. Then, pour the white chocolate chips into the bowl.
-
3Stir the chips as they start to melt. Use a kitchen towel to hold the hot bowl with one hand. Don't worry if the chips don't seem to melt fast at first. After a few stirs, they should start to melt.
- You can add a spoonful of vegetable shortening to speed up the process.
-
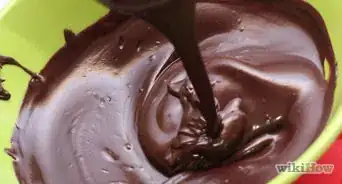
4Check the consistency of the chocolate once it has melted. You want it to fall off the spoon easily.
-
5Take the chocolate off the heat and place the bowl next to the oil or powder colors. Leave the chocolate in the warm bowl as the heat will keep the chocolate smooth and melted.


Coloring the Chocolate with Powder Colors
-
1Sprinkle the powder color directly into the chocolate. Sprinkle a dash or two of the powder right into the bowl.[6]
-
2Stir the chocolate to blend in the color. As you stir, add more or less powder depending on how bright you want the color to be.
- Remember that the bowl will be hot, so use a kitchen towel to hold it as you stir!
-
3Place the bowl back on the double broiler if the chocolate starts to harden. As you stir, the chocolate may begin to harden around the edges of the bowl. You want the chocolate to remain melted so warm up the bowl again as you stir.

Coloring the Chocolate with Coloring Oils
-
1Warm the coloring oil before you put it in the chocolate. Chocolate is very sensitive to temperature changes. So when you add the oil to the chocolate, its important that the oil is the same temperature as the chocolate. This will prevent the chocolate from seizing, or turning lumpy and hard.
-
2Place the tightly sealed coloring oil in a small zip lock bag. Squeeze the bag to remove as much air as possible from the bag.
-
3Place the plastic bagged bottle in a bowl with warm water for 10-15 minutes. The water should be no more than 20 degrees warmer than the chocolate. Shake the bottle every 5 minutes to distribute the heat evenly.
- It's a good idea to warm your oil up right before you warm up the chocolate, or in between warming up your chocolate. You want to avoid letting the chocolate sit and harden as you warm up the oil.
-
4Remove the oil from the plastic bag. Make sure you dry it off completely. You don't want to get any water in the chocolate by accident, as this will dilute it!
-
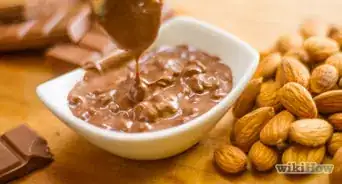
5Slowly add a few drops of oil to the warmed chocolate and stir. With most chocolate oils, a 2 oz. bottle will vibrantly color up to 6 pounds of chocolate. So for a deep, rich color, use about 2 teaspoons for each pound of chocolate. Use less for a lighter color.
-
6Work on one color at a time. If you are planning to make several different colored bowls of chocolate, work one color at a time. This will prevent any mixing of the colors or accidents with the powder or oil.


References
About This Article