This article was co-authored by Linh Le and by wikiHow staff writer, Sam Browning. Linh Le is a Certified Mobile Repair Specialist and the Owner of SC Mobile Repairs in San Clemente, California. With more than 12 years of experience, he specializes in smartphone, tablet, and smartwatch hardware repair. Linh has an iTech Mobile Device Repair Certification and an iOS Certification. He holds a Bachelor’s degree from The Franciscan University of Steubenville.
This article has been viewed 42,252 times.
If your iPhone charger is acting up, the tip might have gotten dirty or corroded. Luckily, with a few household items, it is possible to clean the connectors on your charger and potentially get it working again. This wikiHow article will teach you how to remove buildup on the tip of your iPhone charger.
Steps
Cleaning Your Charger with Rubbing Alcohol
-
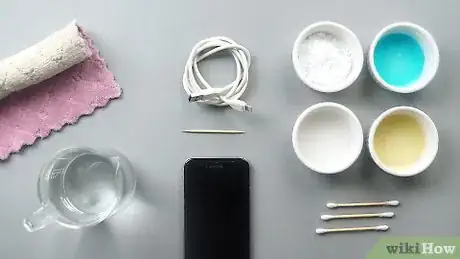
1Gather a q-tip, rubbing alcohol, a toothpick, a towel, and your charger. You might already have these items around the house, but if not, they can likely all be found at your local grocery store.
-
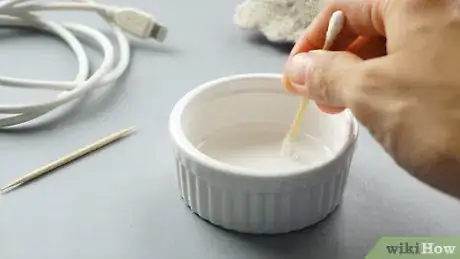
2Dip the end of the q-tip in rubbing alcohol.[1] Use the rubbing alcohol with the highest alcohol percentage you can find. Ideally, it would be 99%.[2]
- Lower alcohol percentages mean there is more water in the solution, which can corrode your charger.
Advertisement -
3Rub the charger tip with the q-tip. When cleaning the tip of the charger, do not be afraid to apply some pressure.
- Often, chargers that fail due to corrosion have a visibly dirty fifth gold pin (when viewed with the metal tip below the white insulation). This is the most powerful circuit, so be sure to clean it as well as you can.
-
4Scrape the charger tip with the toothpick. After using the q-tip, some spots may remain on the tip of your charger. Use a toothpick to remove any residue or corrosion while being careful of the gold connectors.
- If you damage a gold connector, the charger will stop working permanently, so do not scrape too hard!
-
5Dry the charger. After drying the charger with your towel, wait as long as it takes to ensure there is no remaining liquid.
-
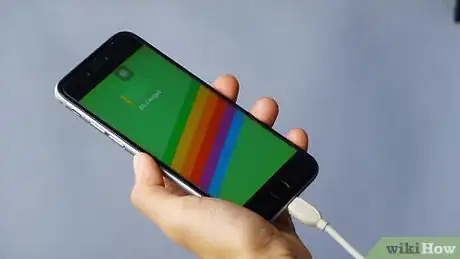
6Plug the charger into your phone. If your phone begins charging, you have successfully cleaned your charger! Otherwise, if the charger still is not working, and the tip is still corroded, try cleaning it once more.
Cleaning Your Charger with Baking Soda and White Vinegar
-
1Gather three q-tips, water, baking soda, liquid soap, white vinegar or lemon juice, a toothpick, a towel, and your charger. These are relatively common household items, but if you cannot find any of them, they are almost certainly available at your local grocery store.
-
2De-grease the charger tip with soap and water. Dip your q-tip in some warm water with a little bit of soap, then rub the charger tip gently on each side. This will remove any residual grease from your hands.[3]
- If you are not sure what soap to use, dishwashing detergent or hand soap will work!
-
3Mix water, baking soda, and white vinegar or lemon juice. You can measure out about half a cup of water, a teaspoon of baking soda, and a teaspoon of white vinegar or lemon juice. Warm water is preferable, but if you only have cold water, that is ok.
-
4Scrub the charger tip with the baking soda solution. Dip your second q-tip in the solution you just made, then clean the lightning connector. Do not be afraid to apply pressure and clean it for several minutes, as this is necessary to remove the tougher build-up.
- Chargers that stop working due to corrosion often have a significant amount of buildup on the fifth gold pin (when viewed with the metal tip below the white insulation). This is the most powerful circuit, so be sure to clean it as well as you can.
-
5Remove residue and corrosion with the toothpick. For especially resistant spots, lightly clean the charger tip with a toothpick. Be careful not to damage the gold pins, or your charger will stop working permanently!
-
6Clean the charger tip with water. Dip your last q-tip in warm water and rub both sides of the connector once more to remove the baking soda solution.
- Do not clean your charger tip with running water! If there is a leak in the cable connector housing, it will ruin the charger.
-
7Dry the charger. Pat the connector dry with a towel, then wait two to three minutes to ensure it is completely dry.
-
8Plug the charger into your phone. If your phone starts charging, the cleaning worked! Otherwise, if you can still see corrosion on the charger, try cleaning it once more.
Expert Q&A
-
QuestionHow can I clean my iPhone charger port without a toothpick?
 Linh LeLinh Le is a Certified Mobile Repair Specialist and the Owner of SC Mobile Repairs in San Clemente, California. With more than 12 years of experience, he specializes in smartphone, tablet, and smartwatch hardware repair. Linh has an iTech Mobile Device Repair Certification and an iOS Certification. He holds a Bachelor’s degree from The Franciscan University of Steubenville.
Certified Mobile Repair Specialist Go over the charger port with a small, square alcohol wipe—those work really well!
References
- ↑ Linh Le. Certified Mobile Repair Specialist. Expert Interview. 10 February 2022.
- ↑ https://www.youtube.com/watch?v=7FLMCzv94fI
- ↑ https://www.thetechmentor.com/posts/clean-iphone-cable-port-intermittent-charging/
About This Article
1. Scrub the tip of your charger with rubbing alcohol.
2. Remove residual corrosion with a toothpick without damaging the gold connectors.
3. Dry the charger, wait two to three minutes, then test it.
4. Alternatively, scrub the tip of your charger with water and dish or hand soap.
5. Mix a half cup of water, a teaspoon of baking soda, and a teaspoon of white vinegar or lemon juice, then dip a q-tip in the solution and clean the lightning connector.
6. Scrape any remaining corrosion off with a toothpick without damaging the gold connectors.
7. Clean the charger tip with a q-tip dipped in water, then dry it and wait for two to three minutes.
8. Test your charger.

