This article was co-authored by Raymond Chiu. Raymond Chiu is the Director of Operations for MaidSailors.com, a residential and commercial cleaning service based in New York City that provides home and office cleaning services at affordable prices. He has a Bachelors in Business Administration and Management from Baruch College.
This article has been viewed 37,529 times.
Your stove’s range hood can be easily overlooked when cleaning your kitchen. However, this is an area you definitely should be cleaning to keep your home safe from germs, bacteria, and fire hazards.[1] The hood itself can be easily cleaned if you make a regular habit of it, although it may require some harsher chemicals than your regular surface cleaner at first. Then, depending on what type you have, you can easily clean or replace the hood’s filter on a less frequent basis.
Steps
Washing the Outside of the Hood
-
1Choose the right cleaner for your specific hood. Range hoods can be made from a variety of materials. When choosing what to clean with, pick a cleaner that's safe to use on that material in order to avoid damaging it. For instance:
-
2Wipe the outside of the hood. Expect the hood’s exterior to be a pretty easy job since it’s aimed away from your stovetop. Simply spray it with your cleaner. Follow the cleaner's directions if it advises letting it sit for any length of time before wiping it off.[5]Advertisement
-
3Dry the hood. Wipe it down with a dry, clean cloth or paper towels. Remove all traces of the cleaner. If the hood's material has an obvious grain, wipe with the grain for a more effective clean and polish.[6]
Cleaning Underneath the Hood
-
1Steam the inside if needed. First, take a peek under the hood. If it looks like you have your work cut out for you up there, fill a large pot three-quarters of the way with water. Bring it to a boil, uncovered, on the stovetop and keep it boiling for a half hour or more, as needed. Let the steam soak into the crud so it starts to loosen from the hood.[7]
- Wait for the stovetop to cool before proceeding. Keep in mind that you’ll probably have to lean over the stove to reach up and under the range hood. If you boiled water to work the crud loose with steam, remove the pot to a heat-safe surface. Wait for the burner to cool down before moving on.
-
2Test-spray the inside. If the dirt is light enough for your regular surface cleaner to work, great. If, however, you need a tougher chemical for degreasing (like Super Clean, OxiClean, or Mrs. Myers’ All-Purpose Cleaner) to get the job done, give a small area of the hood a test spray before using it all over. Make sure it doesn’t cause any adverse reactions with the hood’s paint or other materials.[8]
- Again, always double-check the cleaner's recommendations regarding which materials it's safe to use on.
-
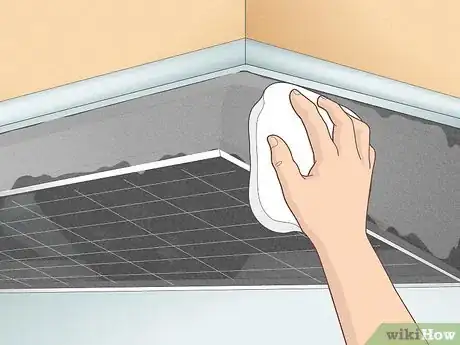
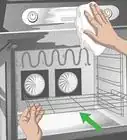
3Spray and wipe. First, read your cleaner’s instructions for proper use. Wear safety gloves if advised. Open windows and turn the exhaust fan on if strong ventilation is recommended. Then spray the hood’s interior as directed and wipe it down with a sponge, cloth, or paper towels.[9]
- Some cleaners may recommend wiping down immediately. Others may advise letting it sit for a period of time so it can soak into the dirt, grease, and crud.[10]
-
4Wipe again with wet towels. Expect strong cleaners to leave streaks and odors if any traces are left to linger. Once the area is clean, dampen a cloth or paper towels. Wipe the interior again to remove any chemical residue. Then repeat with a dry cloth to dry it.[11]
-
5Repeat frequently. Expect the job to be tougher the longer you wait in between each cleaning. Make washing the hood part of your daily or weekly routine when doing the whole kitchen. If a particular meal used a lot of oil or caused a lot of splatter, clean it up immediately afterward, as soon as the stovetop is safe to work around.[12]
Dealing with the Filter
-
1Check it monthly. Clean the hood itself on a daily or weekly basis, but don’t worry about dealing with the filter that often (unless you happen to deep-fry a lot of foods on a regular basis). Inspect it once a month. If it appears stained or splattered, plan on cleaning or replacing it ASAP.[13]
-
2Remove the filter. Filters can be secured into place in a number of different ways. Give yours a look over. It will probably be attached by:[14]
- A fastener that you can rotate in and out of position.
- A latch that you need to press and lift.
- Rim supports that just need to be pushed up and rotated.
- Screws.
-
3Replace fabric and charcoal filters. If you have either of these types, do not attempt to clean them. Simply switch the old one out and install a new one. However, with charcoal filters, keep in mind that you only need to replace these if you have a ductless range hood.[15]
- A ductless range hood means the exhaust fan is recirculating air right back into the kitchen. If the exhaust is being ventilated out of the house through ducts, you shouldn’t need to replace your charcoal filter.
-
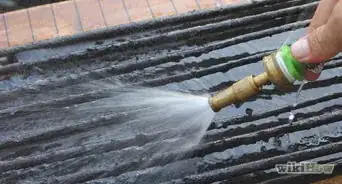
4Soak metal filters in cleaner and water. Fill your sink with hot water. Add dish soap or the recommended amount of a stronger cleaner (like Super Clean or OxiClean) to degrease it. Let it soak for ten minutes up to a half hour, then agitate it in the water to shake off any loose dirt. Use a bristle brush to scrub any stubborn bits.[16] Then rinse clean under a strong jet of water (like your faucet’s sprayer attachment).[17] After that:
- Set the filter on a clean towel or drying rack and allow it to air-dry before reinstalling.
EXPERT TIPRaymond Chiu is the Director of Operations for MaidSailors.com, a residential and commercial cleaning service based in New York City that provides home and office cleaning services at affordable prices. He has a Bachelors in Business Administration and Management from Baruch College.House Cleaning Professional
 Raymond Chiu
House Cleaning ProfessionalOur Expert Agrees: Remove the filter from your range hood, then soak it for about 5-7 minutes in degreaser or dishwashing liquid and water. Rinse the filter thoroughly, and soak it again if necessary.
Things You’ll Need
- Your preferred surface cleaner
- Stronger degreasing cleaner if needed
- Paper towels, cloths, or sponge
- Water
- Sink
- Bristle brush
- Replacement filters (depending on material)
References
- ↑ https://dengarden.com/cleaning/how-to-clean-range-hood-filters-5-easy-methods
- ↑ http://www.epicurious.com/expert-advice/how-to-clean-oven-vent-range-hood-grease-article
- ↑ http://www.marthastewart.com/1057169/how-clean-range-hood
- ↑ http://www.howtocleanstuff.net/how-to-clean-copper-vent-hood/
- ↑ http://www.howtocleanstuff.net/how-to-clean-copper-vent-hood/
- ↑ http://www.marthastewart.com/1057169/how-clean-range-hood
- ↑ http://tiphero.com/clean-your-range-hood-filter/
- ↑ https://www.homerepairtutor.com/how-to-clean-a-greasy-kitchen-hood/
- ↑ https://www.homerepairtutor.com/how-to-clean-a-greasy-kitchen-hood/
- ↑ http://www.epicurious.com/expert-advice/how-to-clean-oven-vent-range-hood-grease-article
- ↑ https://www.homerepairtutor.com/how-to-clean-a-greasy-kitchen-hood/
- ↑ http://www.epicurious.com/expert-advice/how-to-clean-oven-vent-range-hood-grease-article
- ↑ http://www.epicurious.com/expert-advice/how-to-clean-oven-vent-range-hood-grease-article
- ↑ https://dengarden.com/cleaning/how-to-clean-range-hood-filters-5-easy-methods
- ↑ https://dengarden.com/cleaning/how-to-clean-range-hood-filters-5-easy-methods
- ↑ http://tiphero.com/clean-your-range-hood-filter/
- ↑ http://www.epicurious.com/expert-advice/how-to-clean-oven-vent-range-hood-grease-article
About This Article
If you need to clean your range hood, make sure you use a cleaner that's appropriate for the material, such as soapy water for a plastic hood and copper cleaner for copper. Spray the cleaner onto the outside of the hood, then wipe it off and dry the hood with a paper towel. To make cleaning the inside easier, boil a pot of water so the steam loosens the grime on the hood. Next, test spray your cleaner on a small area before applying it to the hood if it causes no damage. When the hood is clean, wipe off the cleaner with a damp towel. For advice on how often to clean your filter, read on!

