This article was co-authored by Renée Plevy and by wikiHow staff writer, Danielle Blinka, MA, MPA. Renée Plevy is an Internationally Acclaimed Portrait Artist from New York/Palm Beach who has painted The Grand Dames of Palm Beach and various celebrities and community leaders. With over 50 years of experience, Renée specializes in painting realistically in oil and capturing the soul of the person. She has studied under internationally renowned portrait artists John Howard Sanden, David Leffel, Robert Beverly Hale, Clyde Smith, and Leonid Gervits. Renée is featured in over 68 shows and galleries including a one-woman museum show at the Paterson Museum. She has garnered numerous awards including “Artist of the Year” from The Bloomfield Art League and First Prize from the Boca Raton Museum Artist’s Guild. Renée has even painted a portrait of celebrity, Vanilla Ice. She also teaches at the Boca Raton Museum Art School - formerly at SVA in Manhattan.
There are 9 references cited in this article, which can be found at the bottom of the page.
This article has been viewed 17,254 times.
Paintings are a lovely addition to any home, but keeping them clean can be a challenge. Unlike other pieces of decor, paintings can’t be cleaned with the wipe of a dusting cloth. Fortunately, you can clean dirt and dust from your paintings with minimal risk of damage. The best way to clean oil, acrylic, and watercolor paintings is to brush away dirt and dust with a soft-bristle paint brush. For stubborn dirt on oil or acrylic paintings, you can use saliva as a paint-friendly cleaning solvent. If your paintings are valuable, old, damaged, or pastels, however, it’s a good idea to call in the professionals.
Steps
Brushing Away Dirt and Dust
-
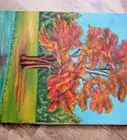
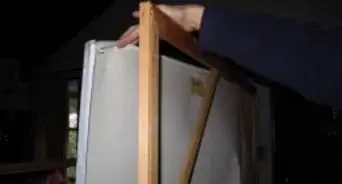
1Rest your painting on a soft surface with the painting upright. This ensures that the dirt and dust will fall away from the painting as you dust. It increases the likelihood that you’ll be able to remove debris rather than just redistribute it. If you can, have someone else help you hold the painting steady.[1]
- For example, you could drape a soft throw blanket over a chair, then set the painting on it. The back of the chair will help you keep the painting upright.
-
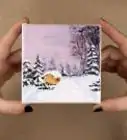
2Select a new soft-bristle paint brush with clean, dry bristles. Your brush should have a wide base and flat shape. Look for natural bristles, as they are softer and finer.[2] The ideal brush size for cleaning dust is 3.5 to 5 centimetres (1.4 to 2.0 in). You can use brush cleaning for oil, acrylic, and watercolor.[3] You can attempt to clean pastels using the brush method, but you may damage the artwork, as pastels are easily altered.
- For oil and pastel paintings, choose a brush labeled for oil painting.
- For acrylic paintings, choose a brush labeled for acrylic paintings.
- For watercolor paintings, use a watercolor brush. It's especially important that the brush be dry.
- Never use dust cloths, feather dusters, or stiff-bristles to clean a painting. Even a soft cloth or duster can damage the painting.[4]
Advertisement -
3Work from the upper left corner to the bottom right corner. Starting at the corner ensures that you brush the entire surface of the painting. Simply work in straight lines, moving from 1 corner to another. Then, move down the painting in sections that are no larger than the width of your brush.[5]
- This will be the corner that is on your left, as you face the painting.
-
4Make small, gentle brush strokes moving horizontally. It’s best to make several little strokes as you move across the surface of the painting. Hold your brush above the painting, never pressing down. The bristles should lightly graze the surface.[6]
- If you press down on the brush, you could leave a mark in the paint.
- Horizontal strokes go back and forth.
-
5Repeat the brushing process making vertical strokes. Return to the top left corner, then start working in a downward motion. Your first pass should go from the top left corner to the bottom left corner. Continue working across the surface of the painting until you’ve dusted all of it.[7]
- Vertical strokes go up-and-down.


Using Saliva for Stubborn Dust
-
1Use spit to clean paintings with stubborn dust or dirt. It may seem gross, but saliva is commonly used by museums and historians to keep paintings clean.[8] Saliva contains enzymes that break down dirt and dust, but it’s also gentle enough that it doesn’t harm the paint. Not only is saliva the perfect solvent for cleaning your painting, it’s also free![9]
- Cleaning with saliva can take a while, so make sure that you’re committed to the project. It will likely take several hours, at the minimum.
- You can use spit cleaning for acrylic or oil paintings, but never use it for watercolors or pastels.
-
2Don’t eat or drink for at least 30 minutes before using your saliva. Food and drinks can alter the chemistry of your saliva, making it possible your painting could be damaged. They could also color your saliva or add food particles. If you do need to take a snack break, wait 30 minutes before adding new saliva to your bowl.
- When you need to take a drink so that you can make more saliva, water is a safe option. Just make sure you don’t spit any water into your saliva bowl.[10]
-
3Collect your spit in a small bowl. This will make it easier to clean the painting once you get started. Fill the bowl with as much spit as you reasonably can, which will mean spitting several times.[11]
- You can add more spit to the bowl later, so don’t worry if you don’t produce much right now.
-
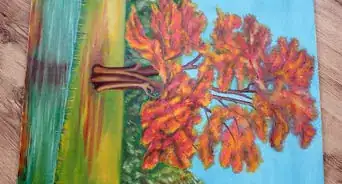
4Test the saliva on a lower corner to check the effect. Although saliva is very safe, you still want to see how it’ll work on your painting before you make noticeable changes. Choose a small spot on a lower corner to try it out. Lightly dab the corner with a cotton swab dipped in the saliva. Check the results to make sure they match your expectations.[12]
- Make sure that the saliva didn’t alter the paint in any way. For example, it shouldn’t be flaking and shouldn’t have marks on it.
- Check that the dust and debris are gone.
-
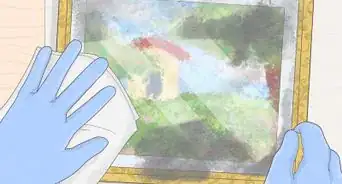
5Dip a cotton swab in the saliva, then wipe away dirt and dust. Make small, gentle swipes along the surface of the painting. The cotton should barely touch the surface of the painting, as you don’t want to leave an impression.[13]
- If any dirt and dust remain, you can make a second pass. Continue to use gentle pressure.
- You’ll need to have a lot of patience, as the cleaning process can take a lot of time.
-
6Work in 1 inch (2.5 cm) sections until the entire painting is clean. Focusing on small sections at a time will help you make sure that you successfully clean the entire painting. It will also help you avoid becoming overwhelmed.[14]
- You can adjust the size of your sections, if you need to. For example, you might want to work in very small sections if the painting is very dirty.
-
7Use both ends of the cotton swab, then get a new swab. When a cotton swab starts to look dirty, you need to switch to a clean swab. Expect to go through many cotton swabs as you clean the painting.[15]
- It’s best to start with a full or mostly full box of cotton swabs. You won’t use all of them, but you’ll be sure that you have enough.


Hiring a Professional Conservator
-
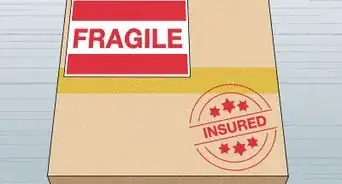
1Obtain art insurance on the piece before getting it cleaned. In the unlikely event that your painting is damaged by the conservator, insurance will protect you from financial loss. You can add fine art insurance onto your homeowner's policy, or you can take out a policy from a company specializing in fine art insurance. They'll ask for proof that the art work is yours, and then you'll need to get an appraisal to estimate the current value of the work.
- You can prove ownership with a bill of sale or other legal documents.
- You should get your artwork appraised every 3-5 years to make sure your policy reflects its current value.
- Insurance can also cover your painting during transportation. Just check with your insurer to make sure your policy offers this coverage.[16]
-
2Take valuable, notable, or older pieces to a professional conservator. Although getting a painting cleaned by a professional conservator can be pricey, it can save you a lot of heartache if the painting needs special attention.[17] It’s easy to damage a painting, especially if it’s already old. A professional conservator is trained in the best practices for preserving and cleaning artwork, which limits the risk of harm.[18]
- For example, if you own an expensive original painting from a famous artist, it’s best to get it professionally cleaned.
- Similarly, you'll need to hire a conservationist if your watercolor painting has damage other than dust. For example, they can remove mold from the painting.[19]
- Keep in mind that an art conservator is different from an artist or a curator. Don’t turn your painting over to anyone without properly checking their credentials.
-
3Contact the nearest art museum or art school to get a referral. An art museum or art school should be able to put you in contact with a qualified conservator. In some cases, the person may work at the museum or school, preserving the artwork in their holdings. Going through a museum or art school will give you confidence that the person knows what they’re doing.[20]
- If you don’t know of any art museums nearby, do an Internet search. You can also do a simple search for art conservators.
-
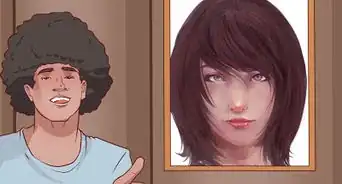
4Select a conservator experienced with the type of painting you possess. Ask them about their education, work history, and specializations. Then, look at examples of their past work. Ideally, they should have experience in handling artwork from a similar time period to yours and in the same medium.[21]
- For example, you wouldn’t want to have a classical Renaissance painting restored by someone who only has experience working with contemporary art.
-
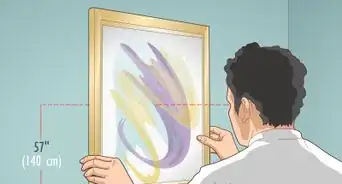
5Allow the conservator to evaluate the painting and create a plan. Each painting has its own issues, so every professional cleaning process will be different. The conservator will evaluate the quality of the paint, existing damage, and the presence of varnish that may be protecting the paint. They can also determine if prior restoration efforts have been done. After their evaluation, they’ll provide you with a restoration plan.[22]
- In many cases, they will look at the paint under a UV light to check the varnish and paint layers.
- At the very least, the conservator will remove debris. It’s likely that they will also remove the top layer of varnish.
- If the painting has other damage, such as tears or flaking paint, the conservator will repair these, as well. They may even touch up the paint, with your approval.[23]
-
6Ask the conservator to get approval from you before they begin. This can protect you from unwanted changes or a high bill. Have them explain what they want to do to your painting, such as removing the varnish or touching up paint. Next, check the proposed fee. Make sure that you are happy with everything before you approve the plan.[24]
- If a painting needs minimal cleaning, conservation may cost a few hundred dollars. If it requires more work, costs for a small painting may range from $800-$1,000. A larger painting that has damage may cost as much as $10,000-$15,000 to conserve and restore. Most conservationists are paid by the hour and will not disclose costs until they can evaluate a painting. Additionally, x-rays of the painting add to the cost.[25]
- Get everything in writing. If any changes are made, make sure they are noted in the agreement and you both sign off.


Expert Q&A
-
QuestionHow do I clean a painting without damaging it?
 Renée PlevyRenée Plevy is an Internationally Acclaimed Portrait Artist from New York/Palm Beach who has painted The Grand Dames of Palm Beach and various celebrities and community leaders. With over 50 years of experience, Renée specializes in painting realistically in oil and capturing the soul of the person. She has studied under internationally renowned portrait artists John Howard Sanden, David Leffel, Robert Beverly Hale, Clyde Smith, and Leonid Gervits. Renée is featured in over 68 shows and galleries including a one-woman museum show at the Paterson Museum. She has garnered numerous awards including “Artist of the Year” from The Bloomfield Art League and First Prize from the Boca Raton Museum Artist’s Guild. Renée has even painted a portrait of celebrity, Vanilla Ice. She also teaches at the Boca Raton Museum Art School - formerly at SVA in Manhattan.
Portrait Artist & EducatorIf you're worried about damaging the piece, take it to a professional conservationist to be restored.
Things You’ll Need
Brush Cleaning
- New soft-bristle paint brush
Spit Cleaning
- Saliva
- Bowl
- Box of cotton swabs
Warnings
- You can easily ruin a painting by cleaning it yourself. When in doubt, hire a professional.⧼thumbs_response⧽
- Don’t try trendy cleaning methods that use food, such a bread or potatoes. While they may clean some paintings, food also leaves crumbs and enzymes on the painting, which can cause damage over time.[27]⧼thumbs_response⧽


References
- ↑ https://www.si.edu/mci/english/learn_more/taking_care/care_painting.html
- ↑ https://www.agora-gallery.com/advice/blog/2016/04/12/cleaning-and-protecting-paintings-what-you-need-to-know/
- ↑ https://www.si.edu/mci/english/learn_more/taking_care/care_painting.html
- ↑ https://www.si.edu/mci/english/learn_more/taking_care/care_painting.html
- ↑ https://www.agora-gallery.com/advice/blog/2016/04/12/cleaning-and-protecting-paintings-what-you-need-to-know/
- ↑ https://www.si.edu/mci/english/learn_more/taking_care/care_painting.html
- ↑ https://www.si.edu/mci/english/learn_more/taking_care/care_painting.html
- ↑ https://www.agora-gallery.com/advice/blog/2016/04/12/cleaning-and-protecting-paintings-what-you-need-to-know/
- ↑ https://www.jstor.org/stable/1506167?seq=1#page_scan_tab_contents
- ↑ https://www.agora-gallery.com/advice/blog/2016/04/12/cleaning-and-protecting-paintings-what-you-need-to-know/
- ↑ https://www.agora-gallery.com/advice/blog/2016/04/12/cleaning-and-protecting-paintings-what-you-need-to-know/
- ↑ https://www.agora-gallery.com/advice/blog/2016/04/12/cleaning-and-protecting-paintings-what-you-need-to-know/
- ↑ https://www.agora-gallery.com/advice/blog/2016/04/12/cleaning-and-protecting-paintings-what-you-need-to-know/
- ↑ https://www.agora-gallery.com/advice/blog/2016/04/12/cleaning-and-protecting-paintings-what-you-need-to-know/
- ↑ https://www.agora-gallery.com/advice/blog/2016/04/12/cleaning-and-protecting-paintings-what-you-need-to-know/
- ↑ https://www.artworkarchive.com/blog/how-to-insure-your-art-collection-the-right-way
- ↑ Renée Plevy. Portrait Artist & Educator. Expert Interview. 7 May 2021.
- ↑ https://www.agora-gallery.com/advice/blog/2016/04/12/cleaning-and-protecting-paintings-what-you-need-to-know/
- ↑ http://www.ala.org/alcts/preservationweek/advice/watercolorpaintings
- ↑ https://www.si.edu/mci/english/learn_more/taking_care/painting_clean.html
- ↑ https://www.si.edu/mci/english/learn_more/taking_care/painting_clean.html
- ↑ http://www.businessinsider.com/julian-baumgartner-painting-conservator-fine-art-restoration-2017-11
- ↑ https://www.si.edu/mci/english/learn_more/taking_care/painting_clean.html
- ↑ http://www.businessinsider.com/julian-baumgartner-painting-conservator-fine-art-restoration-2017-11
- ↑ http://artbusinessnews.com/2015/12/the-cost-of-conservation-and-restoration/
- ↑ https://www.agora-gallery.com/advice/blog/2016/04/12/cleaning-and-protecting-paintings-what-you-need-to-know/
- ↑ https://www.agora-gallery.com/advice/blog/2016/04/12/cleaning-and-protecting-paintings-what-you-need-to-know/
About This Article