This article was co-authored by wikiHow Staff. Our trained team of editors and researchers validate articles for accuracy and comprehensiveness. wikiHow's Content Management Team carefully monitors the work from our editorial staff to ensure that each article is backed by trusted research and meets our high quality standards.
The wikiHow Video Team also followed the article's instructions and verified that they work.
This article has been viewed 16,614 times.
Learn more...
Collard greens grow in sandy soil, so freshly picked, unprocessed greens are often quite dirty. To loosen stuck–on dirt, soak and swish your greens in a sink or large bowl filled with clean water. Then, give them a final rinse to remove any remaining dirt or grit before cutting the greens and preparing them as desired. You may need to repeat the cleaning process a few times, however, to ensure that your collard greens are completely clean!
Steps
Filling the Sink or Bowl
-
1Clean out your sink or get a large, clean bowl. Make sure that your sink is free from debris if you want to clean the collard greens in it. Use a disinfectant spray to clean the sink, and then rinse the cleanser off completely. Alternatively, you can use a large bowl to clean the collard greens.[1]
- The sink is a good option if you have a lot of collard greens to wash. Choose a large bowl instead if your sink is in use, or if you don't have a large amount of collard greens to clean.
-
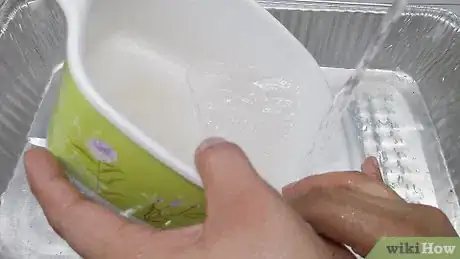
2Fill the sink or bowl with tepid water. Plug your sink with a stopper if you are using it to clean the greens. Then, fill the sink about 1/2 of the way full with tepid (room temperature) water. If you are using a bowl, fill it about 1/2 of the way full with tepid water.[2]
- Do not use hot water to clean the collard greens! It will wilt them. It's important to make sure your water is tepid or lukewarm.
Tip: If your tap water is coming out too warm, add 2 to 3 cups of ice to the sink or bowl to cool the water down before you add your greens.
Advertisement -
3Add 1/2 cup (120 mL) of white vinegar if you want extra cleaning power. Stir the vinegar into the water to distribute it. Vinegar is edible and it helps to dissolve dirt, so it may get your greens cleaner than water alone.[3]
- Note that if you use vinegar to clean the greens, you will need to rinse them a second time to remove the vinegar taste.
Soaking and Swishing the Greens
-
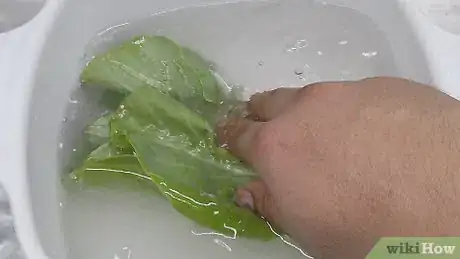
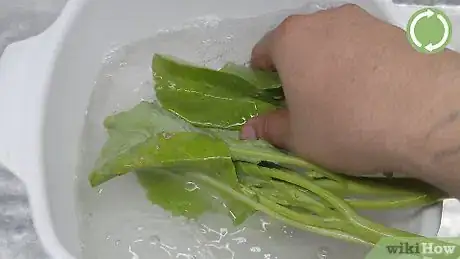
1Place the collard greens into the water and swish them with your hands. Put all of the collard greens you want to clean into the sink or bowl and push them down into the water with your hands to submerge them. Leave the greens to soak in the water for about 10 minutes, and then start swishing them around in the water. Push them down and side-to-side for about 30 seconds.[4]
- You can also use a wooden spoon to swish the greens around.[5]
- Collard greens float, so you will have to push them down several times during the soaking and swishing process.
-
2Swish the greens every 10 minutes for a total of 90 minutes. Set a timer for 10 minutes and another timer for 90 minutes to keep track of the time that passes. Let the collard greens soak in the sink or bowl for 90 minutes in all, and swish them around with your hands or a wooden spoon every 10 minutes.[6]
- Try setting simultaneous timers on your phone to keep track of the time: one for 90 minutes, and one for 10 minutes that you can keep resetting each time it dings.
- If you have other items to prep in the kitchen, ask someone to help you by swishing the collard greens every 10 minutes.
-
3Rub off any visible dirt with your fingertips near the end of the soak. When the total soaking time is almost up, look at the collard greens in the water. If you spot any leaves with visible dirt on them, rub the dirt off in the water using your fingertips.
- Keep in mind that more dirt will dissolve the longer the greens soak, so don't worry about inspecting every leaf for dirt early in the process.
Tip: Don’t scrub the greens with a vegetable brush. They are too delicate to withstand scrubbing.
Rinsing and Using the Collard Greens
-
1Transfer the greens to a colander and drain the water. Scoop the greens out of the sink and into a colander using your hands, a slotted spoon, or a pair of tongs. Then, drain the sink and rinse it out. If the greens were in a bowl, transfer the greens to a colander, and then pour out the water.[7]
- Don't drain the sink or bowl with the greens still in it or the dirt and grit at the bottom will get on the greens again.
- Be careful not to let any of the greens go down the drain if you're rinsing them in the sink!
-
2Rinse the greens under running water. Place the colander or bowl under the spigot and turn on the water so it is cool or tepid. Move the colander around under the running water for about 1 minute.[8]
- This is especially important if you added vinegar to your greens. Rinsing them thoroughly will help to ensure that no vinegar taste remains.
-
3Repeat the process if the greens still appear sandy or dirty. Assess the greens after you finish rinsing them. Check them for any remaining dirt or sand. If they still appear dirty or gritty, then you will need to repeat the process. Otherwise, all of that dirt and grit will end up in your meal.[9]
- When you are happy with the cleanliness of your greens, they are ready to use!
Tip: You may need to repeat the soaking and rinsing process 2 to 3 times to get your collard greens clean, so it is a good idea to start cleaning your greens at least 4 hours before you want to cook them.
Expert Q&A
-
QuestionHow do you know if collard greens are fresh?
 Marrow Private ChefsMarrow Private Chefs are based in Santa Rosa Beach, Florida. It is a chefs’ collaborative comprised of an ever-growing number of chefs and culinary professionals. Though regionally influenced primarily by coastal, traditional southern, cajun, and creole styles and flavors, the chefs at Marrow have a solid background in all types of cuisine with over 75 years of combined cooking experience.
Private Chefs Look for collard greens that have a firm, crisp, and rigid texture. They should also have unwilted leaves with no signs of yellowing or browning.
Things You’ll Need
- Sink or large bowl
- Water
- White vinegar (optional)
- Wooden spoon or tongs
- Colander
References
- ↑ https://www.spendwithpennies.com/clean-collard-greens/
- ↑ https://www.loavesanddishes.net/the-secret-to-perfect-southern-collard-greens/
- ↑ https://www.loavesanddishes.net/the-secret-to-perfect-southern-collard-greens/
- ↑ https://www.loavesanddishes.net/the-secret-to-perfect-southern-collard-greens/
- ↑ https://www.southernliving.com/food/how-to/how-to-clean-collard-greens-video
- ↑ https://www.loavesanddishes.net/the-secret-to-perfect-southern-collard-greens/
- ↑ https://www.southernliving.com/food/how-to/how-to-clean-collard-greens-video
- ↑ https://www.loavesanddishes.net/the-secret-to-perfect-southern-collard-greens/
- ↑ https://www.loavesanddishes.net/the-secret-to-perfect-southern-collard-greens/
