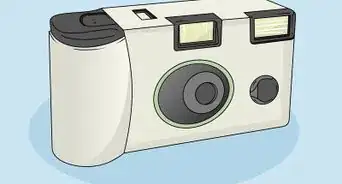
The film you choose for your camera matters far, far more than your choice of camera and lens. There are three kinds of films you are likely to encounter: colour negatives, E-6 slide films, and traditional black and white films. All of these have their place, and none of them is perfect for every photographic situation; and all of them are capable of getting great results if you use them appropriately. There are trade-offs involved in using every kind of film; armed with the right knowledge, you'll be able choose one that's good for your needs.

1

Understand the main types of film.

  1. Before purchasing new film, it will be helpful to know the differences between the three main film types. Many people are only familiar with the first of these, but the other two have their place in photography (perhaps more so).
    • Color negative film, also called print film, is what most people are familiar with; the stuff you can still buy almost anywhere (and what non-specialists will generally assume you want if you ask for "film"). The image you see on a developed negative is orange-tinted, and the colors are inverted. The process used to develop these is called C-41, and so these are sometimes called "C-41 films".
    • Slide film, more properly called reversal film, gives a positive image; in other words, when you look through it, it looks like a photograph. Nearly all slide films today use the E-6 process, which is a completely different process to that used for negative films.
      • We've deliberately omitted any discussion of Kodachrome, which uses the K-14 process that can only be done in one lab in the world, and is about to be killed off anyway. For more on Kodachrome, and some amazing photography, see The Kodachrome Project.
    • Traditional black-and-white films are usually negative films, but (you guessed it) they're black-and-white. These, again, use a very different process (albeit a much simpler one) to all the other types of film.
      • There's a special subset of black-and-white films: those that can be developed in the same C-41 process used for color negatives. Ilford XP2 and Kodak BW400CN are two of them. These have all the properties of color negatives, except for the color part, so most of what is written below about the latter applies to these films as well.
  2. Advertisement
2

Consider your processing options.

  1. Knowing where you can develop your film is important. After all, you don't want to buy film that needs to be sent to a lab if you want more instantaneous results.
    • Color negative films can be developed almost anywhere for very little expense; if you're not living in some Nowheresville with a population of you and your dog, you probably have a place nearby capable of developing them. If you're weird, don't mind messing up a lot of films and enjoy dealing with a lot of unpleasant and dangerous chemicals, you can even develop it yourself.
    • E-6 slide films and traditional black-and-white films normally need to be sent off to a professional lab for developing. Most large cities will have a lab of this kind; smaller labs will often be willing to handle this for you. On the other hand, you can develop traditional black and white films yourself without a great deal of expense, and with much less unpleasantness than you'd encounter with color negative film.
3

Decide how much exposure latitude you want.

  1. Exposure latitude is the degree to which a film can tolerate this and still return acceptable results. Metering errors and bad technique will cause your photos to be under- or over-exposed.
    • Slide film has almost no tolerance to either; if you're going to shoot slide film, it's a very good idea to shoot a test roll or two first.
    • Unless you want an unusual effect for artistic purposes, don't bother with slide film in a camera without manual settings or electronics; its one-size-fits-all settings will often give poor results.
    • Color negatives can tolerate huge amounts of over-exposure and usually a stop of underexposure; it's not a bad idea at all to shoot them at a stop over their rated speed all the time.
    • Traditional black-and-white film also has a huge exposure latitude; any error in exposure can be corrected during developing or printing.
  2. Advertisement
4

Choose a film speed.

  1. The film speed is usually given according to its ASA (also known as ISO) speed index. This will be a number like 50, 100, 200, etc. The higher the number, the more sensitive the film is to light. More and less sensitive films are called "faster" and "slower", respectively. As usual, there's no one right film, but a trade-off.
    • Faster films allow you to capture a subject in worse light. The trade-off is that you end up getting more grain in your pictures (think digital camera noise, but far less ugly). Some people might say that it's not worth bothering with the extremely fast (ASA 1600 upwards) films; if you need extremely fast shutter speeds for sports (for example), just shoot a good digital SLR, which will give great results at these fast speeds. On the other hand, photography is an art, not a science. Film grain can look awesome on black-and-white photographs.
    • Slower films typically have less grain but require longer shutter speeds. This isn't a problem for landscapes in daytime through to sunset, but it does become a problem indoors, or shooting things that move quickly. Don't worry about any of this too much: if you want easy snapshots, go for ASA 200, 400 or 800 film; if you're shooting in daylight or can control your lighting, shoot the slowest film that you like the look of.
5

Select a film based on your color preference.

  1. Decide what colors you like and choose a film accordingly. This will depend on your subject. For example, super-saturated films like Velvia might be great for landscapes, but terrible for lighter-skinned people. Subtle colors or black-and-white is often much better for this sort of thing. But again, remember, art, where using the "wrong" film in a certain situation often looks better than doing the technically "right" thing.
    • If you're shooting a negative film, the colors you will get will depend far on how they are printed or scanned than on the film itself, since there is no standard way to represent colors on film. Unlike with slides, there is no such thing as printing or scanning without corrections, because all inverted color negatives have to be color-corrected to remove the base tint of the film. Which isn't to say that they can't look superb; they can, and often do, especially for photos of people. Just don't be surprised if you get unsatisfactory results, or very different results from film to film.
  2. Advertisement
6

Experiment with different films.

  1. The best way to decide on a film type is to go try some films. None of this technical trivia is the same thing as art. There's no substitute for playing with film and seeing if you like the results.
    • Unless you take many, many pictures, have a fancy professional-type camera with interchangeable film-holding backs, or keep multiple cameras on hand, you may often have to choose a film good for a variety of conditions. In this case, choose a print film (for increased tolerance of bad exposure), in color (you can always lose the color in a computer later if you like), with high speed.

Community Q&A

  • Question
    What film is best for a novice photographer to use with a Nikon N80 SLR camera?
    Community Answer
    Community Answer
    If you want to shoot color negative (print) film, then something like ASA 100/200 for a start to see how the results are. Make sure you set the ASA dial on the camera to suit film speed.
  • Question
    What is the difference between HP and FP film?
    Community Answer
    Community Answer
    HP is high speed and FP is fine grained.
  • Question
    What is the best 35 mm film speed to use for taking pictures of outdoor Christmas lights at night?
    Community Answer
    Community Answer
    Try using films with higher ISO, like 2000 or 3200. They work well at night, but it all depends of your environment. Do some tests to see which works best.
Advertisement

About This Article

wikiHow is a “wiki,” similar to Wikipedia, which means that many of our articles are co-written by multiple authors. To create this article, 16 people, some anonymous, worked to edit and improve it over time. This article has been viewed 225,135 times.
102 votes - 92%
Co-authors: 16
Updated: May 31, 2022
Views: 225,135
Advertisement