X
This article was co-authored by wikiHow staff writer, Jack Lloyd. Jack Lloyd is a Technology Writer and Editor for wikiHow. He has over two years of experience writing and editing technology-related articles. He is technology enthusiast and an English teacher.
The wikiHow Tech Team also followed the article's instructions and verified that they work.
This article has been viewed 72,036 times.
Learn more...
This wikiHow teaches you how to charge an iPhone or iPod using the included charger cable.
Steps
Part 1
Part 1 of 3:
Using an Electrical Outlet
-
1Plug the power adapter into a wall socket. The wall socket side of the iPhone/iPod power adapter, which resembles a white cube, has two prongs that should fit into the wall like any other standard plug.
-
2Attach the large end of the cable to the power adapter. The USB end of the charger is a rectangular piece of exposed metal; if you look at its end, you'll see a block of plastic inside. It plugs into the horizontal rectangular slot on the outward-facing side of the power adapter.
- The block of plastic inside of the USB end of the charger cable must fit on the opposite side of the block of plastic in the adapter's slot. If you're having trouble fitting the USB end into the adapter, try flipping the USB end over.
Advertisement -
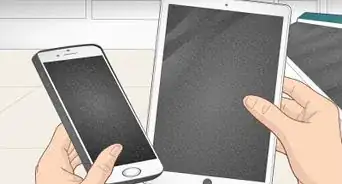
3Determine the type of charger cable you have. There are two types of charger cables for your iPhone and iPod:
- Lightning - iPhone 5 and up; iPod touch 5th Generation and up. This cable's charging end is relatively narrow and flat.
- 30-pin - iPhone 4S and down; iPod touch 4th Generation and down. This cable's charging end is wide and flat.
-
4Insert the other end of the cable into the bottom of the iPhone/iPod. If you're using a Lightning cable, the charger should fit no matter how you insert it into the device's charging port; however, a 30-pin charger must be inserted with the grey rectangle icon on side of the charger facing the same way as the iPhone's screen.
-
5Wait for your device to begin charging. A second or so after plugging it in, your device should make a sound (or vibrate), and the screen should briefly display a battery icon.
- If your device doesn't begin charging, try using a different electrical outlet.


Advertisement
Part 2
Part 2 of 3:
Using a Computer
-
1Locate a USB port on your computer. USB ports are slim rectangular openings with three-pronged symbols next to them. You'll typically find them on the sides of laptops' casings, though their locations vary for desktop computers.
- If you can't find a USB port on your desktop computer, try looking at the sides or back of the keyboard, back of the CPU, or behind the desktop monitor.
- Some MacBooks don't have USB ports.
-
2Plug your iPhone or iPod cable into a USB port. The USB end of the charger is a rectangular piece of exposed metal; if you look at its end, you'll see a block of plastic inside. When plugging the cable into the USB port, make sure the three-pronged symbol on the USB cable is facing upward.
- You may need to disconnect the cable from the power adapter cube first. Do so by gently tugging on the USB end of the cable until it disengages from the power adapter.
-
3Determine the type of charger cable you have. There are two types of charger cables for your iPhone and iPod:
- Lightning - iPhone 5 and up; iPod touch 5th Generation and up. This cable's charging end is relatively narrow and flat.
- 30-pin - iPhone 4S and down; iPod touch 4th Generation and down. This cable's charging end is wide and flat.
-
4Insert the other end of the cable into the bottom of the device. If you're using a Lightning cable, the charger should fit no matter how you insert it into the device's charging port; however, a 30-pin charger must be inserted with the grey rectangle icon on side of the charger facing the same way as the iPhone's screen.
-
5Wait for your device to begin charging. A second or so after plugging it in, your iPhone/iPod should make a sound (or vibrate), and the screen should briefly display a battery icon.
- If your device doesn't begin charging, try using a different electrical outlet.


Advertisement
Part 3
Part 3 of 3:
Maximizing Battery Life
-
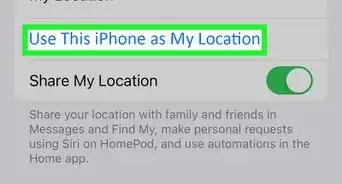
1Make sure your software is up-to-date. Apple is always attempting to improve your device's battery life, so updating to the latest version of iOS as soon as it becomes available will potentially help save battery life in and of itself.
-
2Adjust your device's auto-lock settings. After a certain amount of inactivity, your iPhone or iPod will automatically turn off its screen. To change this setting:
- Open your iPhone's Settings.
- Scroll down and tap Display & Brightness.
- Tap Auto-Lock.
- Tap a time limit (the lower, the better).
-
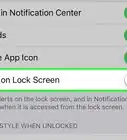
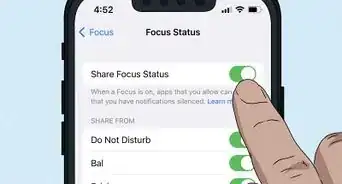
3Use your device's "Low Power Mode" feature. Low Power Mode is a process that temporarily restricts your iPhone's or iPod's visual effects and overall power consumption until you disable it. To enable this feature:
- Open your iPhone's Settings.
- Scroll down and tap Battery.
- Slide Low Power Mode right to the "On" position.
-
4Enable auto-brightness. This feature uses your iPhone's or iPod's camera to detect ambient light and adjusts the screen's brightness automatically in response. To enable this feature:
- Open your iPhone's Settings.
- Scroll down and tap General.
- Tap Accessibility.
- Select Display Accommodations.
- Slide Auto-Brightness right to the "On" position.
-
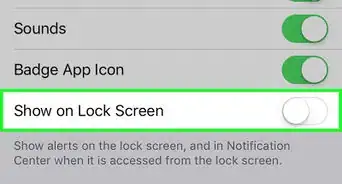
5Disable your device's Mail fetching. This feature sends new mail to your Mail app from the pertinent email server, which can use a significant amount of battery life. To disable fetching:
- Open your iPhone's Settings.
- Scroll down and tap Mail.
- Tap Accounts.
- Tap Fetch New Data at the bottom of the page.
- Slide Push left to the "Off" position.
-
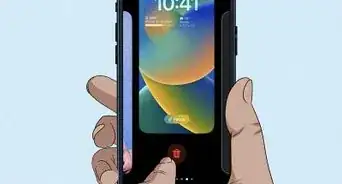
6Turn on Airplane Mode when you have no coverage. Doing this will prevent your iPhone or iPod from attempting to send or receive any kind of signal, which will in turn reduce the impact on your battery. To enable Airplane Mode:
- Open your iPhone's Settings.
- Slide Airplane Mode right.
- Even when you do have coverage, turn on airplane mode to help your phone charge faster.


Advertisement
Community Q&A
-
QuestionShould an iPhone be off while it's charging?
 Community AnswerThat is ideal, but it's fine to leave it on if you need to.
 -
QuestionWhat does it mean when charge symbol is yellow instead of red or green?
 Community AnswerIt means your device is on low battery mode, which is supposed to help save your battery. It usually gives you the choice to enable it when your device is losing juice and down to about 20 percent charged.
 -
QuestionHow am I able to tell if my phone is charging?Community AnswerThere is a small lightning bolt next to where the battery icon is, but when it's not charging, the lightning bolt is gone.
Advertisement
Warnings
- If you let your iPhone or iPod die, plugging it in won't turn it back on for a few minutes.⧼thumbs_response⧽
Advertisement


About This Article
Jack Lloyd
wikiHow Technology Writer
This article was co-authored by wikiHow staff writer, Jack Lloyd. Jack Lloyd is a Technology Writer and Editor for wikiHow. He has over two years of experience writing and editing technology-related articles. He is technology enthusiast and an English teacher. This article has been viewed 72,036 times.
How helpful is this?
Co-authors: 8
Updated: January 31, 2023
Views: 72,036
Categories: IPhone
Article SummaryX
Plug your charger into a wall outlet or USB port, then plug the other end of the cable into your iPhone's or iPod's charging port.
Did this summary help you?
Advertisement