This article was co-authored by Chad Zani. Chad Zani is the Director of Franchising at Detail Garage, an automotive detailing company with locations around the U.S. and Sweden. Chad is based in the Los Angeles, California area and uses his passion for auto detailing to teach others how to do so as he grows his company nationwide.
This article has been viewed 83,070 times.
The Subaru Outback air filtration system is designed to improve the quality of air in the cabin of the car. Replacing the filter will also allow the air from the vents and the A/C to move more freely throughout the vehicle. It's recommended that you change your air filter once a year, or every 7,500 miles (12,100 km). The following steps outline how to change the filter, and only a few simple tools are needed for the project.
Steps
-
1Remove the right dashboard panel next to the glove box. Remove all contents in the glove box. Locate the dashboard panel at the right side of the glove box and pull it out. Use a flat-head screwdriver to pry the panel from the dash.
-
2Take out the glove box. Disconnect the stopper string of the glove box, which is found on the right side. Push in the sides of the glove box to release the knock pins. Unscrew the screws that hold in the knock pins 1/4 of an inch with a Phillips screwdriver. Remove the pins.[1]Advertisement
-
3Remove the glove box stops from the track grooves. Carefully put pressure on both sides of the glove box, 1 side at a time, to loosen the stops from the tracks. Let the glove box drop out of the way.[2]
-
4Detach the owner's manual shelf. In the Subaru Outback and Legacy models, there is a raised shelf in the glove box that holds the owner's manual. Locate the owner's manual shelf on the right side of the console. Use a Phillips screwdriver to unscrew the 3 screws attaching it to the console. Remove the shelf.
-
5Remove the filter housing bracket. Unscrew the 3 screws on the filter housing bracket using a Phillips screwdriver. Remove the bracket. Remove the insulation on the bracket cover.
-
6Extract the old filter. Apply pressure to the 4 clips on the front of the filter housing tray. Pull out the tray. Remove the old filter from the tray.[3]
-
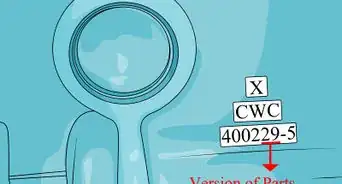
7Insert the Subaru replacement air filter. Place the new filter in the tray. Ensure that the arrow for filter direction that is indicated on the new filter is facing the right direction.[4]
-
8Place the tray back in the filter housing. Make sure the tray clips are in place.
-
9Reinstall the glove box. Reconnect the assembly of stops and track grooves. Reinstall the console side panel and the glove box installation screws. Lift the glove box up and replace the knock pins. Restore the dashboard panel.[5]


Things You'll Need
- Replacement air filter
- Phillips screwdriver
- Flat-head screwdriver


-Beetle-Step-5-Version-3.webp)


References
- ↑ https://www.youtube.com/watch?v=_ymLG4vLnfY
- ↑ https://www.youtube.com/watch?v=bBOxtAgUuKE
- ↑ https://www.subaruoutback.org/threads/how-to-change-the-cabin-air-filter-2015-2019-subaru-outback.303266/
- ↑ https://www.youtube.com/watch?v=CILpKJ4dXao
- ↑ https://www.youtube.com/watch?time_continue=3&v=WKXTy_Teaig
- http://www.cars101.com/subaru/airfiltration.html#00-04legacy
About This Article