X
wikiHow is a “wiki,” similar to Wikipedia, which means that many of our articles are co-written by multiple authors. To create this article, volunteer authors worked to edit and improve it over time.
This article has been viewed 20,953 times.
Learn more...
Beets are a nutritious and delicious way to add color to your meal. Preserve the flavor and health benefits of fresh beets by canning them and enjoy them all year long. As beets are a low-acid food, a pressure canner is required to prevent bacterial contamination.[1]
Ingredients
- 13.5 lb. (6 kg) beets, any variety or color
- Canning salt, also known as pickling salt [2]
Steps
-
1Prepare the beets for canning. Select firm, fresh beets with a diameter of 1 to 2 inches (2.5 to 5 cm). Slice off the beet tops and trim roots, leaving one inch (2.5 cm) of the stem and root to reduce bleeding of color. Wash and scrub the beets with a vegetable brush under cool running water.
-
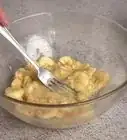
2Cook the beets in boiling water for 15 to 25 minutes to loosen their skins. Remove the beets from hot water, carefully slide off their skins with a spoon or your hands and cut off remaining roots and stems. Transfer the beets to a large bowl of cold water to stop cooking process.
- If the beets are different sizes, try cooking similar sized beets together as the larger beets will require a longer cooking time to remove skins.
Advertisement -
3Slice medium to large beets into 1/2 inch (1.3 cm) cubes or slices. Small beets can be left whole.
-
4Clean 9 glass pint (500mL) canning jars and metal lids with soap and hot water. Keep the jars and lids hot until they are ready to be filled.
- Jars and lids can be kept hot by placing them upside down in a pot of hot water or by washing them in a dishwasher and keeping them in the dishwasher until needed.
-
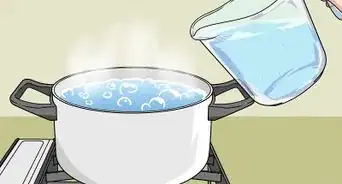
5Pack the clean jars with the prepared beets leaving 1 inch (2.5 cm) of space at the top of the jars. Add one tsp. (5 mL) of canning salt to each jar (optional), then fill jars with boiling water, while keeping 1 inch (2.5 cm) of air space at the top of the jars. [3]
-
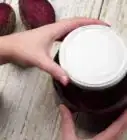
6Wipe the rims of the jars with a clean cloth, shake gently to allow air bubbles to escape and cover with the metal lids. Place the sealed jars on the rack in the pressure canner filled with 3 quarts (2.8 L) of hot water. [4]
- The jars must not sit directly on the bottom of the canner, and should not touch each other to allow steam to flow freely around them.
-
7Place the cover securely on the canner and heat water to boiling. Allow steam to vent from the canner for 10 minutes before adding canner weights or closing vents. After 10 minutes close vents or put on weights (depending on the type of pressure canner you are using) and allow the pressure to build.
-
8Process jars in the pressure canner for 30 minutes, adjusting the pressure based on your altitude (see guide below).[5] Start timing when the necessary pressure is reached. Check the gauge frequently to ensure the pressure remains constant.
- For dial gauge canners, set the pressure to 10 PSI (68.95 kPa) for altitudes of 0 to 1,000 feet (0.0 to 300 m) (0 to 305 m), 11 PSI (75.8 kPa) for altitudes of 1,001 to 2,000 feet (305 to 610 m) (305 to 610 m), 12 PSI (82.7 kPa) for altitudes of 2,001 to 4,000 feet (610 to 1,219 m) (610 to 1220 m), 13 PSI (89.6 kPa) for altitudes of 4001 to 6000 feet (1220 to 1830 m), and 14 PSI (96.5 kPa) for 6001 to 8000 feet (1830 to 2440 m).
- For weighted gauge canners set pressure to 10 PSI (68.95 kPa) for altitudes of 0 to 1,000 feet (0.0 to 300 m) (0 to 305 m), and 15 PSI (103.4 kPa) for altitudes above 1,000 feet (304.8 m).
-
9Turn off heat and allow the pressure to return to 0 PSI (0 kPa), then remove the weights or open the vent and wait for 2 minutes. Carefully remove lid and allow steam to escape.
-
10Remove the jars from the canner with a jar lifter and place them on a wooden board or thick kitchen towel to allow them to cool in a draft free area. Keep 1 to 2 inches (2.5 to 5 cm) of space between jars to allow air to circulate.
- Listen for a small “ping” sound indicating that the seal of the jar lids has been sucked down and the jars are properly sealed. This could take around 12 hours.
-
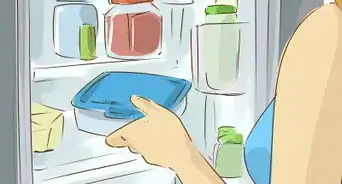
11Label the jars with ingredients and the date, then store in a cool, dark and dry location.
-
12Finished.


Advertisement
Warnings
- To avoid the risk of botulism from bacterial contamination[6] , which can be life-threatening, follow instructions closely.⧼thumbs_response⧽
- If lids on canning jars fail to seal (the button in the center does not pop down), use beets immediately and do not store them.⧼thumbs_response⧽
- Beet juice can stain clothing, cutting boards and countertops, so be sure to wear an apron, cover the working surface with cloth and use a cutting board that you don’t mind staining.⧼thumbs_response⧽
Advertisement
Things You’ll Need
- Pressure canner
- 9 Pint (500 mL) glass mason jars
- Canning lids with rings
- Jar lifter
- Kitchen towels
- Cutting board
- Sharp knife
- Kitchen scissors
- Large pot
- Large bowls

References
- ↑ http://nchfp.uga.edu/how/can_04/beets.html
- ↑ http://www.thekitchn.com/pickling-salt-what-is-it-and-do-you-need-it-193108
- ↑ http://www.simplycanning.com/canning-beets.html
- ↑ http://www.simplycanning.com/pressure-canning.html
- ↑ http://nchfp.uga.edu/how/can_04/beets.html
- ↑ http://www.cdc.gov/nczved/divisions/dfbmd/diseases/botulism/
About This Article
Advertisement