This article was co-authored by wikiHow Staff. Our trained team of editors and researchers validate articles for accuracy and comprehensiveness. wikiHow's Content Management Team carefully monitors the work from our editorial staff to ensure that each article is backed by trusted research and meets our high quality standards.
This article has been viewed 28,606 times.
Learn more...
Building a backyard RC track is a fun project when you’re tired of driving your RC car on the plain grass or around your neighborhood’s streets. Make sure you have a large, relatively flat and clear area that you can create your track on. Other than that, there are really no rules for building your track! It’s up to you to get creative with the design and build fun obstacles like berms and jumps. Keep in mind that it does take some physical work, so you might want to get some friends together to help you out with the labor.
Steps
Designing and Laying out the Track
-
1Pick an area that is about 20 ft (6.1 m) by 20 ft (6.1 m) for the track. Choose a grass or dirt area on your property that is approximately this big to give yourself enough space to build a fun track. Make sure that it’s OK to do some landscaping for your track there.[1]
- It’s fine to select an area that’s a little bit smaller or bigger, depending on the space you have available. Just keep in mind that a track much smaller than this won’t give you a lot of room to get creative, and a very large track can be hard to drive because you can’t see it all well.
Tip: Choose a spot for your track that’s relatively flat and clear. You can build the track around certain obstacles like lone trees if needed, but make sure there is nothing that will limit your visibility of the track.
-
2Draw a blueprint of your track design. Get a piece of paper and a pen or pencil and draw an outline of the space you chose for your track. Draw an outline of the lanes for the track inside the space in any shape you want, as long as it makes a full circuit.[2]
- For example, you could make the track a traditional oval shape with a long straightaway on either side and a U-shaped turn at each end. On the other hand, you could try something more complex with a straightaway on one side and S-curves on the other side. It’s totally up to you to get creative here!
- You can draw multiple designs to put down some different ideas on paper, then choose the one that looks most fun and interesting to you.
Advertisement -
3Mark 5–7 ft (1.5–2.1 m) wide temporary lanes with string. Lay string out on the ground to mark the lanes as you drew them in your blueprint. Stick twigs or nails into the ground at regular intervals and wrap the string around them to hold in in place temporarily.[3]
- If you’re just planning on running 1-2 RC cars at a time, 5–6 ft (1.5–1.8 m) wide lanes should be big enough. If you want to race more cars than that at once, make the lanes 6–7 ft (1.8–2.1 m) wide.
-
4Test drive the course to make sure the lane design works and is fun to drive. Get out your favorite RC car and take it for a few spins around the temporary lanes you marked. Take note of things like corners that are too sharp or parts that are boring and make any alterations to the design that you want.[4]
- For example, you might decide to make a straightaway shorter and add an S-curve before a corner.
-
5Install corrugated pipe with galvanized nails for the lane walls. Remove the string and replace it with 4 in (10 cm) corrugated pipe once you’re happy with your lane design. Drive 12 in (30 cm) galvanized nails through the pipe into the ground at regular intervals to hold it in place.[5]
- You can get 4 in (10 cm) corrugated pipe and 12 in (30 cm) galvanized nails at a home improvement center.
Smoothing out the Track
-
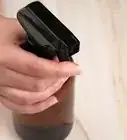
1Kill grass and weeds with weed killer. Spray an environmentally safe weed killer onto the race track. Wait a day or two for the weeds and grass to die off before you proceed.[6]
- If the ground is just dirt already, you don’t need to do this.
-
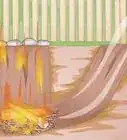
2Use the flat ads head side of a pickaxe to tear up any turf and weeds. Hack away at the dead grass and weeds with the pickaxe to tear it up from the soil underneath. Set aside the turf in a pile somewhere outside of the track.[7]
- You can use some of the turf to fill in jumps and berms when you build them later on, so you don’t need to use as much soil.
- You could also use a garden hoe to do this, if you don’t have a pickaxe with an ads head.
Warning: Try to avoid digging down into the track and removing soil because this can cause drainage problems. Just aim to get rid of grass and vegetation from the top of the ground to create a clear track.
-
3Level out the soil with a rake and tamper. Rake along the entire track to even out the soil. Pack down the soil with a tamper to create a smooth, compact surface for your new race track.[8]
- A tamper is a heavy flat piece of metal attached to a long handle. To use one, just hold the flat metal part above the soil and drive it straight down into the ground. Let the weight of the tamper do most of the work or you’ll get tired very quickly!
Adding Jumps and Berms
-
1Put jumps and berms where they won’t block water from draining away. Look at the natural slopes of the land in and around the track. Avoid building berms or jumps where they will block water from flowing off the track.[9]
- A berm is a bank built into the outside edge of a corner.
- For example, if there is a corner slightly downhill from the rest of the track, don’t build a berm here because it could trap water on the track. If there is a straightaway on a hill, don’t build a jump across the whole straightaway that could trap water on one side.
-
2Build slanted berms in sharp outside corners using a shovel and topsoil. Dump topsoil into the outside edge of a sharp corner up to about the level of the corrugated piping. Use the rounded backside of a shovel to pack it and shape it into a bank that your RC cars can go up to go around the corner at an angle.[10]
- Berms make sharp corners fun because you don’t have to slow down as much to go around them.
- For example, if your track is an oval shape with a U-shaped turn at each end of the circuit, build a berm on the outside edge of each U-turn.
-
3Make jumps on straightaways using a shovel and topsoil. Dump enough topsoil onto a straightaway to build a small bump. Use a shovel to shape and pack it into a hard mound that your RC cars can go up to catch some air.[11]
- It’s up to you how big to build the jumps, but keep in mind that the bigger the jump is, the harder the landing will be on your RC cars. Start with something small like a 6 in (15 cm) high jump and test it out, then go bigger if you think your cars can handle it.
- Depending how dry the soil is, it might help to water the jumps down, compact them, then add more soil and repeat the process until they are hard enough to keep their form.
- You can make many different styles of jumps. For example, you could make a wide jump across a whole straightaway, so that all racers have to go over it, or build a narrow jump on one side of the straightaway so that it’s optional.
- Keep in mind that an RC car needs about 1.5 times its length to land, so build jumps with a landing space that is 1.5 times longer than the largest car you plan to run on the track.
Tip: You can set up temporary jumps with boards, supported by bricks or other pieces of wood, and test drive over them to see what angles and sizes work best, then construct the permanent dirt jumps.
References
- ↑ https://www.toptenreviews.com/how-to-build-the-best-rc-track
- ↑ https://www.toptenreviews.com/how-to-build-the-best-rc-track
- ↑ https://sackvillerc.com/2014/05/23/backyard-rc-track-building-tips/
- ↑ https://sackvillerc.com/2014/05/23/backyard-rc-track-building-tips/
- ↑ https://sackvillerc.com/2014/05/23/backyard-rc-track-building-tips/
- ↑ https://sackvillerc.com/2014/05/23/backyard-rc-track-building-tips/
- ↑ https://www.youtube.com/watch?v=X6xC0suCFdQ&feature=youtu.be&t=351
- ↑ https://www.youtube.com/watch?v=X6xC0suCFdQ&feature=youtu.be&t=382
- ↑ https://sackvillerc.com/2014/05/23/backyard-rc-track-building-tips/
Warnings
- Avoid digging and removing soil from your track so that water doesn’t puddle in your track.⧼thumbs_response⧽
- Always consider drainage when you’re building jumps and berms and avoid placing them where they will keep water from draining off the track.⧼thumbs_response⧽
Things You’ll Need
- Paper
- Pen or pencil
- String
- 4 in (10 cm) corrugated pipe
- 12 in (30 cm) galvanized nails
- Shovel
- Pickaxe
- Rake
- Tamper
- Topsoil
- Hose


